How to propagate the Phalaenopsis orchid at home?
Phalaenopsis is one of the most demanding orchids in the world of flowers. The genus, consisting of more than 50 species, forms the basis for the development of various hybrid varieties. It grows in its natural environment on hills, but you can successfully grow and propagate the plant at home.
Breeding conditions
In their natural habitat, most species of this orchid grow as epiphytes under the canopy of large trees, and some of them adapt to rocky surfaces. Their internal clock is focused on optimal conditions for growth, so it is important to mimic their habitat in a quality manner when breeding. Phalaenopsis orchid blooms beautifully and reproduces at home. The plant prefers to grow in partial shade, as in its natural habitat. Low light intensity or filtered light is optimal for this flowering plant variety.
It is easy to determine the lighting level, it is enough to avoid exposure to direct sunlight and it is better to put the flower on the windowsill, where the rays do not fall. If this condition is not met, then burns appear on the leaves. You need to provide plenty of natural light, but without direct sunlight from 11 am to 4 pm. The best position is east or west. Plants grow well on the north side as well.
It is not recommended to keep the orchid on the window in winter, as low temperatures can harm the leaves. A south-facing window sill can be used if the windows have curtains to help diffuse direct sunlight.
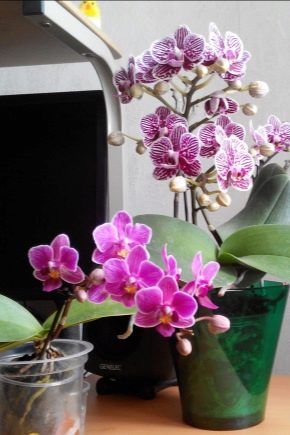
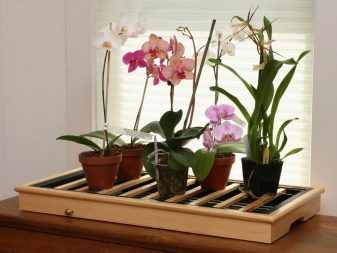
The orchid loves high humidity indoors, where it should be at least 60-70%. Such a requirement is a prerequisite for the healthy growth of phalaenopsis. If the room has a low level of humidity, then it is worth taking marble or decorative stones and placing them in a shallow tray, pouring water and placing an orchid in a pot above the stones. This will help increase humidity while preventing other environments from absorbing water.
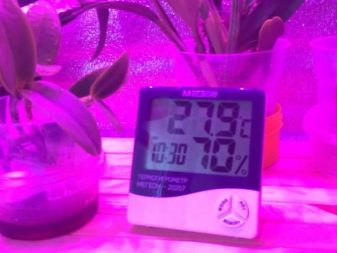
The favorable temperature for breeding indoors is 25 to 35 degrees Celsius. To keep the air moving inside, you can set the ceiling fan at low speed for several hours every day. Proper watering is the most important condition for the germination of any planting material. Water the flower with warm tap water, the soil should remain slightly moist, but under no circumstances be wet. Over-watering will cause rotting rather than germination.
Insufficient watering is also harmful, since in this case neither seeds nor cuttings will have anywhere to take moisture for the development of the root system. After planting, it is necessary to create greenhouse conditions, that is, cover the plant with foil. You can then moisten the soil with a spray bottle. It is best to pick up cuttings for planting after the end of the flowering period.
How to propagate?
Regardless of the type of propagation used, the instruments used during work must be clean and even sterilized. All sections on the mother plant should be treated with an antiseptic to prevent the possibility of future disease. There is an option to root the cuttings in water, not only in wet soil; to accelerate growth, you can use a special activator.
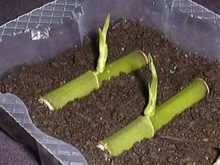
Cuttings
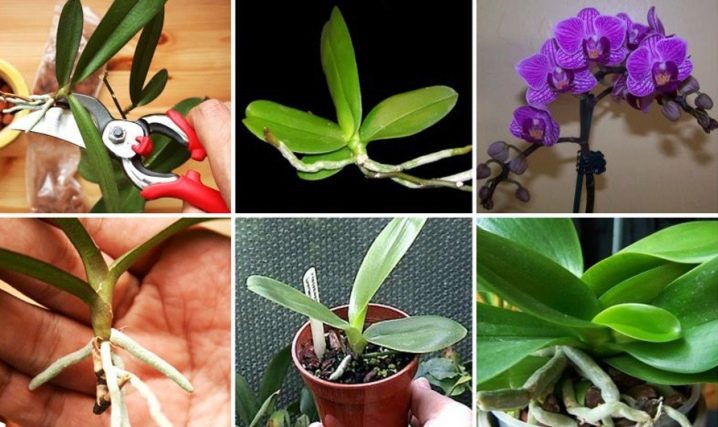
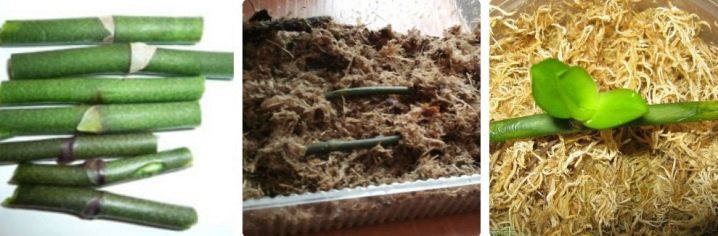
The most common type of reproduction of the described orchid variety is cuttings. Early summer or late spring is best. Step by step, this process is as follows.
- Before carrying out the procedure, it is necessary to remove all the leaves located below.
- The cuts made must be treated with diluted activated carbon or wood infusion.
- The plant should remain in the most comfortable conditions, including receiving the dose of the required feeding.
- When new roots appear, cut off below, then transfer the cutting to the ground.
- For the first two days, you do not need to water or moisten the soil in any other way. Young slices should dry slightly.
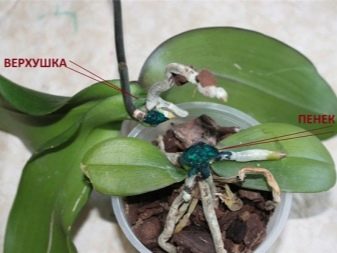
- Within a few months, you will be able to enjoy the new plants that will appear from the stumps.
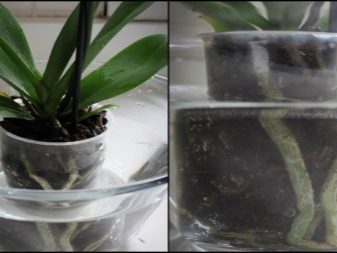
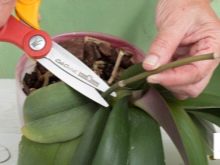
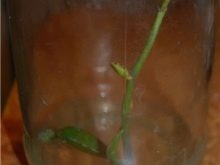
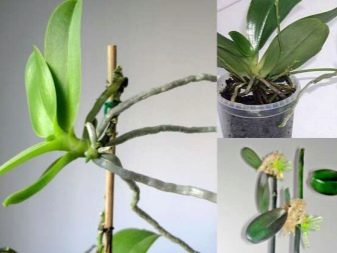
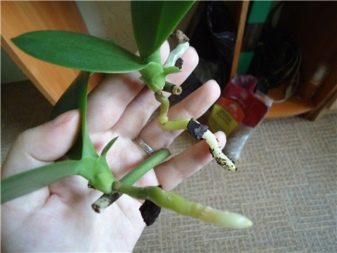
Sometimes a peduncle acts as a cutting. It is carefully cut and placed in a bottle of water and one activated charcoal tablet. The lower part should be constantly in the liquid for 5 centimeters. To awaken the kidney, the scales that cover it are carefully cut off with a clean blade and smeared with cytokinin ointment.
They are treated with the composition for a month every week, the bottle and water are replaced with the same frequency. In this case, the ambient temperature should be in the range of 25-28 degrees.
To accelerate growth, you can add a little mineral fertilizer to the bottle, but in a ratio of 1: 4. As soon as the baby has several leaves and the roots reach 3 centimeters in size, you can plant it in the ground.
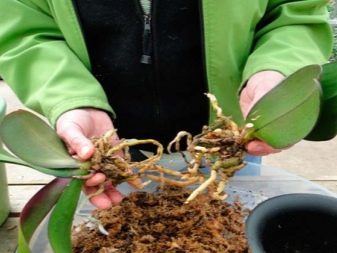
Dividing the bush
At a certain period, children can form on the plant, in this case, you can reproduce the orchid by simply dividing the bush. It is possible to separate young shoots after the end of the flowering phase, while the plant must be older than 1.5 years. They stimulate the growth of the buds in early February, for this the orchid is moved to the west or east side, so that the leaves are in the shade, and sunlight falls only on the peduncle. The daytime temperature should be at the level of 27 C, at night it is allowed to decrease to 16 C.
The plant is very rarely watered during this period, top dressing is not applied until the kidney wakes up. On average, this process takes about a month. Already after the irrigation regime is restored, the flower is transferred to a warm place, fertilizers are applied by the foliar method through a spray bottle to the foliage. After 6 months, the necessary root system will develop, you can divide the mother bush, and the baby can be planted in a separate pot.
Germinating seeds
Planting seeds is not as easy as it is with most other houseplants and is preceded by a complex and lengthy process. Professionals call this method one of the most difficult, so they do not advise beginners to use it. It takes a lot of time and effort to germinate seeds, since they are very small, it is almost impossible to see them.
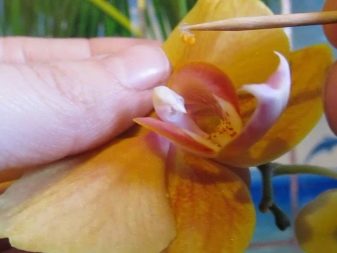
The difficulty of germination is associated with the lack of endosperm in the embryos, that is, there is no special tissue that could protect and nourish the developing plant. Any negative impact - and the embryo instantly dies. First, the breeder will have to pollinate the flower on his own in order to subsequently obtain planting material.
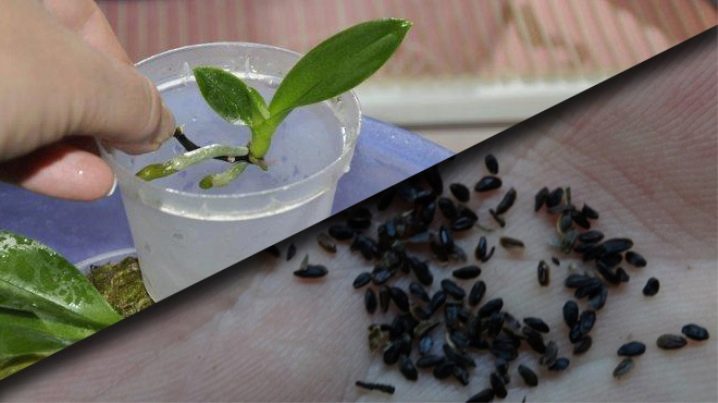
For this, a simple toothpick is used, which is passed over several flowers inside the cavity where the stamens are located. If possible, you can buy seeds already in a bag.
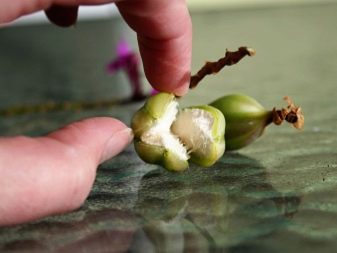
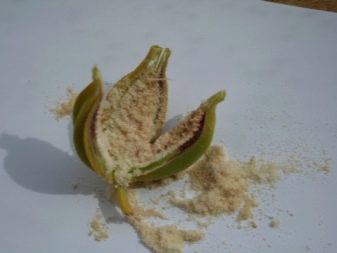
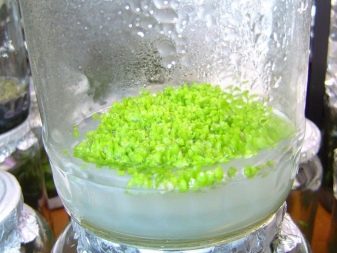
If pollination is successful, then a box will soon begin to grow, which will mature only after six months. Now it's time to select the planting material. At this stage, a nutrient medium is prepared, for the creation of which you will need agar-agar powder in an amount of 20 grams, the same amount of fructose, glucose, a small amount of phosphoric acid and calcium carbonate.Agar-agar is diluted in 200 ml of water and wait until it swells, then poured into boiling water, add the remaining ingredients and mix well until completely dissolved.
If it is difficult to get these ingredients, you can use another recipe, which requires 20 grams of sugar, distilled water in an amount of 400 ml, 100 milliliters of tomato juice. You also need 40 grams of banana, 0.5 ml of special fertilizer for the described flower, activated carbon in the amount of two tablets and 0.5 grams of honey.
The environment must be sterile, otherwise mold will appear in it.
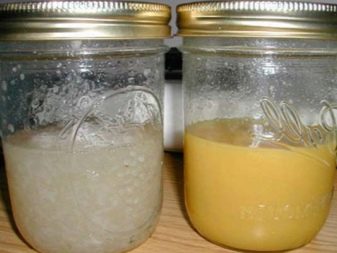
The jars where the solution will be poured must be well sterilized and left for several days with the solution to see that there is no infection. If mold appears, the mixture cannot be used in the future. The seeds also need to be pre-prepared, for this they are covered with a 1% chlorine solution and left in this state for 20 minutes. You will need to shake the jar vigorously several times during the specified time.
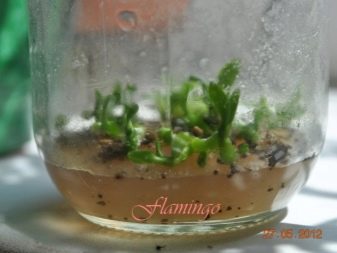
For convenience, you can take a grate and a saucepan with boiling water; you will need to place containers with a nutrient mixture there. The covers should also be nearby so that they can be quickly disinfected. The seeds are transferred from the chlorine solution into the nutrient medium, for this the easiest way is to use a sterile syringe. The containers are well closed and placed in the greenhouse. They open it only after 6 months, if everything went well, then there will be sprouts inside.
Pour 50 ml of water, shake, pour the mixture into a wide container and add two drops of 1% furnadzol. In this state, the seeds are kept for 15 minutes. With the help of a small soft brush, the seeds are transferred into a nutrient medium, which should consist of moss and bark with soil. Add chopped charcoal and fern roots. After 6 months, it will be possible to transplant the orchid into the soil for an adult plant.
The disadvantage of the method used is that the plant will bloom no earlier than after 4 years, and sometimes even after 7 years.
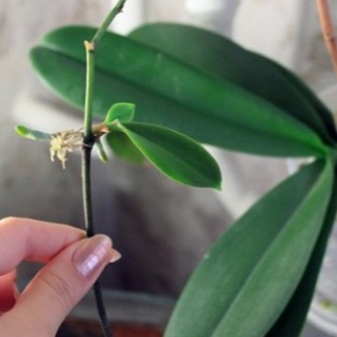
Seating the kids
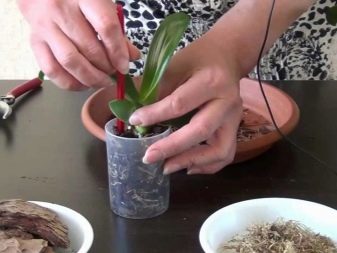
In children, this plant also reproduces well, for this it is worth separating the process from the main stem in such a way as not to damage the roots, which should already be 3-6 centimeters long. The sections are treated with charcoal powder. Transplant each piece obtained into a pot and spray with water until the roots are sufficiently rooted. Aftercare is no different from what an adult plant needs.
You can plant any shoot that already has a sufficient root length, and if they are still small, it is better to leave it on the mother plant. It is advisable to plant a new bush in early spring, so that during the growing season it can take root well in the new soil.
Possible problems
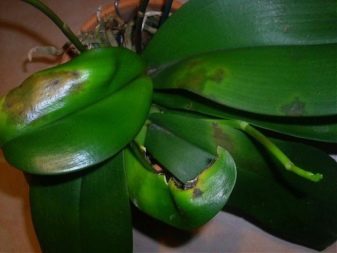
When growing an orchid, problems can arise, spots appear on the trunk and stem, and the breeder does not always understand what happened. It is very important that the roots are completely in the ground, and that direct sunlight does not fall on the leaves. Of the other problems that one has to face, the following can be distinguished.
- When propagating, a diseased plant is immediately used, which can be distinguished by the unhealthy color of the foliage, black roots, which sometimes even have mucus on the surface. Such a plant can only be propagated in water and nothing else, in order to get a healthy orchid later.
- All sections made must be sterilized.
Indoors, it is important to comply with the conditions necessary for the plant, including the level of humidity, the quality of lighting.
Further care
It is not so difficult to grow a beautiful orchid at home, with the right approach, it will bloom in a year or 2. It is not enough just to carry out timely watering, it is also worth pruning correctly in due time. Orchids need a little more feeding when they are actively growing.The flower is fed with nitrogen, phosphorus, potassium, you can use special complex formulations, in accordance with the manufacturer's instructions.
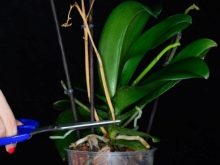
To help the plant in the long term, it is necessary to periodically cut the stem of the flower up to 5 cm. As a result of this pruning, the flowers will appear a little earlier. Sometimes the stem is cut just above the highest node, where there are no flowers or have not yet appeared. Such pruning provokes abundant flowering in the future.

As for the treatment of pests, aphids are a frequent guest. These tiny green or brown insects, they can not always be seen, but a white skin remains on the surface of the leaves, which the insect sheds. The best control is insecticides, but you can simply treat the leaves and stem with soapy water.
Black spots on the leaves are almost always caused by the fungus Pythium ultimum or late blight. The fungus thrives in humid conditions. Affected leaves may turn yellow. Damaged shoots will need to be removed and cut. In this case, the grower is required to establish an irrigation schedule.

See below for more details.


The comment was sent successfully.