What is lens alignment and how do you know if you need it?
A photographic lens is a complex optical-mechanical device. Its elements are tuned with micron precision. Therefore, the slightest change in the physical parameters of the lens leads to a deterioration in the quality of the frame when photographing. Let's take a look at what lens alignment is and how do you know if you need it?

What it is?
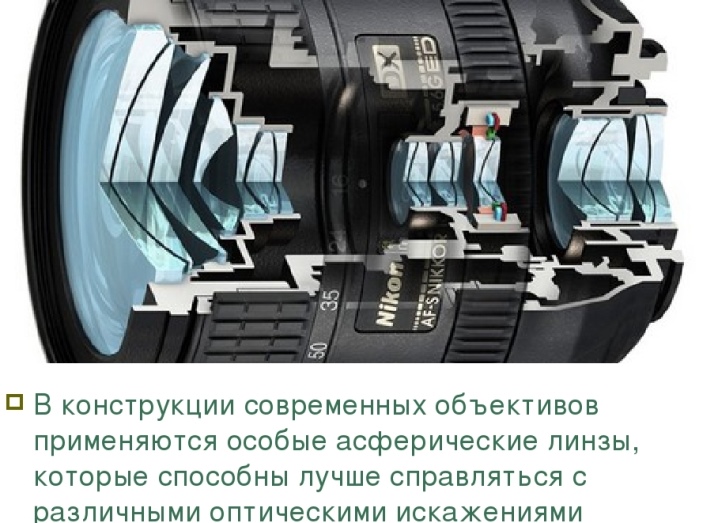
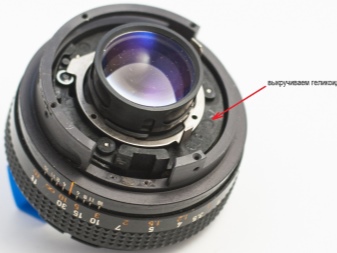
The modern lens includes lenses (up to ten or more), spherical mirrors, mounting and control elements, electronic systems. An interchangeable Nikon lens is shown as an example. The complexity of the device inevitably leads to possible numerous deviations in its operation from the accepted standards.
There are three main groups of such violations:
- damage or misalignment of optics;
- breakdown of mechanical parts;
- failure of electronics.
Usually the photographer himself determines the threshold for the performance of his lens. In the same time there are certain general requirements for the quality of the frame: there should be no geometric distortions, gradients of resolution or sharpness, aberrations (colored borders of objects) over its entire area... Electronic circuits usually control autofocus and lens iris, image stabilization. Accordingly, malfunctions are manifested in the form of loss of clarity, sharpness, and other defects.

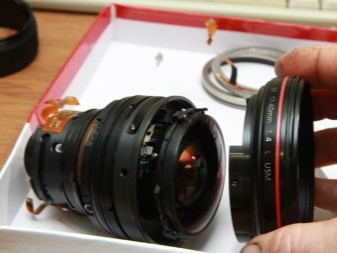
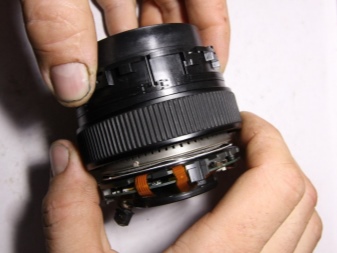
Lens alignment, the process of fine tuning and coordination in the operation of all its constituent parts, is quite complicated: it requires the performer to have certain skills, the necessary instruments and devices.
For example, a collimator, microscope, and other precision equipment are required... It is hardly possible to adjust the optics on your own, outside the walls of a special workshop. The same applies to the repair of lens mechanics: diaphragms, rings, internal mountings.
In the home workshop, we can eliminate the simplest defects: remove dust from available lenses, adjust the lost back- or front-focuses, and finally determine if our lens needs professional adjustment.
When to conduct?
So, adjustment should be carried out in cases where frames or parts of them have lost their former quality.
The reasons for misalignment are manifold:
- there may be a factory defect;
- during operation, gaps and backlash appear;
- physical impact on the lens.
The fact of a violation of the lens alignment can be determined by the following signs:
- the image in the focus area is blurred;
- uneven sharpness over the area of the frame;
- chromatic aberration appears (rainbow stripes at the edges of objects);
- does not focus on infinity;
- the focusing mechanics are broken;
- distortion occurs (for wide-angle cameras).

Most often, alignment is required when focus is lost:
- absolutely not - does not focus on anything;
- focus is unbalanced - one side of the frame is in focus, the other is not;
- focus is not therewhere necessary.
Deterioration of the frame and chromatic aberration are signs of mechanical misalignment of the optical elements of the lens. They are eliminated in special services.
What is necessary?
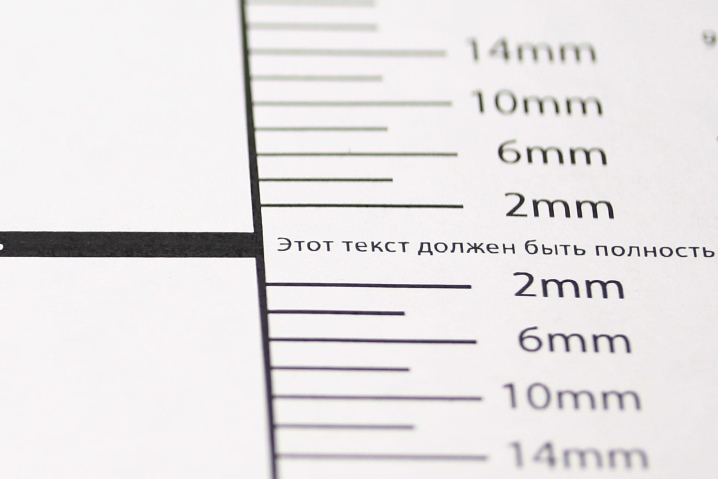
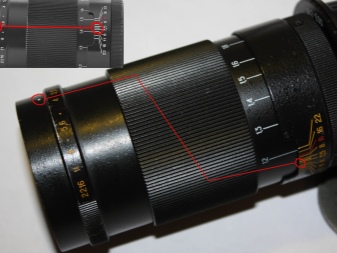
In the first case, one of two special targets and a sharpness table are needed to carry out the adjustment, that is, to test the lens. We print the target with a cross on a sheet of paper, glue it onto cardboard, cut out the squares with scissors, as shown in the figure. We bend the square with a cross by 45 degrees, the other - for the stability of the sheet.
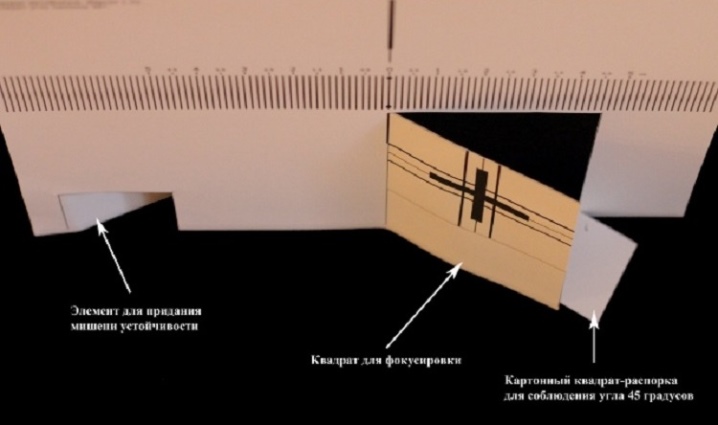
When adjusting the camera lens should be directed strictly perpendicular to the plane of the cross. If necessary, print a second test target.
We put the sheet with the target on a flat surface, set the camera in such a way that the lens axis passes through the center of the black line in the middle of the target at an angle of 45 degrees.
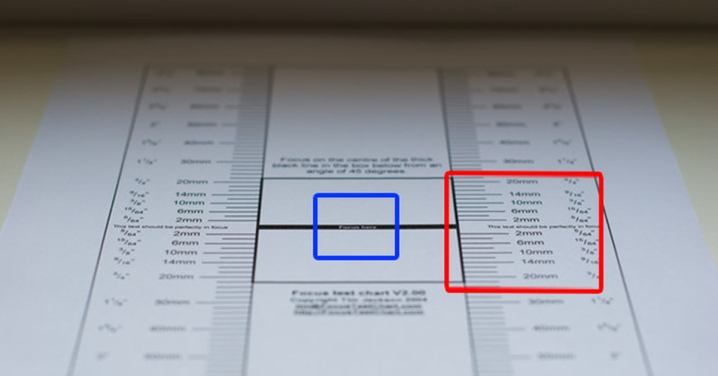
And finally, a table for checking the sharpness.
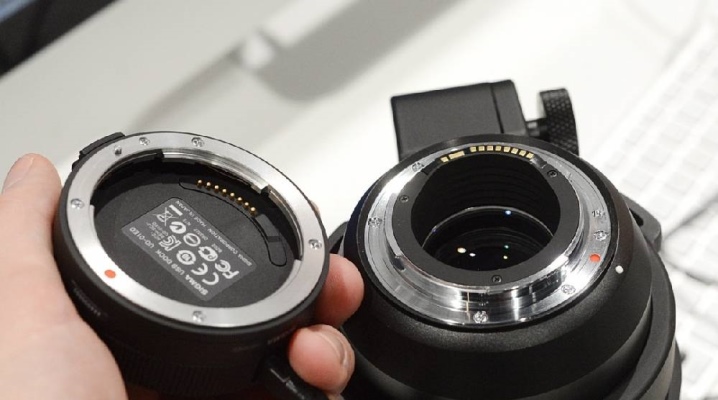
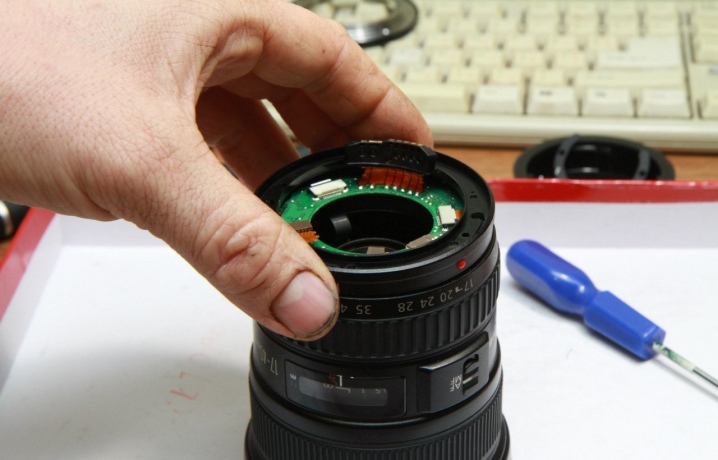
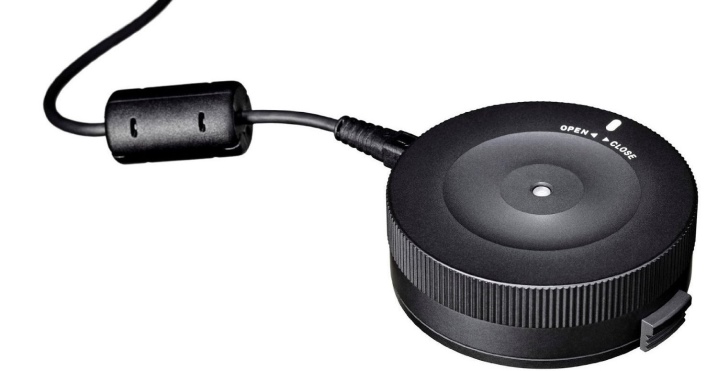
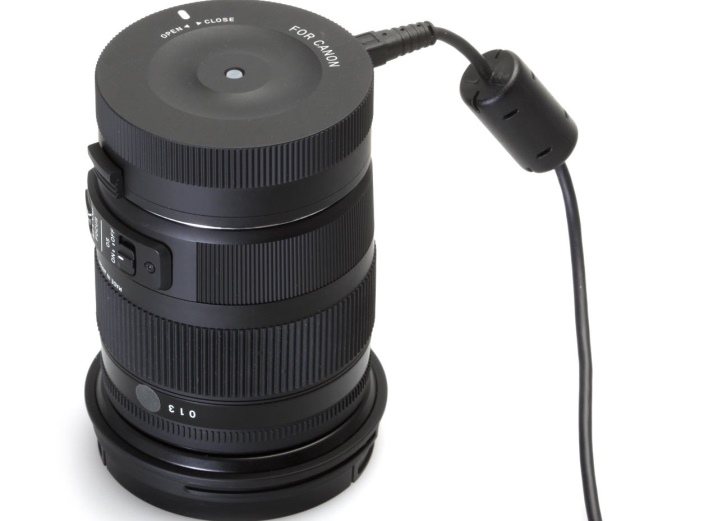
In the second case, we use the DOK station, USB-dock. It can be purchased from the online store along with the software. Enables self-alignment of the lens.
How to adjust?
Deep alignment is almost impossible at home. With the above targets and the table, you can only determine the degree of functionality of a given lens.
The sequence of actions is approximately as follows:
- the camera is fixed as far as possible;
- aperture priority turns on;
- the diaphragm is as open as possible;
- focus on bold cross or center line;
- take multiple shots with aperture limits;
- analyze pictures on the screen of the camera.
Thus, it is possible to determine the presence of back-front focuses.
To check the sharpness of the lens, using the table, do this:
- the diaphragm is as open as possible;
- short exposure.
We upload the pictures to the computer. If the table sharpness over the entire area, including the edges, is acceptable and uniform, the lens is adjusted correctly. Otherwise, use the built-in Live Veiw feature, if present, or take it to a service center.
The docking station removes front-back tricks, can update the lens firmware. It is important to purchase (about 3-5 thousand rubles) a station with a suitable bayonet mount and download the necessary programs for work.
The features of using this device for alignment are as follows:
- daylight (for correct autofocus operation);
- two tripods - for the camera and the target;
- ready-made targets (discussed above);
- to measure distances - tape or centimeter;
- the diaphragm is open as much as possible, the shutter speed is 2 sec .;
- SD memory card (empty);
- cap for an objective hole on the camera body;
- clean room - so as not to contaminate the optics and matrix (with frequent lens replacement).
We connect the Docking station to the computer, install the software, read the instructions. In this case, the alignment is done by the internal lens electronics using the docking station utilities.
The order of work is approximately as follows:
- measure the distance from the target mark on the target;
- focus on it;
- remove the lens, cover the hole in the camera with a plug;
- screw it onto the docking station;
- making corrections in the station utility;
- write new data to the lens firmware;
- transfer it to the camera, compare it with the previous step.
Usually 1-3 iterations are enough for correct focusing at a given distance.
We measure distances starting from 0.3 m, 0.4 / 0.6 / 1.2 m and so on... After carrying out the adjustment in the entire distance range, it is advisable to take a control series of images, viewing them not on a computer, but on the camera screen. At the very end, we take a picture of a flat surface, for example, a ceiling, for the dustiness of the optics. So, we have shown that you can do a lot with your own hands, even in the field of precision optics.
See below for lens alignment.


The comment was sent successfully.