How to make your own headphones?
The breakdown of the headphones overtakes the user at very unexpected moments. If new headphones last the standard warranty period, and you have several broken kits on hand, this is a chance to make a new headset yourself. With all the necessary components on hand, it is much easier to assemble a workable device than to do it from scratch.
A headphone device contains several basic components:
- plug;
- cable;
- speakers;
- frame.
The design can differ depending on the selected type of headphonesto do.
If key parts are missing, a plug, cable, or speakers can be purchased from a radio store.
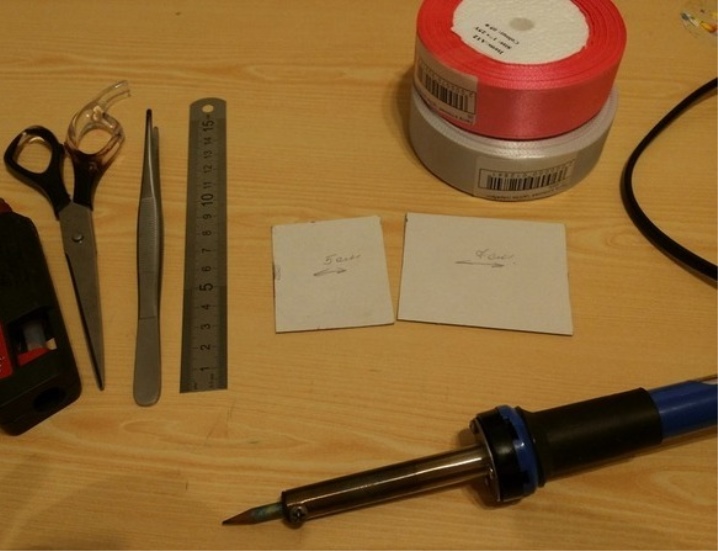
But it will be much more convenient to use old headphones, taking working parts from their kit. Of the tools, you will also need to have at hand the very minimum:
- knife;
- soldering iron;
- insulating tape.
Success depends on a phased approach and mindfulness. In order to make headphones with your own hands, just follow the instructions and do not rush.
How to choose the right components
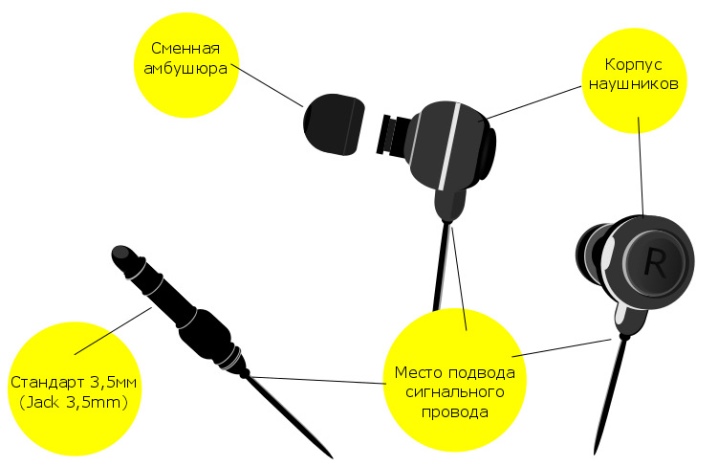
The design of a standard headphone includes the following components:
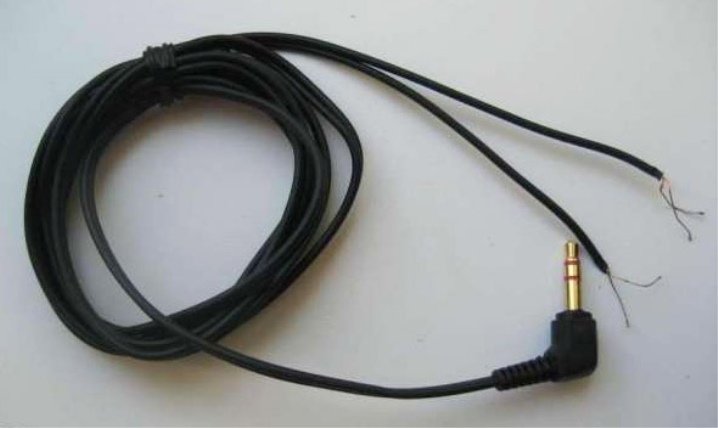
- 3.5mm plug. Its other name is TRS connector, on the metal surface of which you can find several contacts. Due to them, a linear signal is received from any sound source, be it a computer or a telephone. Depending on the type of headphones, the number of receiving contacts also changes. Stereo headphones have three of them as standard, a headset has four, and the most common devices with mono sound are equipped with only two. This is one of the most important points, since the right choice and connection will guarantee the performance of the gadget at the output.
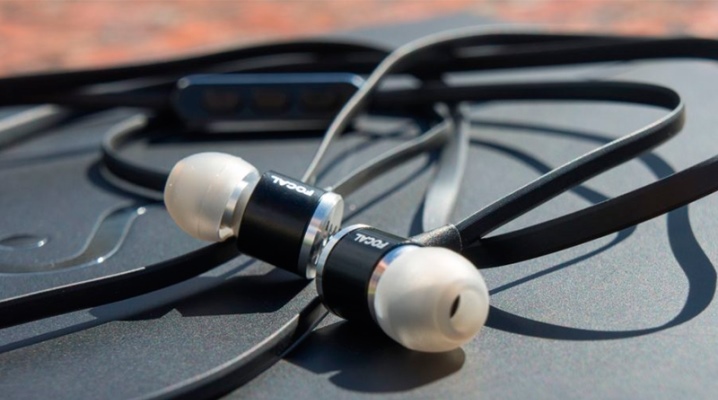
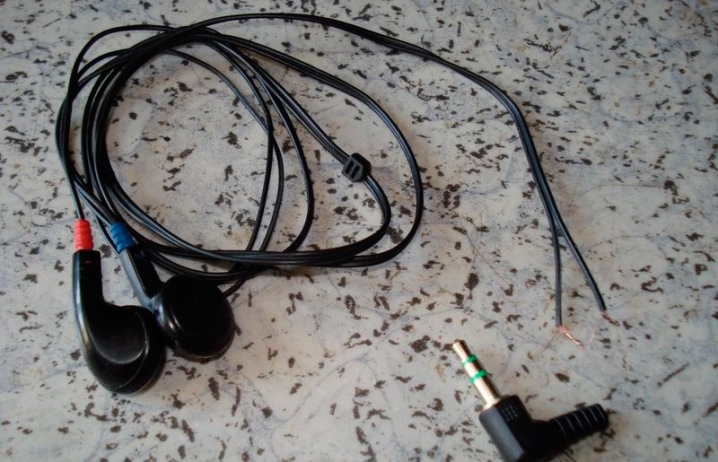
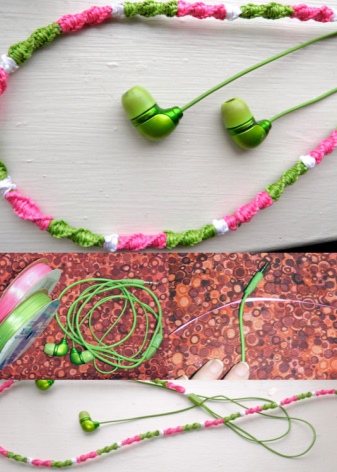
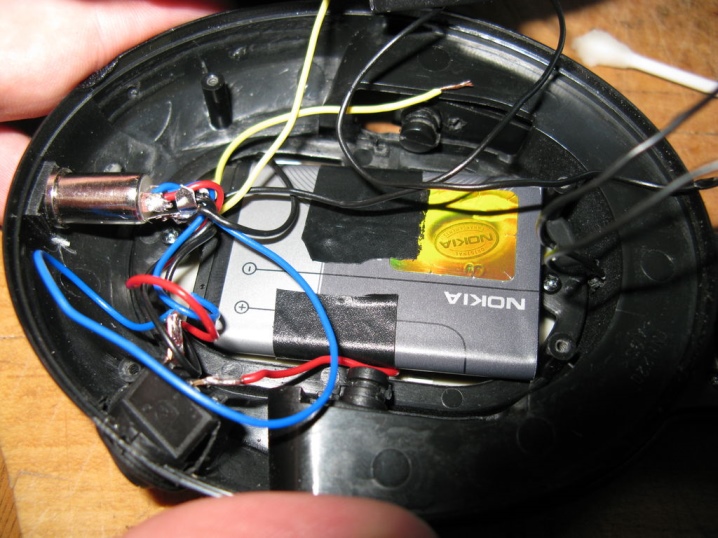
- Headphone cable can be different - flat, round, single or double. In some models it connects to only one speaker, in others it connects to both. The cable contains a set of "live" wires with a bare ground. The wires are painted in conventional colors so that the input for the connection cannot be confused.
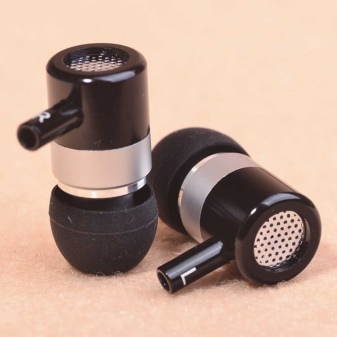
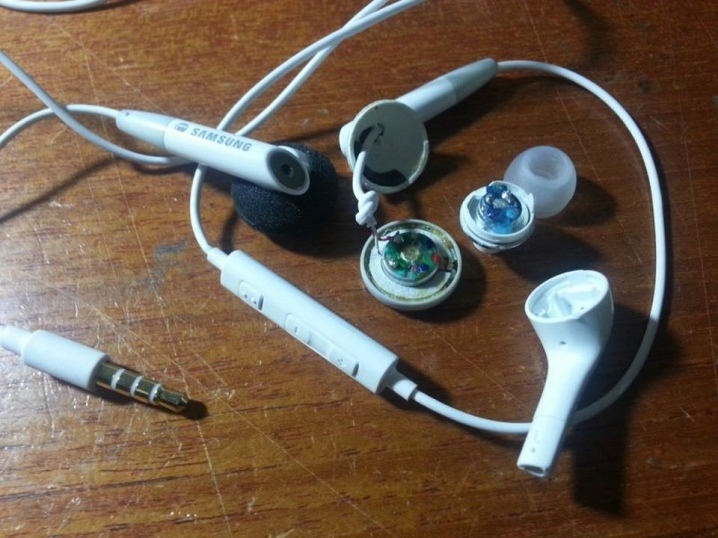
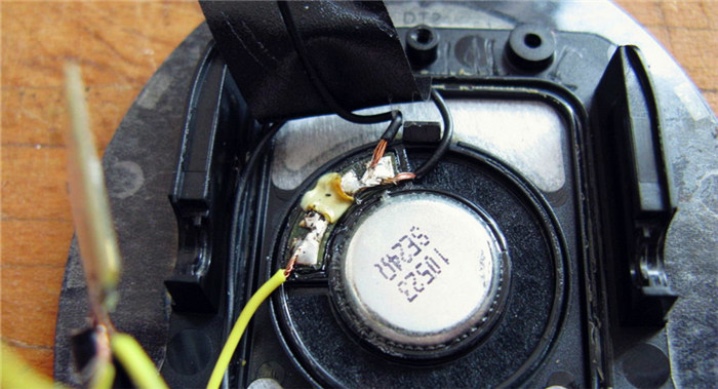
- Speaker - the heart of any headphones, depending on the width of the sound sector, the tone and spectrum of the sound changes. Different speakers can be targeted to different audio frequency ranges. In standard headphones, these are low-power models with minimal sensitivity. The loudspeakers will be easiest to take from the old headphones along with the plastic housing. Cutting them off, it is worth leaving a little cable for further connection.
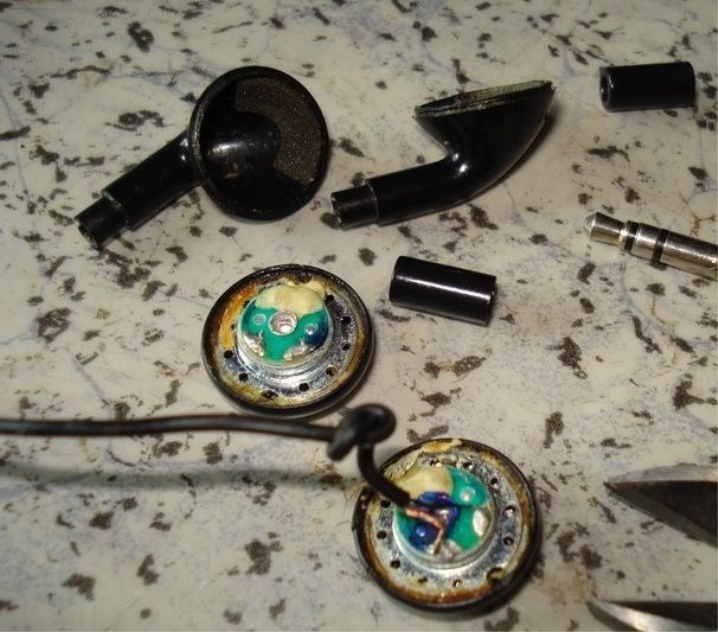
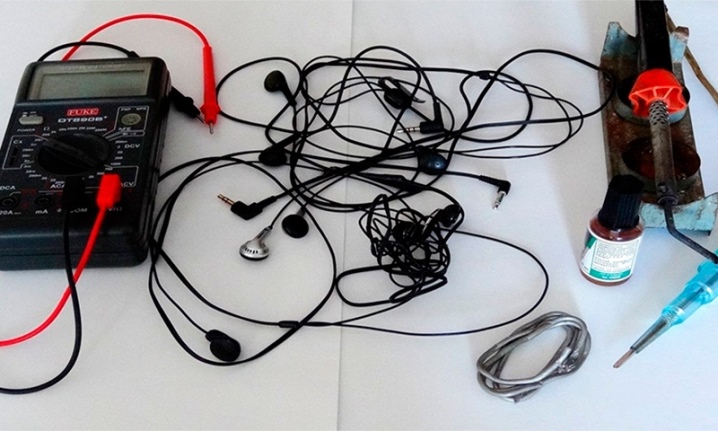
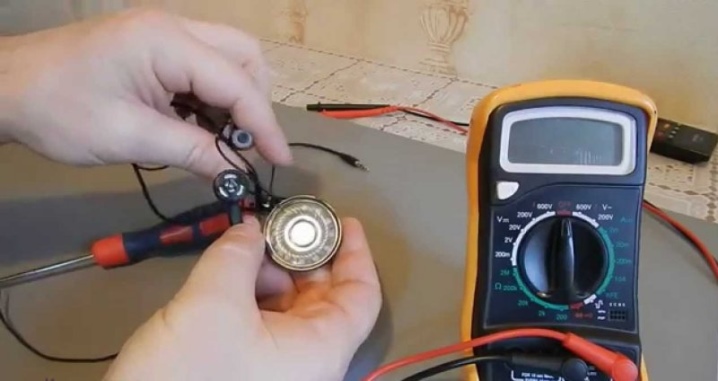
By itself, the design of any headphones is simple enough that even a beginner can figure it out. The most important thing, when creating a new gadget from several non-working ones, is to choose really workable components. To do this, it is mandatory to carry out diagnostics of spare parts.
Checking the performance of parts
You can determine the cause of a breakdown at home with headphones in several stages:
- It is worth checking the sound sources themselves - it is possible that the headphones will work when connected to another device.
- It is worth checking whether the wire plugs have come off the contacts, whether the cable is intact and whether the speaker is working. Reconnecting the plugs has a chance to significantly improve the sound quality.
For one pair of headphones, on average, you will need three non-working kits, which can be used for spare parts if you do not plan to buy wires and other components in the store.
Step by step assembly
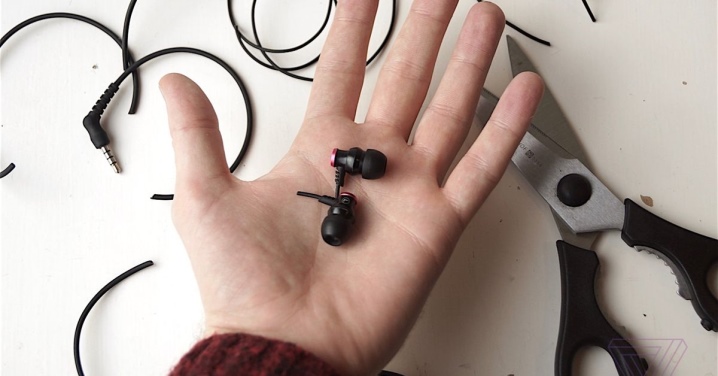
Before making your own headphones, you need to collect all the suitable tools for the job:
- several knives for working with wires (cutting and stripping);
- soldering iron;
- insulation tape or a special thermal pad to connect cable sections together.
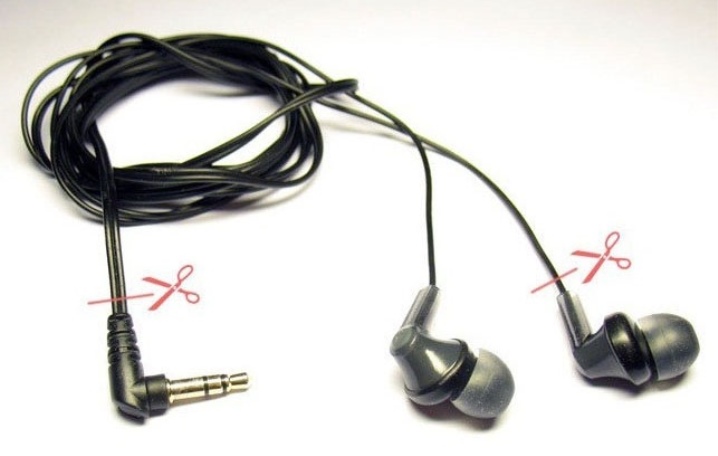
When cutting off the plug always leave a few centimeters of the old cable, as with disconnecting old speakers. If the plug does not work, then it is cut completely together with the body and the old wires are completely disconnected from the contacts so that new ones can be inserted instead. If necessary, you can easily pick up a new cable.
On average, the cable length from the headphones can be up to 120 cm. Even high impedance models are rarely far from the sound source, so the cable does not affect the sound quality. If it is too long, then a drop in quality is possible, ranging from distortion to the complete disappearance of the signal. A very short cable will be inconvenient to use.
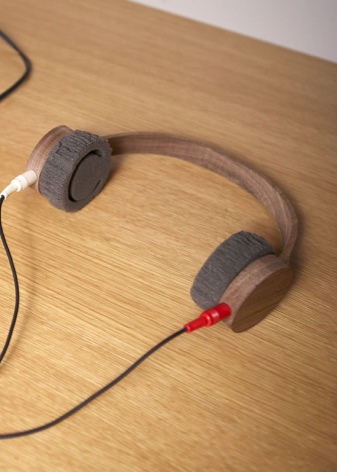
You can create homemade IR headphones for your phone, and then the need to calculate the length of the cable and wires, in principle, disappears completely. Any body can be used, even made of wood. If desired, the user can decorate it with small details and original ornaments.
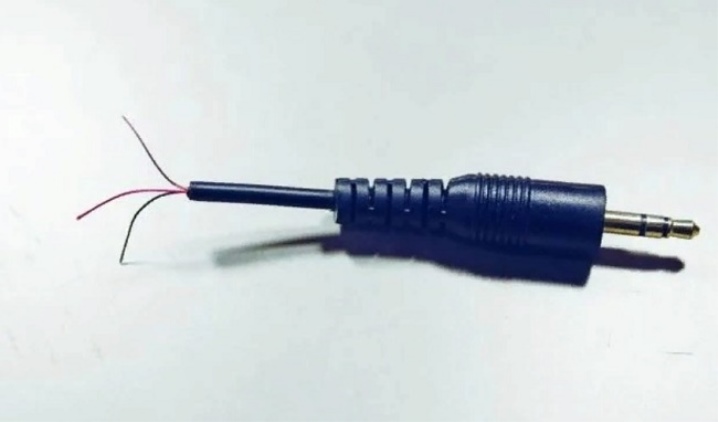
After everything has been prepared and the desired design option is selected, the stage of direct assembly of new headphones follows. First you need to connect plug.
The algorithm of actions here may be different depending on the performance of the parts:
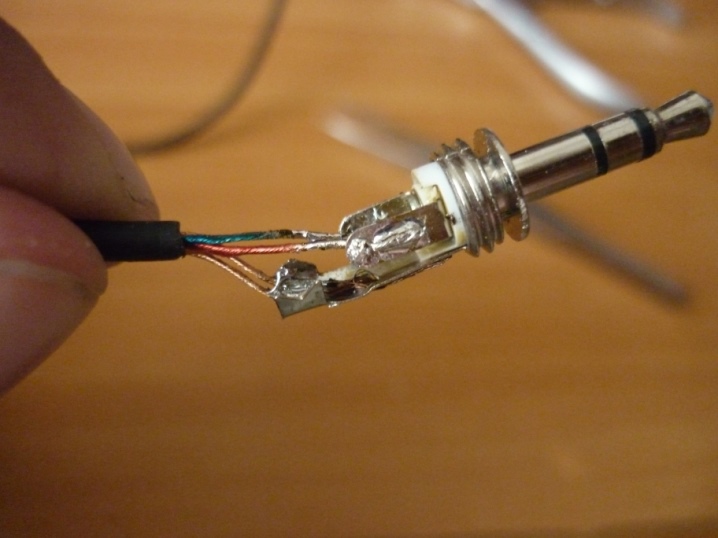
- if the plug is working, then the wire is simply soldered to the rest of the cable;
- if it is not working, you will need to disassemble it completely and connect it to a new cable.
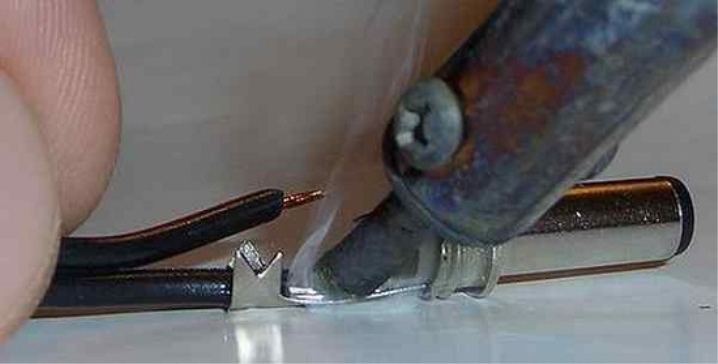
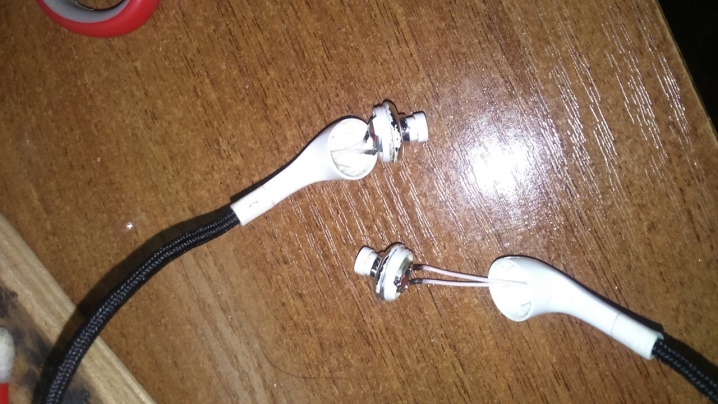
The base of the plug is protected by a housing, between which you can see several thin plates - depending on the type of headphones, there may be 2, 3 or 4. It is also mandatory and present grounding.
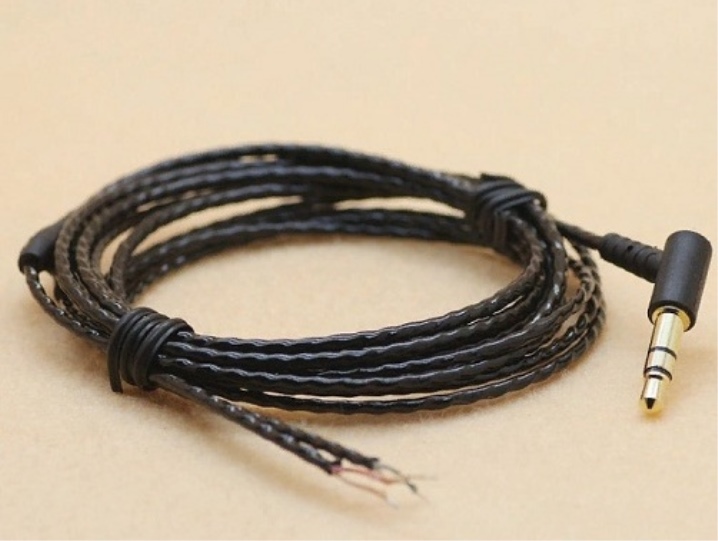
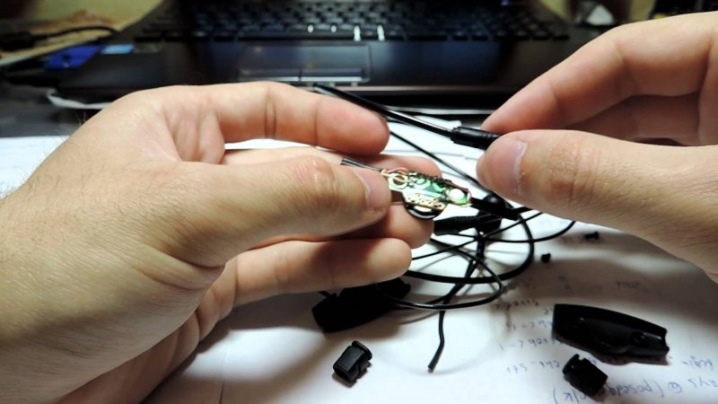
One part of the cable is stripped from the end at the junction. Sometimes multiple wires are used for this. To achieve the goal, it should be remembered that stripping the insulation is a mandatory step. After that, the protective layer is melted with a soldering iron in order to connect the channels to the sockets without interference. Even if the wires get mixed up, this should not affect the performance in the end. Next, you need to twist the copper conductors, connect to the contacts and solder. The wires must be insulated from each other. The body is fixed at the final stage. Sometimes they even use electrical tape or the plastic housing of a ballpoint pen instead.
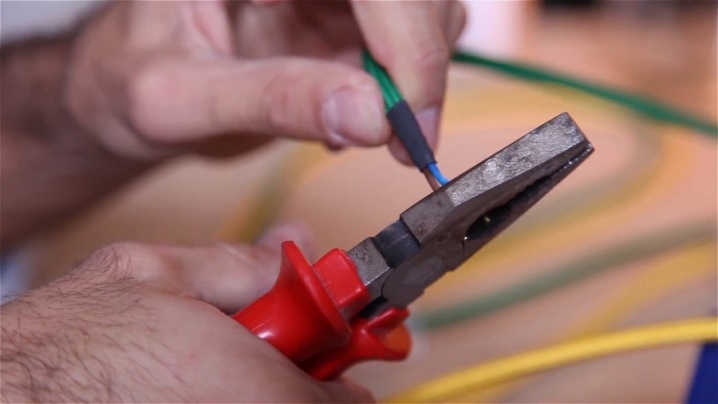
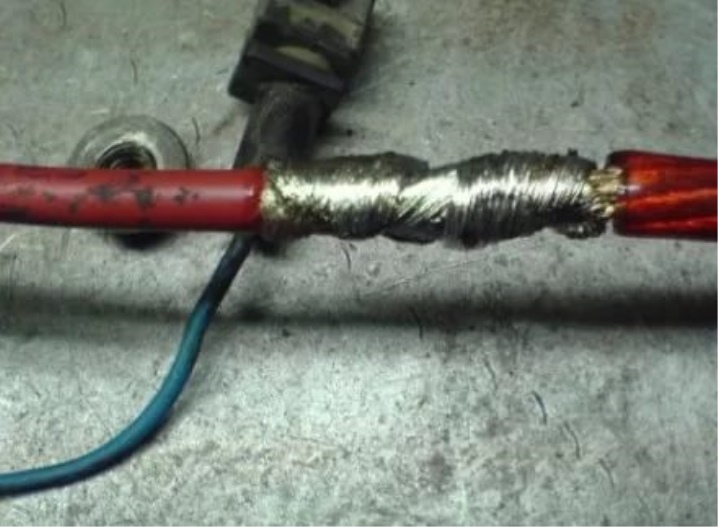
In the case of a cable, it can be monolithic or assembled from several parts, and they will have to be twisted together... The wires are stripped of insulation and the braiding layer is removed from them. Twist them either linearly or spirally. The twisted wires are soldered with a soldering iron, they are insulated with grounding, the wiring harness is fastened from above with electrical tape or special tape, and the braid is reinstalled.
Finally, the speaker is connected. There are special contacts on the case for this, grounding is connected and soldered together with the main wires directly. The work will take a minimum of time and then you only need to assemble the case back. After that, you can safely start using the headphones that were assembled with your own hands.
Standard wired
Assembly instructions for standard wired headphones differ little from the usual... Differences will depend on the model chosen, the length of the wires and the type of headphones in terms of power. Mono sound is different from stereo, and speakers for a high-quality headset must have certain characteristics in order to transmit music in high quality.Accordingly, the cost of homemade headphones will also change. But they will last much longer than the warranty period.
USB headphones
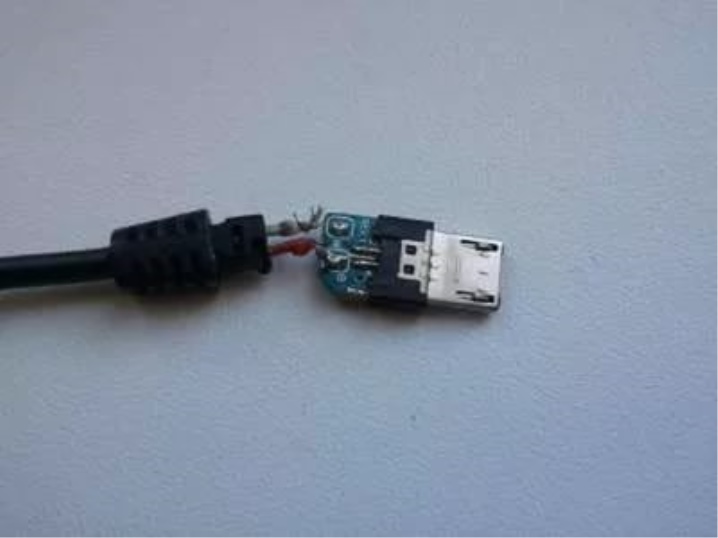
The assembly of USB headphones is also carried out in stages. Pay particular attention to connecting the speakers and assembling the transmitters. Their design is somewhat similar to infrared models, only the type of signal reception differs. The USB connector can be like wiredand wireless.
In the case of a wireless design, the work is a little more complicated: it will be necessary to take into account the microchip of signal reception and transmission in the design.
You can learn how to make USB headphones with your own hands from the following video.
Infrared
The main thing in the work of infrared headphones is the transmitter. In order to ensure the operation of wireless headphones with its help, you will need to strictly follow the diagram during the assembly process. A voltage of 12 volts is transmitted to the transmitter. If it is less, then the sound in the headphones will start to fade and deteriorate.
There is no need to set up the transmitter, just plug it in.
The circuit includes up to four infrared diodes, but theoretically you can get by with three or two, depending on the desired output power of the device. The diodes are connected directly to the receiver according to the selected circuit.
The receiver is powered up to 4.5 volts from any power source. The motherboard and microcircuit can be purchased at any radio store. A standard 9 volt power supply can be purchased there. When the assembly is complete, along with securing the housing, you can test the headphones and transmitter in operation. After switching on, clicks should be heard in the headphones, and then a sound should appear. In this case, the build was successful.
For a visual overview of creating wireless Bluetooth headphones, see the following video:


The comment was sent successfully.