How to update old tiles in the kitchen?
Tile, albeit in small quantities, is a completely typical guest of most domestic cuisines. The value of this material lies in its endurance - it serves for decades, but due to the fact that its replacement is rather problematic, some owners decide to extend the operation of the finish for a dozen or two years, even if it is already scary to look at it. If it's high time to update the old tile in the kitchen, it is worth considering options for how to do it.
Hide the old finish under the new one
Perhaps it is not so difficult to glue a new ceramic tile as to beat off an old one.
To do this, you often have to work with a puncher, noisy and very dusty work takes several hours, several bags of heavy debris turn out, and after that you will also have to level the wall again, since it will be very embossed under the former tile. Fortunately, the tile itself can be a good base for a new finish that sits right on top of it... Please note that this option is only possible if the old tile holds up well and you do not like it only because it is worn. In addition, the new finish must necessarily be light, otherwise it may fall off along with the tiles, and it’s good, if not on foot.
Consider the main options for outdoor decoration of tiles without removing the latter.
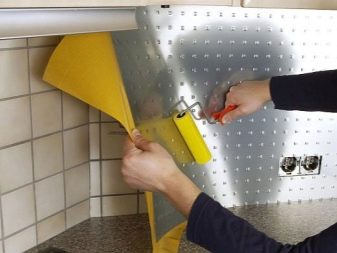
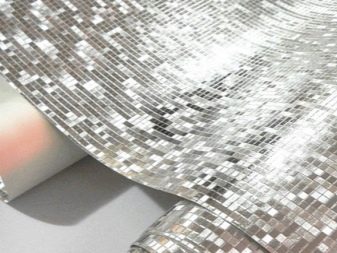
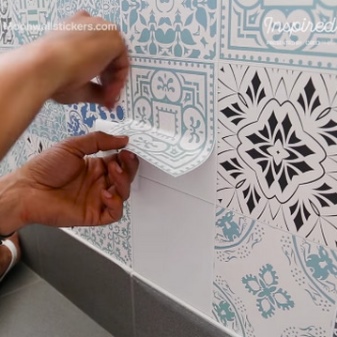
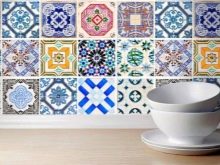
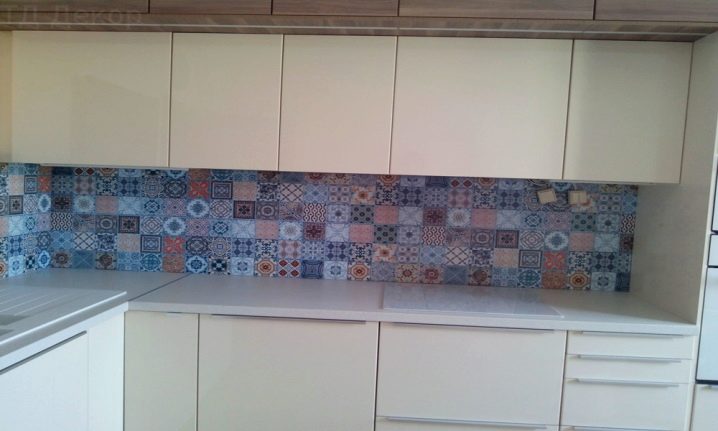
- Self-adhesive foil. This is the easiest and cheapest way to transform a design. In the worst case, such a pleasure costs several hundred rubles per piece of about a square meter, the glue has already been applied to its inner side - it remains to carefully glue it to the wall, expelling all the air bubbles outward along the way. To glue the old tile with it, they never call the master - the work is done by hand in 10-15 minutes. The bonus is that the new finish is then fairly easy to remove or cover with a new layer. Often, colorful drawings are also applied to the material, so that with a competent approach, the result looks very beautiful.
- Photo wallpaper. No, you should not glue them directly onto the tile, but you can nail a thin sheet of plywood to the latter, and such a finish will perfectly fit on it. You don't even need to spend money on an expensive type of waterproof and non-flammable wallpaper, if you can get a piece of plexiglass of the right size. However, there is still no place in the immediate vicinity of the slab of such a design.
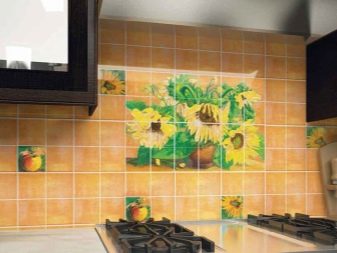
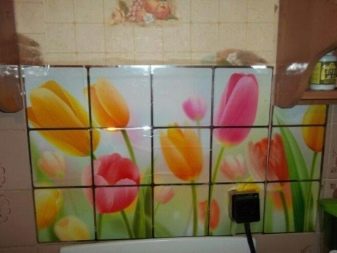
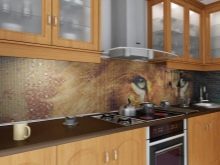
- Panels. It is no secret that today many consumers prefer to order a kitchen apron in the form of a whole panel of plexiglass or some other materials. The tile in the kitchen is usually located in the area of the apron, but even if it significantly goes beyond this zone, it still does not interfere with closing the old finish with such panels. If you ordered a product in a specialized store, you should not fear for its safety - such glass does not break from impact, and does not melt from the heat, and you can also apply bright drawings on it. For the competent installation of expensive glass, it makes sense to call a master, but if you are not alien to working with profiles, you can do it yourself.
Decorate tiles without changing them
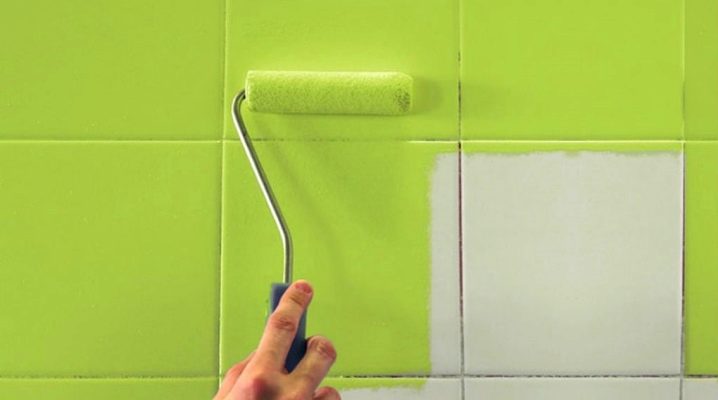
Paint is one of the oldest ways to restore a fresh look to many things, and although tiles are not painted very often, in fact, this is also possible. Even if you do not succeed at all, you can always use any of the above methods later.There are two ways to solve the problem: by completing the painting, not completely hiding the original design, or corny to paint over everything in one color.
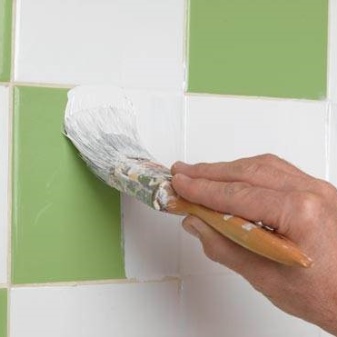
The painting option will surely appeal to creative people who are ready to paint on any surface. Perfect drawing skills are desirable, but not required - after all, no one forces you to depict charming landscapes, you can limit yourself to simple geometry, if only the old finish looks a little newer. All preparation of the wall is to thoroughly degrease the old tile, the paint should be used that is intended for ceramics or glass.

Painting is completely appropriate if the original appearance of the tile has deteriorated - the pictures are erased, and the color is uneven. The restoration should start by thoroughly washing the tiles with soapy water, then wiping them with a solution of vinegar or alcohol - this will help to effectively remove grease. After that, the old finish should also be sanded using fine-grained sandpaper, and then the tile itself and the seams, which usually deteriorate first, should be primed. If done correctly, painted tiles will look fresh for several years.
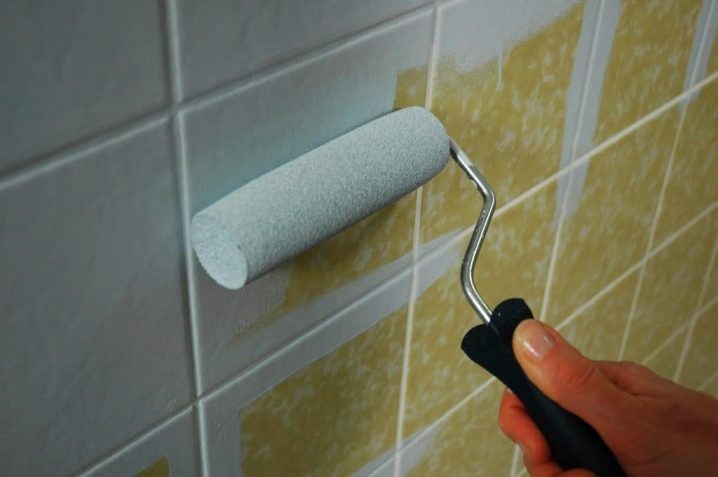
The primer must be given at least a day to dry thoroughly, after which it is advised to grind it a little more - so the adhesion will be perfect. The paint for ceramics is thoroughly mixed before application, it must be used quickly - in the open air after 6 hours, it will begin to thicken excessively. After 12 hours, a second coat can be applied, which is usually enough, unless you decide to radically change the shade of the finish. Once the work is complete, you can re-grout or putty the joints, and although the work can take several days, the result will be impressive, and it will take most of the time to wait.
If one tile is missing
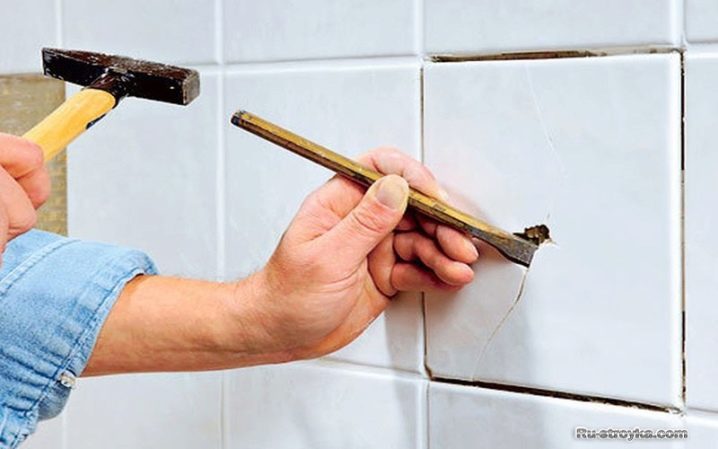
It so happens that the tile as a whole is still pleasing to the eye, but one tile fell off or was broken by an imprudent movement. Because of this, I do not want to make a full-fledged repair, but such a picture hurts the eye. Ideally, after the repair, you should have left a little tile, the damaged fragment can be replaced with the same one, but whole. If the tile itself has fallen off, you can skip this step, but if it is broken or noticeably loose, you need to try to remove it as carefully as possible, picking it up with something sharp and not scratching the adjacent fragments. In the place where the defective element was previously attached, it is worthwhile to carry out a full cleaning, removing from there the remnants of the old glue or solution.
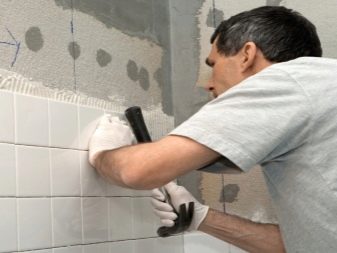
After that, you need to attach a new tile to the vacant place or return the old one to its place, if it did not break during the fall or was removed in time by the owners themselves. Ideally, for fixing, you should use the same "fasteners" that were used before, it would also be nice to pre-prime the surface and make small notches on it - this is the only way to ensure that the element will hold.
When laying, you can coat both the wall and the tile itself with glue, but in this case the first option will turn out cleaner. You don't need to feel sorry for the glue - the layer should be abundant. After applying the tile, press it well with your hands over the entire area and tap it with a rubber mallet.
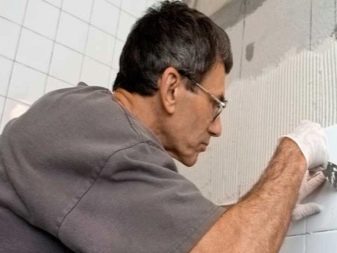
After the tile is in place, you need to try not to touch it with your hands and not subject it to strong vibration for at least one day. Next, you should check the reliability of the fastening by tapping the tiles with the same rubber mallet - a ringing sound indicates the presence of voids, the tile will not hold on to them, therefore the procedure should be repeated from the beginning. If successful, it remains only to prepare the grout according to the instructions, to rub it around the seams around the repair area.
How else to update the old tiles in the kitchen, see the video below.


The comment was sent successfully.