How to glue tiles: the subtleties of the process
The modern market for finishing materials is extensive. Each buyer has the opportunity to select suitable products for a reasonable price. One of the most popular and demanded finishing materials is tile. It can be placed not only on the floor, but also on the walls. Today we will talk about the intricacies of installing these coatings.

Peculiarities
Tile is a popular and demanded finishing material. This is due to its aesthetic qualities and rich assortment. Today, it is possible to choose materials of a suitable style and shade for any interior. It is worth noting the fact that high-quality tiles can be laid even in rooms with high levels of humidity (bathroom, kitchen, toilet).
The main condition is a perfectly flat and prepared base before the actual laying of the material. If you neglect this work, the tile can lie inaccurately. It will not be reliable enough to hold on to such a foundation.


Level the base in various ways. Different hosts look to a variety of materials. It can be PVC sheet, quality leveling plaster, plywood or gypsum backing. Such materials are indispensable, especially when it comes to applying tiles to bricks or wooden walls, since these bases by themselves are not perfectly even.
Most experts recommend dividing the base into several separate squares or zones when gluing tiles. Due to this popular method, the installation of finishing materials will be faster and easier.


A distinctive feature of working with tiles is the fact that it is quite possible to do the laying with your own hands, but for this you need to take care of the high quality of the purchased materials and sufficient alignment of the walls. Low-quality tiles not only look poor, but are flimsy: they are easily damaged. The utmost care should be taken in the choice of tile adhesive, since the low-grade composition will not keep the tiles on the walls or will, but not for long. There are several ways to install tiles. If you want to save money, are confident in your abilities, you can finish the walls or floor in your home yourself.


Aligning surfaces
Leveling the base is a necessary process if you plan to install tiles on walls or floors. For this stage of finishing work, you can use different materials. Let's take a look at the most common ones.
Plywood
Laying tiles on plywood is one of the most common methods. With sheets of this popular material, you can quickly and easily get rid of irregularities and various surface defects. Tiles can be glued to a plywood sheet using universal glue or a special solution designed for wood materials. The second option often has a more liquid consistency, therefore it is perfectly distributed over the surface of the base of the floor or wall.
Experts recommend using such compositions also because after all the finishing work, you do not have to tap the tiles with a mallet.


A little less often, tiles are attached to plywood using liquid nails or special liquid glass. Their rare use is due to the fact that such means cannot provide a sufficient guarantee of the quality of adhesion of materials. Over time, the tiles can move away from the wall. That is why experts recommend giving preference to special adhesive mixtures.
It is worth considering that the tiles cannot be glued to the finishing plywood base, so you will have to take some steps to improve the adhesion of the finishing materials.
To do this, experts recommend treating the plywood lining with a special antiseptic and moisture-proof mixture. These works must be carried out even if you purchased waterproof plywood sheets. After that, in order to improve adhesion, a special mesh (serpyanka) is attached to the leveling plywood sheets. This detail will provide a better and more reliable adhesion of the lining to the tiles, waterproofing structures.


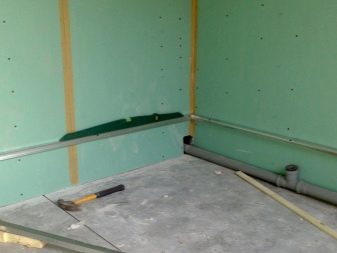
Drywall
When choosing a material for leveling bases, consumers often prefer drywall. It is environmentally friendly and malleable. Using such raw materials, you can save yourself from a long wait until the base dries out and tiles can be glued onto it. During the installation process, no dust and dirt remains from the drywall sheets, which is also an important advantage of this leveling method.
Lightweight sheets made using special gypsum fiber are produced by semi-dry pressing of a mixture containing gypsum, cellulose components and other binders. In the composition of such materials there are no dangerous resins and other toxic substances, so they can be safely used in the decoration of residential premises. Drywall boasts excellent thermal insulation characteristics. To glue the tile to the drywall surface, you must use high-quality and reliable glue.

For this, the following compositions are suitable:
- Glue with cement, which is often used for processing paper substrates.
- Elastic tile adhesive. This formulation is sold dry. You need to stir it yourself. If you do not want to waste time on this process, ready-made solutions can also be found in stores.
- Liquid Nails.

It is necessary to prepare the adhesive composition in accordance with the manufacturer's recommendations, which are usually found on the packaging. If everything is done according to the instructions, the tile will lay on the drywall neatly and reliably, over time it will not come off. Metal strips (or guides) must be installed before laying drywall sheets. A distance of at least 40 cm should remain between them.If this parameter is not observed, the tile will eventually begin to move away from the base, and the seams will undergo deformation. Plasterboard sheets are attached to the guides using self-tapping screws or special brackets.
If you follow Western technologies, it is worth installing drywall in two layers and only then start finishing the base with tiles.


Plaster
Often, plaster is used to prepare the base for the tiles. This method is considered universal, but plastering various surfaces is not so easy, and it takes a lot of time. But if all the leveling work was done carefully and correctly, then the tiles can be laid on such a base quite quickly and easily. It will look aesthetically pleasing. Even an inexperienced user who does not know how to professionally lay tiles can cope with this work.
The main disadvantage of plaster is that it is quite difficult to work with it. In the process of its application, a lot of dust and dirt remains on the base. The plaster dries for a long time, so you will have to lose some time before applying the tiles. If there is a previous finishing material on the base, it is imperative to get rid of it.


Putty
It is recommended to putty the surfaces before laying the tiles in cases where no significant irregularities or defects are observed on them.
In this case, the composition should have some important characteristics, which should include:
- Moisture resistance. Special gypsum putty, which is not resistant to moisture and moisture, can only be applied in dry and warm rooms, in which there are no changes in air humidity.
- Clutch. The putty should adhere well to the substrate and not affect its quality characteristics. For example, for walls made of gas silicate blocks or a foam block, special mixtures are produced that differ in a silicone lime-cement or silicate base.

When buying a putty, you need to consider for which surfaces you are choosing it. Today, stores sell compounds for exterior and interior decoration, which have different characteristics.
Before direct work, the base must be cleaned of dust and dirt. If there are cracks and chips on the surface, they must be removed with construction foam or plaster.
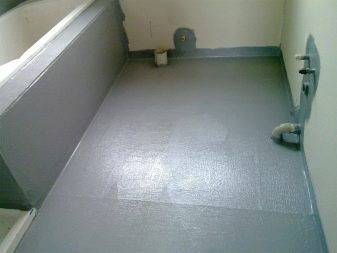
Next, you should apply a primer to the base. A primer is necessary to strengthen the base and protect it from mold and mildew. It will provide better adhesion to the putty. When the soil layer is completely dry, you can proceed to puttying. The putty layer should not be more than 5 mm. There are times when this thickness is not enough to fully level the base. Then you can apply several layers of putty, each of which should be covered with primer.


The surface that has just been covered with putty must not be tiled. Experts strongly recommend waiting for the base to dry completely, then treat it again with a deep penetration primer. Before tiling, make sure that there are no voids under the layer of putty, and that it is firmly adhered to the base. To do this, it is worth tapping the surface with a special rubber mallet.
Wall or floor preparation is an integral part of the tile installation. Without this stage, all the work will be useless, since the finish will not hold up well.


Room layout
After you have completed the preparatory work, you need to move on to the next important stage - marking the room in which you plan to lay the tiles. This is necessary in order to accurately calculate the required amount of material and its location. It is necessary to mark the area before proceeding to the application of the tiles. So the finishing of different surfaces will be much easier, and you can decide on the sequence of your actions.
An important role in the layout is played by the location of decorative objects in the room, as well as borders.


Floor markings
To make high-quality floor markings, you need to stock up on the following simple devices:
- ruler;
- pencil;
- building level;
- tape measure.
For marking, draw a neat outline on the surface of the floor or walls, along which the tiles will be installed in the future. Adhering to the drawing, the material will be attached to the base in exactly the specified sequence.


Standard
The following types of room markings are standard:
- From a visible corner of the room. This option is suitable for a rectangular layout. With this method of marking, the first tile is placed in the corner of the available space, and the next two tiles are laid from it, looking in different directions.
- In a runaway. This type of tile laying is a good solution for rectangular rooms. However, such finishing works are rather difficult. First you have to calculate the center of the space where the first tiles will be laid. After that, vertical lines are drawn from the midpoint of the first element, and then the second and third tiles are laid out on the left and right sides for the next rows.They will be followed by the third, fourth, fifth and sixth rows.


- Along perpendicular rows. This markup is ideal for a room with a non-standard layout. In such cases, it is also necessary to find the center point of the space for laying the first part. After that, two perpendicular central stripes are marked relative to this tile. Following them, tiles are laid from wall to wall.
- Diagonally. If you want to lay the tiles diagonally, you will have to draw diagonal lines (excluding axial lines). To determine these elements, it is necessary to combine the opposite corners of the room.
- Unusual. If you like interesting and original interiors, you should turn to non-standard markings, which will allow you to lay out tiles in the form of interesting patterns, geometric compositions and mosaics. To create such a unique element, experts recommend using special millimeter or checkered paper. On such canvases it is much easier and more convenient to mark, for example, the floor. The drawing can be drawn up independently, although today many owners turn to experienced designers for this in order to bring really bright and non-trivial surfaces into the interior.
Using the resulting drawings and patterns, you should calculate the required materials, cut tiles, as well as decorative elements, based on the ratio of the dimensions of the piece material.


Wall markings
Wall marking is most often carried out using a bubble level, aluminum guides (rules), a pencil and tape measure, a breaker thread, a hammer, steel dowels and an edged board with a perfectly straight edge.
After you have stocked up with all the necessary tools, you need to do the following:
- The rule is laid on the base of the screed (parallel to the wall being trimmed) (on the edge). After that, a spirit level is placed on it in a horizontal position.
- During this procedure, it is necessary to find the highest point located on the surface of the screed.
- At this point on the next wall, you need to make a mark with a pencil (this will be 0).
- Slightly above the first mark (stepping back 10 mm), you need to put a second mark and draw a line. This will leave you with an extra margin, given the thickness of the adhesive and the tile itself.


Choosing glue
Floor or wall tiles must be installed using high quality and reliable adhesive. A cheap sealant will not provide a tight hold of the cladding on the base, which after a while can lead to the tile peeling off.
You can glue the tiles on the following compositions:
- inexpensive silicone sealant (one component);
- universal adhesive solution;
- moisture-repellent glue;
- highly elastic tile adhesive with the effect of increased fixation of the cladding.


According to its characteristics and composition, tile adhesive is divided into the following types:
- epoxy;
- dispersive;
- cement-based.

The most expensive is epoxy, so it is not bought so often. It is distinguished by increased characteristics of strength, water resistance, frost resistance, durability (does not crack or split over time). Dispersion glue is not that expensive. It has increased flexibility of the hardened mixture. Therefore, a similar composition is most often used in tiling rooms with uneven surfaces (for example, wooden walls). Dispersion adhesive dries quickly and is suitable even for painted surfaces.
Cement-based adhesive is standard. Such a composition is inexpensive, sold in many stores, and has good performance characteristics. It is worth noting that such adhesive mixtures can be matched to any base and tile, which speaks of their versatility and easy selection. Cement adhesive is easy and quick to apply.Even an inexperienced user can work with it.


How to cut tiles?
Various tools are suitable for cutting tiles, which can be easily found in many stores today. These devices should be selected based on the volumes and distinctive characteristics of the raw materials present in the composition of the tile.
Most often, this finishing material is cut with the following convenient tools:
- roller glass cutter;
- diamond glass cutter (often used to cut mirror tiles);
- electric tile cutter;
- manual tile cutter;
- special tile cutters;
- angle grinder (or grinder).


How to make holes?
There are several ways to make a hole in a tile. Different tools are suitable for each of them. Let's consider them in more detail.
- Drill for ceramic tiles. Glazed tiles can be drilled with a special ceramic drill. It is not so easy to work with such a material, since such a tile has a reliable top coating (glaze) with which it is covered after it is sent to the furnace, and it is fired. This layer is slippery, so a conventional drill in working with it can quickly become dull and not cope with the task. This type of drill has a special shape of the cutting element, complemented by a carbide blade with a pointed tip.
- Solid carbide drill bit for concrete. Using a carbide drill bit for concrete is one of the most popular ways to create holes in tiles. Such a simple device is inexpensive, it is not difficult to work with it.
The main distinguishing characteristic of tile drilling with this tool is that it is necessary to start work at the minimum speed of the power tool, otherwise the finishing material can be damaged.


- Diamond core bits. This method is most often referred to if you need to build a cavity for outlets, outlet taps for installing a mixer and other similar trifles. Using such devices, drilling is carried out by rotating the crowns fitted on the pilot drill. The quality and aesthetics of the hole largely depends on the quality of the state of the spraying and the direct grain size of the tool.
- Circular drill. Otherwise, this detail is called "ballerina". The essence of drilling holes with such an element consists in a movable cutter fixed on a rod and rotating in a power tool together with a pilot drill. Such a device can be easily adjusted to any hole diameter (it is limited only by the rod width).


- Drilling large holes. If you need to drill large holes in the tiles, you should use the following technique:
- Mark out the center, and then outline a circle of the desired diameter.
- Insert a special ceramic tile drill (or a simple concrete drill) with a small diameter into the electric drill. Using this part, you need to drill the necessary holes from the inside of the circle. They should be placed as close to each other as possible.
- After that, it is necessary to remove the drilled inner part. Using nippers or pliers, remove any remaining burrs from the resulting hole.
- At the end of all actions, you should grind the diameter of the circle from the inside using sandpaper or a special abrasive stone.


How to glue correctly?
Proper adhesion of tiles to the prepared surface requires care. First, you need to remove the old finishing material from the base (wallpaper, water-based paint, linoleum, carpet). Then decide on the layout of the styling. For example, for the floor, you can choose an original decorative and mosaic composition, if you are an adherent of old traditions, you should give preference to the standard options.After that, it is necessary to level the surface, and it does not matter what it is (wood, concrete, brick or consists of MDF, OSB plates). Any base must be made smooth and even, even if it has minor defects.
Let's take a closer look at how to properly glue tiles on walls and floors in a room.
Cladding
In wall decoration, it is worth adhering to the following work plan:
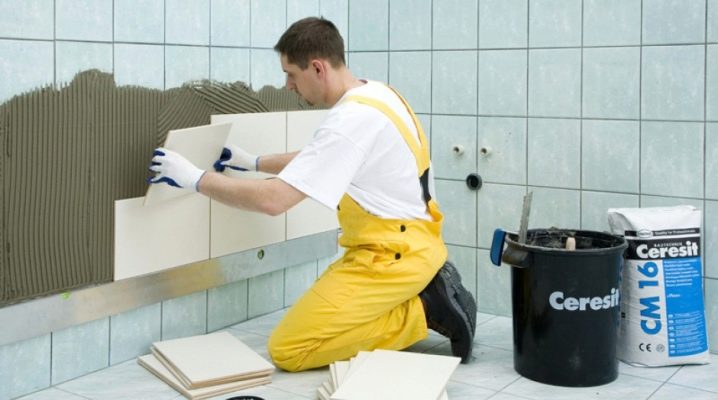
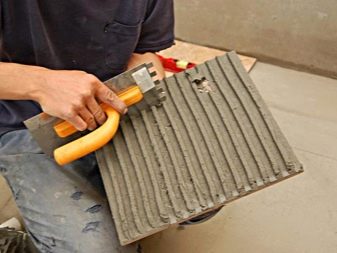
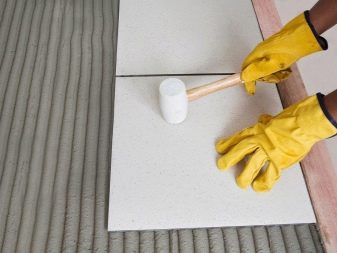
- It is necessary to apply the adhesive to a specific area of the wall or floor using a notched trowel. Get rid of air bubbles and voids underneath. The layer thickness must be at least 5 mm.
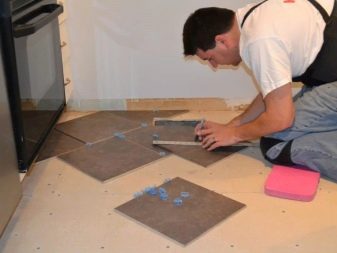
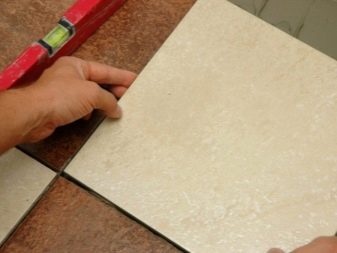
- In accordance with the markup, it is worth sticking the first tile, and then fixing the rest of the elements, moving from the starting part from bottom to top. You can also glue tiles from the center of the wall when it comes to finishing floors. The materials need to be pressed against the base, but do not press too hard. Tap the tiles lightly with the wooden butt of a hammer.
- After fixing the second part, a special plastic cross must be inserted into the seam. Further it is necessary to act on the same principle. Small PVC crosses are necessary so that the tile does not move, and grout can be applied between the different parts.
- The glue that has emerged at the seams must be removed immediately, and not postponed, since a high-quality adhesive composition is characterized by fast drying.


- Use a tile cutter if you need to overlap the remaining small areas (where the area is less than the width of a standard tile).
- After all the work, you must leave the room open for a day. This time is quite enough for the finishing materials to dry completely.
Grouting and washing
Grout must be applied to the joints of the tiles. To do this, you need to use a rubber spatula. This work can be started only after the tile adhesive has completely dried. When it comes to a room with high humidity, it is recommended to buy moisture resistant grout.
After filling the joints with grout, it is worth removing excess mortar with a rag. This should be done as quickly as possible. Choose mixtures that match the shade of the tiles. The grout must be diluted in portions to such a consistency that it does not run down the coating, but looks like a thick paste. At the end of all work, carefully wipe the cladding material with a soft cloth, remove dust and dirt.


Useful Tips
If you decide to lay out the walls or floor with tiles on your own, you should heed some expert advice:
- Be sure to use high quality, reliable materials and tools. In pursuit of low prices, you run the risk of unreliable gluing of tiles and finding, after a while, the tiles that have fallen off.
- Always remove the old coating on the walls or on the floor, otherwise the high-quality adhesion of the finishing materials will be impaired.
- Don't use too much glue. This can lead to the fact that over time it begins to flake and crumble.
- The solution should not be too small. An insufficient amount of glue can lead to the fact that the gluing of the substrates with tiles will not be reliable and durable.

- If the tile has fallen off the base, don't panic. Loose elements should be returned to their place. To do this, it is necessary to qualitatively clean the surface on which the tile was located. Then you need to apply an adhesive and install the finishing material in its original place.
- When choosing a tile, do not forget that a large number of seams between elements can lead to the penetration of moisture under the tile, this can provoke the appearance of fungus, mold and an unpleasant putrid odor. Experts do not recommend choosing tiles that are too small: there will be many vulnerable gaps between them.
For information on how to lay tiles correctly, see the next video.


The comment was sent successfully.