Mosaic shower tray: spectacular interior details
When choosing a shower cabin, attention should be paid not only to its external panels, sufficient area and the brand of plumbing equipment. Of great practical importance is what kind of tray is installed in the shower. Mosaic can be a very attractive solution, but in order to choose it correctly and implement the idea, you need to thoroughly understand the main aesthetic criteria and practical characteristics of the tiles. In addition, you need to find out exactly how the decorative composition is mounted, and what precedes its creation.

Peculiarities
The mosaic laid on the floor in the shower allows you to solve the most important task - not only to decorate the space as beautifully as possible, but also to exclude the penetration of liquid down and its negative impact. In the manufacture of pallets, the following are used:
- cement;
- brick;
- glue;
- waterproofing layer;
- grout.


Some of these components are responsible for the strength of the structure, others for preventing water seepage, and still others increase the tightness. On the market, pallets made of metal (cast iron) and acrylic are presented in abundance. There is a great variety of geometric shapes, but at the same time the surface (bottom) should be as flat and smooth as possible... Arrangement of a pallet with mosaic cladding can be done by hand, when all the necessary materials are prepared. Particular attention should be paid to decorating the surface, since it is at this stage that many problems arise.


Preparation for work
To lay the mosaic, you will need:
- metal mesh;
- trowels;
- drills and mixing attachments for them;
- beacons for laying plaster;
- levels and spatulas;
- self-leveling mixtures;
- plums;
- waterproofing mixtures;
- roulette.

Each stage of the work must be studied in advance in order to prevent problems from arising. It is very important to find a suitable site for the installation of a shower enclosure, as errors in its installation can be very expensive. The chosen place is carefully prepared and taken care of waterproofing, including on the nearest surfaces.


Execution of works
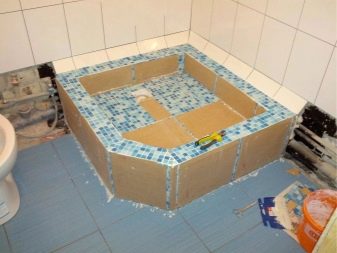
In a small bathroom, as in a large version of the room, it is advisable to design the intended pallet based on ready-made templates. By the end of the preliminary stage, the pallet should be completely dry. Brick bases with borders are made according to internal and external patterns. Two-layer waterproofing is applied after the product has dried and the walls are plastered. When it is assembled, it is the turn of finishing.


Decorative items are created on the basis of a wide range of building materials - crushed stone, sand, concrete. The mortar is placed in a special foam formwork. The pallet is always reinforced and tied to the wall, it is recommended to rub the seams with specialized compounds. The technology allows the arrangement of warm floors under a final screed, when the floor is laid around the pallet and under it at the same time. A brick contour is created above the waterproofing layer (based on simple or silicate bricks).


The base of the pallet is laid with steel mesh, which provides the highest structural strength. Then they choose a place for draining and carefully select the drain device itself so that it does not fail at a critical moment. The rough screed is poured onto a small area when a trowel is used, but any surface can be leveled with a spatula.To compact the mixture, the edge of the trowel is immersed in it, making the most precise and verified movements.

Cladding
All of these steps are necessary. Only after their completion can you lay out tiles or create a mosaic composition. The mosaic is placed from the far corner, in order to correct the location of a separate block, rubber hammers are used. For work, use a construction knife and a rubber spatula (they are laid with water-repellent mixtures). Grout for joints is also selected with water-repellent properties, and as additional devices you will need:
- notched trowel;
- Angle grinder or tile cutter;
- plastic crosses.

The base surface for laying the mosaic must be absolutely flat, this requirement is much more important in this procedure than when painting or gluing wallpaper on the walls. So the experience of performing other repair work does not help much. To determine if the wall is really flat enough, a rail covered with chalk on one side helps. Remaining clean areas after contact with the batten must be additionally leveled with an additional portion of cement.
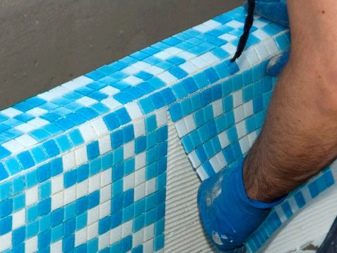
To achieve the most pleasant and stable result, it is very important to take into account the proportions described in the instructions for branded adhesives. You will have to choose a glass or plastic mosaic on your own, design recommendations in this regard are quite general. Scoop up the glue with a notched trowel, coat the surface with it. The tiles are carefully applied with the oiled side down and pressed down on them.

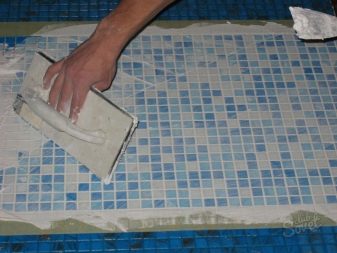
Excess adhesive mixture that has come out is carefully removed. Placing plastic crosses in the gaps between the tiles allows you to guarantee a strictly identical distance between them and complete coincidence of the seams. When a mosaic with a specific pattern is to be laid, a sketch must be formed. Filling the seams is required in small portions of the mixture, since an excess of it can quickly deteriorate. The lined pallet is washed thoroughly and wiped dry.

Selection Tips
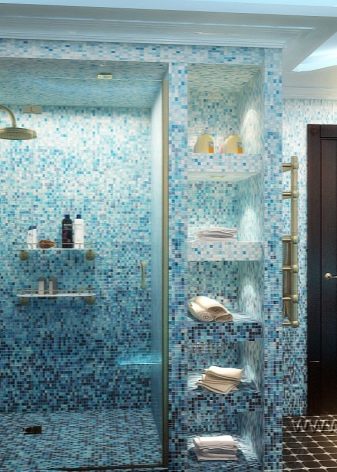
Of course, only the anti-slip mosaic should be matched. A non-slip surface is a very important safety requirement. In terms of appearance, the choice of pastel or bright colors should be subordinate to the dominant style in the room. The aesthetic qualities of the available and elite coatings do not differ at all, the difference is only in strength and durability.


A very important requirement is the compatibility of coatings and all materials used. So, bases made of concrete or brick, wood inserts must calmly transfer the load from the mosaic, their destruction under the influence of adhesives and grouting is unacceptable. Natural materials are coated with special mixtures that prevent destructive environmental factors from acting on the mosaic.

Even if the reviews for some tile or coating option are very favorable, this does not remove the responsibility for careful preparation for work. It doesn't matter whether you decide to make an original pattern or a simple textured mosaic - the slightest mistake or haste can be irreparable. Natural materials tolerate mechanical wear very well, but glass coatings are much cheaper, and they help to achieve an original look.

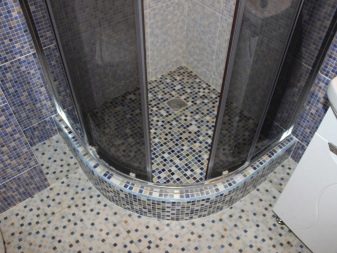
Mosaic tiles with different grain sizes and colors can be used to decorate the seat and other surfaces. When buying, you should carefully choose the sheets, each of them must be viewed in the light.

When forming a mosaic tray, it is required to put the shower drain so that the water can flow freely. The neck should rise above the point of entry of water into the riser by 10 mm per 1 running meter of the drain channel between the ladder and the riser. The boards are raised, in turn, over the throat of the ladder by 40 - 50 mm. For their formation, bricks or reinforced concrete with formwork are used.
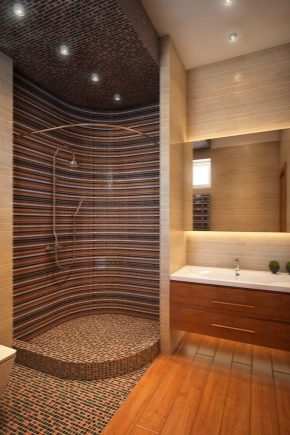
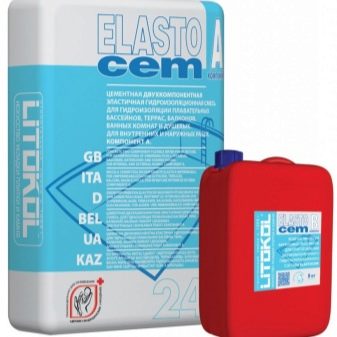
For waterproofing, two-component mixtures are used, which are applied in at least two layers. It covers both the floor of the cabin and its sides and adjacent walls. In a classic shower cabin, it is advisable to use pastel and slightly brownish shades, or products with a slight gilding. It is advisable to decorate the entire space with expensive original accessories.

High-tech furnishings imply an abundance of metal, especially chrome. The fusion style is very flexible, but at the same time extremely moody. It offers unrivaled shower comfort. This means that only a consultation with qualified designers helps to choose a good solution.

How to make a do-it-yourself mosaic shower tray, see below.


The comment was sent successfully.