Making a water ionizer with your own hands
Water safety and quality is a topic that virtually everyone thinks about. Someone prefers to settle the liquid, someone filters it. Whole systems for cleaning and filtration can be purchased, bulky and far from cheap. But there is a device that will perform the same functions, and you can do it yourself - this is a water ionizer.
The value of the hydroionizer
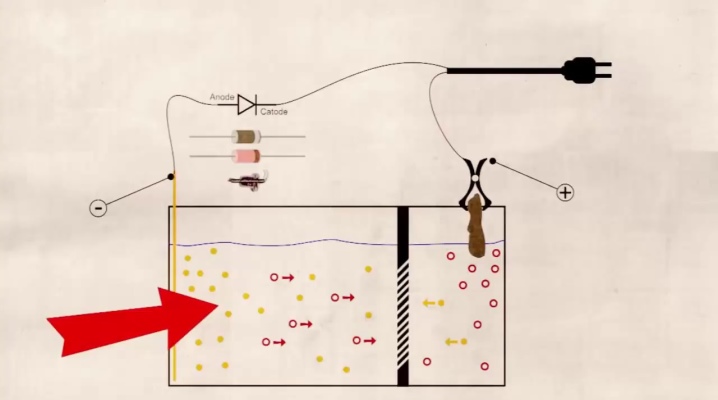
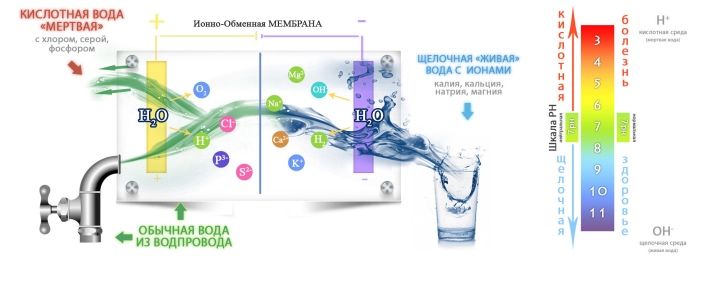
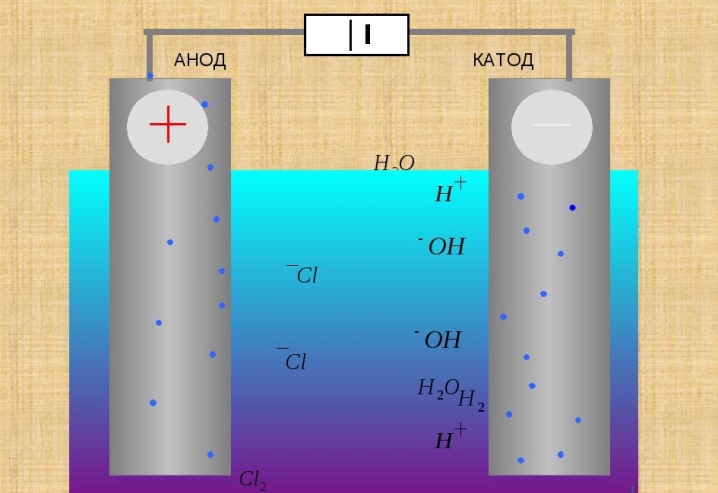
The device produces two types of water: acidic and alkaline. And this is done by liquid electrolysis. It is worth mentioning separately why ionization has gained such popularity. There is more than one opinion that the ionized liquid has a number of medicinal properties. Doctors themselves say that it can even slow down the aging process.
In order for water to have negative and positive charges, it certainly has to be purified from foreign impurities. And filtration helps in this: an electrode with a negative charge attracts alkaline substances, with a positive one - acid compounds. This way you can get two different types of water.
Alkaline water:
- helps to stabilize blood pressure;
- helps to strengthen immunity;
- normalizes metabolism;
- resists the aggressive action of viruses;
- helps in tissue healing;
- manifests itself as a powerful antioxidant.
For reference! Antioxidants are substances that are capable of neutralizing the oxidative reaction of free radicals and other substances.

Acidic water, positively charged, is considered to be a powerful disinfectant, suppressing allergens, combating inflammation and the negative effects of fungi and viruses in the body. It also helps in the care of the oral cavity.
Hydroionizers can be powered by two stimulants. The first is precious metals, and more specifically, silver. This also includes semiprecious metals (coral, tourmaline) acting in a similar way. The second is electric current. During the operation of such a device, the water is enriched and also disinfected.
You can make a water ionizer yourself, a homemade device will function no worse than a store one.

How does it work?
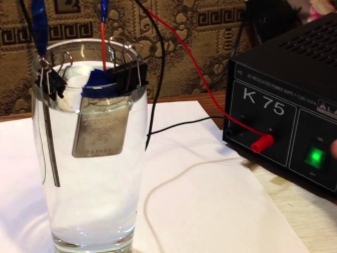
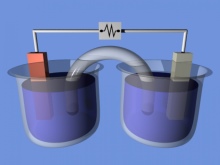
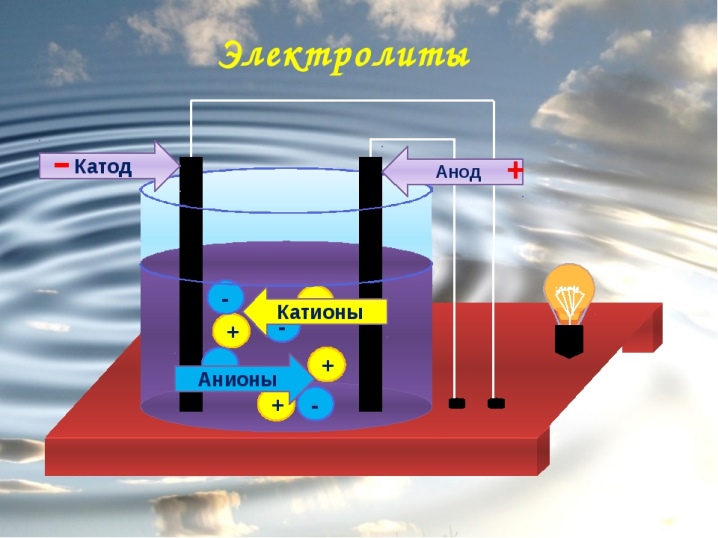
The principle of electrolysis underlies the operation of the device. In any variation of the device, the electrodes are located in different chambers located in the same container. A semi-permeable membrane separates these very chambers. The positive and negative electrodes carry current (12 or 14 V). Ionization occurs when current passes through them.
Dissolved minerals are expected to be attracted to the electrodes and stick to their surface.
It turns out that in one of the chambers there will be acidic water, in the other - alkaline water. The latter can be taken orally, and the acidic can be used as a sterilizer or disinfectant.
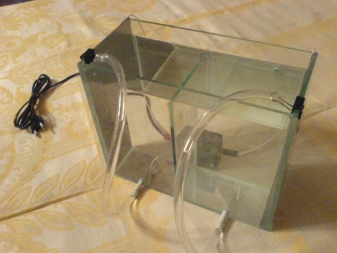
Materials and tools
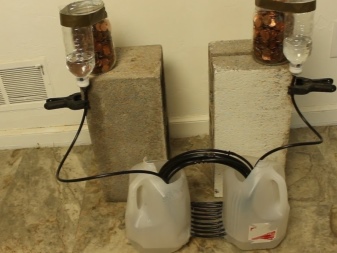
The scheme is simple, it is enough to recall the school course in physics, and at the same time in chemistry. First, pick up two plastic containers with a capacity of 3.8 liters of water each. They will become separate chambers for the electrodes.
You will also need:
- PVC pipe 2 inches;
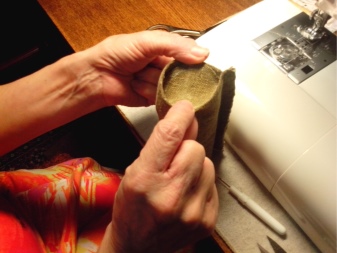
- a small piece of chamois;
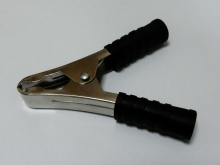
- crocodile clips;
- electric wire;
- power supply system of the required power;
- two electrodes (titanium, copper or aluminum can be used).


All details are available, much can be found at home, the rest is bought in the building market.
Manufacturing algorithm
Making an ionizer yourself is a feasible task even for an inexperienced craftsman.
In the process of work, you need to adhere to a certain sequence of steps.
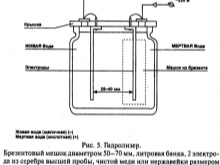
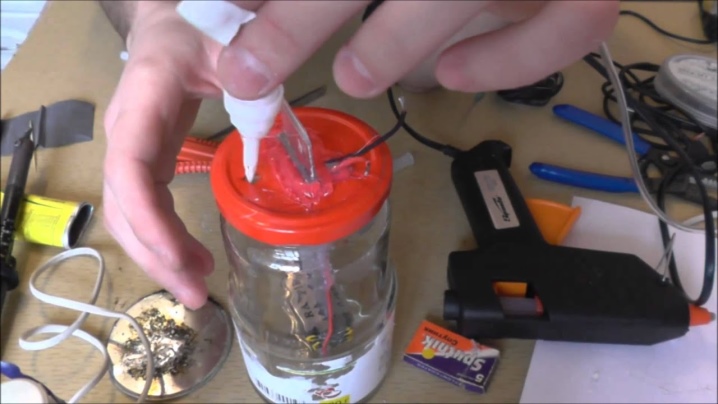
- Take 2 prepared containers, punch a 50mm (just 2 ") hole on one side of each container. Place the containers side by side so that the holes on the sides line up.
- Next, you need to take a PVC pipe, insert a piece of suede into it so that it completely covers its length. Then you need to insert a pipe into the holes so that it becomes a connector for two containers. Let's clarify - the holes should be at the very bottom of the containers.
- Take the electrodes, connect them with an electrical wire.
- The crocodile clips must be connected to a wire that is connected to the electrodes, as well as to the power system (recall, it can be 12 or 14 V).
- It remains to place the electrodes in containers and turn on the power.
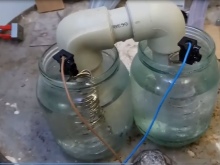
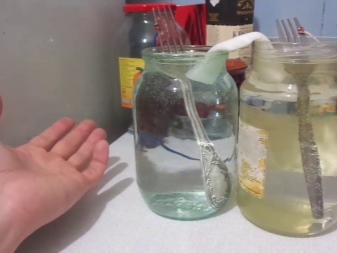
When the power is turned on, the electrolysis process starts. After about 2 hours, the water will begin to spread into different containers. In one container, the liquid will acquire a brown tint (which one depends on the amount of impurities), in the other the water will be pure, alkaline, absolutely suitable for drinking.
If you want, you can attach small taps to each container, so it will be more convenient to extract the water. Agree, such a device can be made with minimal costs - and time too.
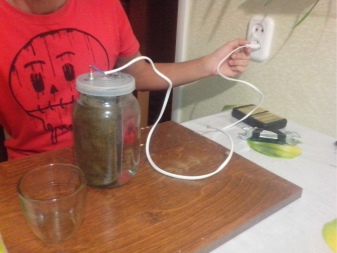
Bag option
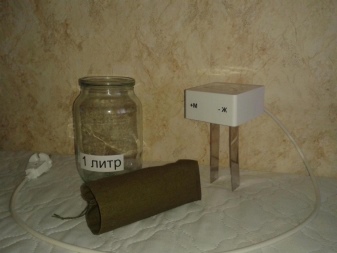
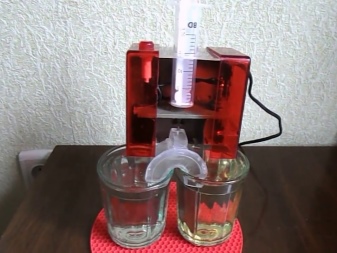
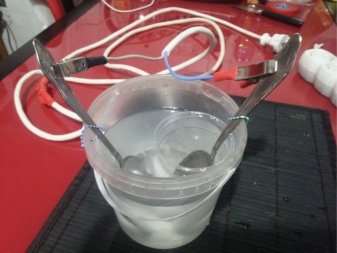
This method can be called “old-fashioned”. It is necessary to find a material that does not allow water to pass through, but conducts current. An example would be a piece of fire hose sewn on one side. The task is to prevent the "living" water in the bag from mixing with the water around it. We also need a glass jar that will serve as a shell.
You put an impromptu bag in a jar, pour water into both the bag and the container. The liquid level should not reach the edge. The ionizer must be placed so that the negative charge is inside the impermeable bag, and the positive charge is outside. Next, the current is connected, and after 10 minutes you will already have 2 types of water: the first, a little whitish, with a negative charge, the second is greenish, with a positive one.
To develop such a device, of course, electrodes are needed.
If you follow the full version of the "old-fashioned" method, then it should be 2 plates of food grade stainless steel. Experts advise turning on such a homemade ionizer through a differential protection device (it's worth looking).

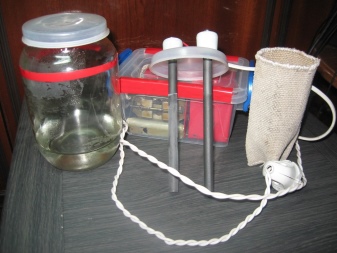
Silver set
There is another option - a homemade hydroionizer that will work on precious metals, on silver. Regular consumption of water, which has been enriched with silver ions, helps to kill harmful microorganisms in the human body. The principle remains simple: any object made of silver must be connected to the plus, and the minus to the power source.
It takes 3 minutes to enrich the liquid with silver. If a variant with a higher concentration of precious metal is needed, the water is ionized for 7 minutes. Then the device must be turned off, the liquid must be mixed well, kept for 4 hours in a dark place. And that's all: the water can be used both for medicinal and domestic purposes.
Important! It is impossible to store the liquid enriched with silver in the sun: under the influence of light, silver falls out in the form of flakes at the bottom of the container.
If we describe what exactly is needed for such ionization, then it will still be the same short list of elements that make it possible to carry out a fairly simple chemical reaction.
Silver ionization is possible with the participation of:
- anode;
- cathode;
- two plastic containers;
- rectifier;
- conductor;
- elements of silver and copper.
The cathode is the conductor for the negative pole, respectively, the anode is for the positive. The simplest anodes and cathodes are made from sinkers. Plastic containers are chosen because plastic does not enter electrolysis. The wiring diagram is very clear: water is poured into a plastic container, it is not topped up to the edge by 5–6 cm. Copper and silver shavings are poured into the container first.The anode and cathode, a conductor (it does not come into contact with the anode / cathode) are installed, you connect a plus to the anode, and a minus to the cathode. The rectifier turns on.
That's all - the process has started: the ions of precious metals passed through the conductor into the plastic container with the cathode, and the volatile compounds of non-metals went into the container with the anode. Some copper and silver shavings may break down during electrolysis, but the rest will be fine for a new reaction.
It is interesting that silver water is not only generally beneficial to the human body - it enhances the effects of antibiotics, for example, it negatively affects Helicobacter (the same one that is a real threat to the gastrointestinal tract). That is, such water, getting inside the body, resists the negative processes taking place in it, but does not affect the favorable microflora, does not remove it. Therefore, dysbiosis does not threaten people using silver water.
The choice is yours - a homemade ionizer or a product from the store shelf. The main thing is that it should be properly composed, function properly and bring you undoubted benefit.
3 designs of water ionizers with your own hands are presented in the video below.


The comment was sent successfully.