How to fit the hammer onto the handle correctly?

Almost all of us from school know the good old way of putting a hammer on a handle. But there are only a few about how to do it correctly. Indeed, in this matter there are some nuances, and sometimes it is not always possible to do this simply by the presence of a hammer with a handle and light efforts. Placing on the handle with a wedge can lead to cracking of the handle.
This article will tell you about the intricacies of putting a hammer on a wooden handle without a wedge.
What do you need?
The required materials include the following points.
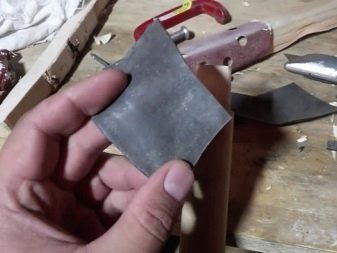
- A small piece of rubber. It is quite easy to measure the required size of rubber - the length should be slightly more than the length of the handle, and the width should be the same as its perimeter. You do not need to purchase rubber separately, you can use an old bicycle tube. It is important to use high-quality rubber without admixtures of other substances.
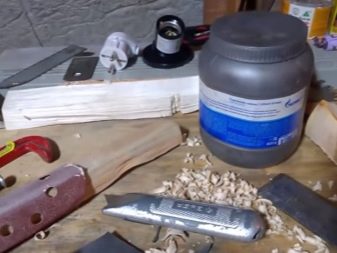
- PVA glue.
- Any lubricant - lithol is most often used.
- Prefabricated wooden handle of suitable size. It should be oval. The handle should gradually taper to the point where the striking part is attached. It is best to make it a little longer than the intended handle. Standard handle length 250-350 mm. The wooden blank must be pre-dried. Otherwise, after drying, the tree will shrink in size, which can lead to fragile fixation.
- Hammer. Here, this word refers to the percussion part of the instrument.
- Sandpaper and file. They are optional. They are only used to adjust the size of the handle or hammer hole.
Step-by-step instruction
Below is the traditional method for attaching the hammer correctly and firmly to the handle.
So now let's get down to the process itself.
- First of all, you need to grind the upper tip of the wooden handle so that it fits into the hole of the hammer.
- A piece of rubber prepared in advance should be wrapped around the sharpened tip of the handle.
- Now the outer rubber layer is lubricated with lithol or other grease. During the process, the rubber can be held with your hand or secured with a rubber band.
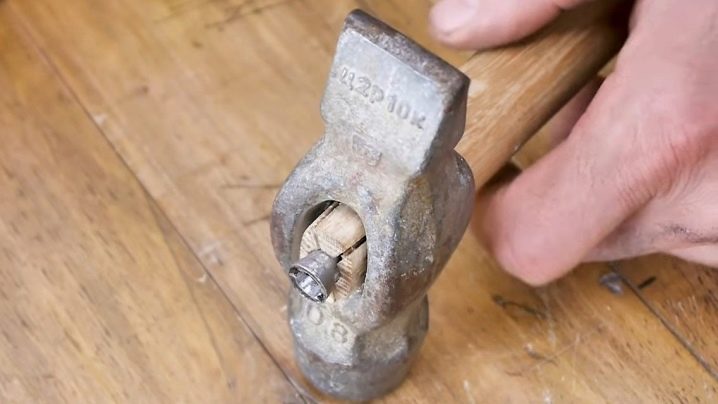
- The head of the hammer is put on the rubber-lined handle.
- Now you need to tap the free end of the hammer on a wooden board or other hard surface. This will ensure the hammer is firmly attached to the handle. This will happen because under the force of its own weight, the striking part of the instrument will be more strongly squeezed onto the handle. The movement can be stopped as soon as the hammer stops moving down the handle.
- Excess rubber at the top and bottom is cut off.
- You will also need to cut off the protruding part of the handle. The tip of the handle should be flush with the outlet of the hammer.
- For the final stage, you will need PVA glue.
The gaps left between the handle and the hammer head are filled with glue. After drying, PVA glue will prevent moisture ingress.


At this point, the process of attaching a hammer to a wooden handle can be considered complete.
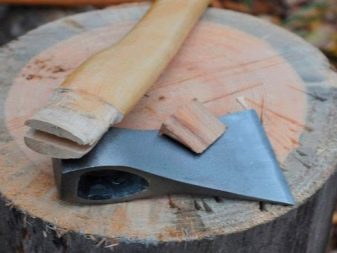
This method can still be used if it is necessary to attach an ax or a sledgehammer to the handle. But you cannot use this method to fit a wooden percussion part of the instrument onto the same wooden handle - in this case, a different technique is used.

Subtleties
It should be remembered that, in addition to the fact that rubber is an adhesion layer, it also takes a part of the load upon impacts on itself, thereby reducing the load on the handle. This will allow the latter to last longer. The most common situation is where the holes on the outside of the hammer head are much larger than the same area in the middle. To prevent this from becoming a complicating factor, you can use a file and emery paper to make the transition smoother, or to make the width of the head the same both along the edges and in the middle. The difference is on average 6 to 8 mm.
It is worth noting that the same processing method can be used to reduce the size of the wooden handle. If the difference is small, then only sandpaper can be used. It is important to ensure that the handle enters the hammer at a right angle. Otherwise, after the tool can be not only poorly applicable in work, but also quickly become unusable.


Why put a hammer on a handle?
Few have seriously thought about this question, but in this article we will try to answer it as clearly as possible. First of all, it should be noted that wood handles are a cheap and affordable material. If the handle breaks down, it is easy to replace it with a new one.
Another important factor is the lightness of the wooden handle. Due to the fact that the handle remains light and the impact end is solid, the impact force of the tool is increased. With some skill and a little experience, it is possible to adjust the intended impact force of the tool by varying the width and length of the handle.
An interesting fact - the most comfortable hammer handles are wooden models. They sit better in the hands and are environmentally friendly. Thus, the efficiency of the hammer can be increased.
Of course, the most common reason for replacing the handle is simply the deterioration of the material. Most often, the handle just dries up and cracks.


In conclusion, it is worth noting that the method described here guarantees a tight fit without a dangling handle, which, among other things, is also quite simple to implement.
For information on how to attach a hammer to the handle, see the next video.


I think that this is the wrong method - because of the rubber, the hammer or ax is cushioned, which affects the impact.
The comment was sent successfully.