Grinder repair: diagnostics and troubleshooting
Angle grinders are solid and generally reliable devices. They can perform a fairly wide range of jobs. However, their periodic breakdowns are inevitable, any home craftsman must know how they are eliminated.
Device
Before talking about the main malfunctions of the grinder, about the methods of dealing with them, it is necessary to understand the design features. Its study is greatly facilitated by the fact that the diagram of electrical and mechanical components is approximately the same in almost all angle grinders. Minor differences are related only to patented innovations promoted by individual manufacturers and to specific adaptations for certain functions. Almost any modern grinder is equipped with a shock-resistant plastic case. Usually it is made not monolithic, but broken into 2 component parts, which are connected with screws. Ventilation openings are provided where the drive is located. The electric motor itself is formed by a combination of the following elements:
- rotor;
- stator;
- electric brushes.


When creating the stator, two-pole coils are used, on which a copper wire is wound. The total number of turns is chosen very carefully. Determining it, engineers take into account the desired parameters of the apparatus. The rotor is connected to the stator by means of bearings. The rotor itself is made of electrical steel. Slots are formed in it to accommodate the winding wires. The number of grooves and winding features cannot be considered a trifle: the speed at which angle grinder can work depends on these parameters. The role of the brushes is to transfer current between the cable and the collector.
This concludes the review of the electrical components of the grinder, but it also contains mechanical devices. Of great importance is the gearbox, the housing of which is made of a durable aluminum-based alloy. It was this material that was chosen due to the combination of excellent strength and high thermal conductivity. The gear housing must allow reliable fastening of the apparatus elements. It provides holes in which the auxiliary handle is mounted. With the help of a gearbox, the force generated by the engine is transmitted. If this unit breaks down, then the work of angle grinders either becomes completely impossible, or occurs at the "wrong" speed.


The reduction axle is equipped with a pair of bearings. From them the impulse is received by the driven gear of the planetary type. At the end of the shaft there is a thread for a nut clamping the trimming discs. And a sun gear is pressed onto the armature axis. It is the driving link for the bevel gear.
It is also necessary to say about the release clutch - it is extremely important when the disc suddenly sticks. If there is no such clutch, any jamming will lead to a kickback, with all its unpleasant consequences. This part is structurally made in the form of two discs. Normally, they are very close together. Slowing down the stopping of the rotor shaft allows you to significantly reduce the load arising from such an emergency. As a result, the total resource of the grinder is used more efficiently.


It is very convenient to remove and replace the disc on modern angle grinders thanks to a special button. When pressed, the planetary gear gear is rigidly fixed.A cylinder nut helps to secure the grinding wheels for normal operation. A special key, usually included in the delivery set, helps to work with it. One more button is provided to start the engine and start smoothly. Some models of angle grinders can also regulate the spindle speed and prevent overloads.


Troubleshooting
As it is easy to understand from this description, the LBM device is quite simple in technical terms. And you can almost always find the cause of the problem with your own hands, without contacting service centers. It is appropriate to start with an assessment of the work of the brushes. In a normal situation, they should sparkle, and evenly and moderately. If there are a lot of sparks or, on the contrary, there are no sparks at all, the electric brushes must be replaced as soon as possible.


One of the common reasons why the grinder does not turn on is just a break in the network cable - along the entire length or at the input. This is the assumption that is worth making when faced with a problem. Before disassembling the mechanism, you need to check with a multimeter or a simple indicator screwdriver if there is voltage. It is also recommended to make sure that there is electricity in the house (apartment). If voltage is present, but the device still does not work, the electric motor needs to be checked. Its most serious malfunctions are as follows:
- short circuit between adjacent turns;
- breakage of individual turns of the armature or stator;
- burnt out collector lamellas.


Anchor problems show up in three ways:
- noticeable heating of the case;
- typical burning smell;
- intensification of sparks on the collector.


In some cases, an external examination is enough to confirm the assumption of problems with the anchor. In this case, it is found that the windings have darkened, and the plates have burned out or peeled off. But it should be borne in mind that visual manifestations of the problem are not always encountered. To determine the real cause of the failure, you will need to check with a multimeter. The device is switched to a resistance of 200 Ohms and sequentially evaluate what resistance is between pairs of adjacent lamellas - normally it should be the same.

But the resistance in the section from the lamellas to the anchor body should have an infinite value. On the stator windings, the terminals are checked, the resistance between these terminals and the case is estimated. A standard multimeter does not allow finding turn-to-turn closures of stators and armatures. This task can be confidently solved only by devices of a special design. Sometimes, if the angle grinder does not start, the whole point is in the malfunction of the button. When its contacts become covered with dust, they quickly deteriorate from overheating. The test is carried out, as in the previous case, with an ordinary multimeter.

Important! Quite rarely, you have to deal with malfunctions of the speed regulator and the capacitor that suppresses interference.
As for mechanical deformations, it is mainly necessary to deal with wear or irreversible destruction of bearings.
This defect manifests itself in the following:
- increased noise;
- vibration on the case;
- strong overheating of the surface.


Bearing failures (wear) can be assumed not only when the housing is warming up. Any owner of angle grinders knows exactly how intensively the device is used. With a significant, systematic load, gears or gear teeth can break faster than other parts. It is very important to inspect the problematic part. Then it will become clear whether its repair is possible or not.

Quite a few people are faced with a problem when the grinder is not gaining momentum, that is, it does not develop the full required power. First of all, in such cases, you need to check whether the unit itself, which regulates the torsion intensity, is in good working order. And also the condition of the electric brushes and the springs of the brush holders should be assessed. You cannot discount the drop in revolutions due to a breakdown of the supply cable (from frequent bending, from a blow in a circle).


It is not difficult to determine whether the contact is of high quality - if it is violated, the insulation of the wire becomes overheated. Of course, you can feel it only after turning off the angle grinder. In order not to waste time on unnecessary checks, you should think about what could cause such a failure. If problems have arisen after the repair, you can assume still errors during reassembly. Usually then disturbances in the power supply of the motor or in its windings are accompanied by strong vibrations.


In some cases, the grinder nut does not unscrew. Basically, this trouble occurs on angle grinders with a disc of 150 mm or more. The increased torque increases the likelihood of tightening the nut to its limit. If the inertial forces are relatively small, this danger is also less likely. Breakage of the stopper, as well as the situation when the disc has bitten, are easily recognized even without special knowledge, so no additional comments are required.


DIY repair
Identifying problems is not enough - you also need to know how to fix them. To unscrew the same nut, if the standard wrench does not help, you need to use a rod. It is inserted into the holes, then they try to move the fasteners in the right direction with hammer blows. But hitting is required very carefully to avoid breaking the button. There are often recommendations to preheat the nut itself. The most gentle method involves breaking off the edges of the disc up to the problem hardware. Next, you will need the following elements to choose from:
- relatively thin steel plate;
- spare grinder with its own disc;
- just a thin disk.

The damaged disc is grinded. But it is undesirable to break its fixing fasteners. The procedure will take a maximum of 5 minutes.
More serious problems sometimes require you to completely disassemble the grinder. It is worth adhering to the following sequence:
- first of all, remove the nut holding the disc;
- after that, remove the bolts securing the protective casing;
- after them comes the turn of bolts on the body and in it;
- further, remove the top of the back of the case and twist the bolts securing the cord;
- both cables and buttons must be removed from the grooves; some models are supplied with a one-piece rear housing that can only be removed completely;

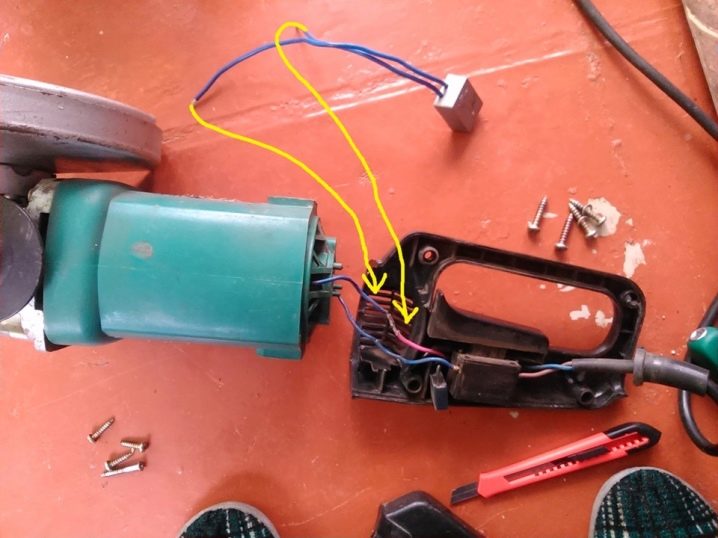
- now you can change the engine - first, they disconnect its wires, remove the brushes, and then separate the gearbox from the external body of the grinder; without this manipulation, it will not be possible to pull out the anchor of the electric motor;
- further, remove the device that draws in air and the bolts pressing the stator to the body, as well as the contact spring rings attached to the stator wires;
- the stator itself is removed after careful blows with a mallet on the ribs, otherwise it will not budge;
- the next step in disassembly is to remove the gearbox bolts and extract it itself.
The assembly is carried out in the reverse order. It must be remembered that the casing at a part of the angle grinder is not screwed in with bolts, but snaps into place. Removing it is very simple: you just need to turn the cutout 90 degrees to the tool. Return the cover to its place by turning it back until it clicks.
You can repair the grinder in more difficult cases. For trained people, even rewinding at home is not a big problem. It will only be necessary to prepare the enamel wire and electrical cardboard. The process is as follows:
- first, the winding and the old insulation are removed from the case;
- further, they inspect the grooves - if the coils burned, the insulation inevitably turns out to be burnt;
- part of the material is fused onto the body - these layers must be cleaned out with a needle file or a diamond drill; leaving them in place risk damaging the new winding;
- the wires can be separated only after the insulation is burned out with an open fire;
- then they measure any of the wires with a micrometer, now it is very easy to determine the number of turns;
- further, take any wire from which a loop is made that fits into the grooves of the stator; according to its diameter, a cylinder is chosen, which will serve as the basis for winding;

- an enamel wire is screwed onto the base;
- the frontal parts are tied with thick technical threads; it is better to do this with glass tape, since it will definitely not tear or melt;
- shrink sleeves are put on the edges that are still free;
- electrical cardboard will make it possible to manufacture sleeves; inserting these sleeves into the grooves, place windings in them;
- further, the resistance is accurately measured with a multimeter;
- impregnation with varnish will eliminate vibration and mutual friction of the wires;
- connect the devices only after the varnish has dried.

Sometimes it becomes necessary to change the direction of rotation of the angle grinder disk. Normally, it should turn exactly so that the sparks fly towards those working with the tool. Yes, overalls will deteriorate faster. However, in the event of an emergency, the nozzle will fly forward and do no harm. Therefore, the device can be reconfigured only if sparks are flying "from the operator".

Precautionary measures
The use of the grinder must be carried out in strict accordance with the instructions and safety requirements. The same rule applies to repairs. The following precautions should be taken:
- it is categorically impossible even to carry out diagnostics, not to mention the replacement of individual parts, if the device is connected to the mains;
- when removing bearings, you should take care of a reliable stop;
- for knocking out parts, only drifts made of soft metals are used;
- it is unacceptable to press in new bearings with direct hammer blows; you can only beat the tube, which will push the parts into the desired position;
- after dismantling the bearings, they are thoroughly cleaned, lubricated; remove everything, even minor contaminants, by flushing with alcohol;
- to eliminate errors, after assembly, be sure to check if there are any backlashes.

Care and correct use
To preserve the performance of the tool and your own health, you should use the grinder only for those works for which it is intended. It is worth paying attention to the following rules:
- you cannot use any lubricant, any spare parts other than those recommended by the manufacturer;
- all firms warn in their instructions that working with angle grinders is possible only with good health; even ordinary fatigue, not to mention alcohol or drug intoxication, is a serious danger;
- no work should be carried out if the protective cover is removed;

- the location of the wire should be monitored all the time - it should not get under the cutting or grinding disc;
- checking the technical condition of the tool should be carried out both before the start of work and after its completion; it is advisable to inspect angle grinders also after long (from 1 hour or more) breaks;
- regardless of the brand and model, it is necessary to disassemble the tool from time to time, cleaning all dirt from it, renewing the lubrication of the chassis;
- it must be remembered that the grinder is not intended for work and even for storage in conditions of high humidity;

- it must always be laid so that the tool does not fall accidentally, is not subjected to the pressure of heavy objects; it is worth remembering that the cord should not hang down;
- it is required to minimize the folding and twisting of the cable;
- it is categorically unacceptable to carry the grinder by the power cord or pull it towards you;
- the disc and other nozzle are selected strictly for the work that they are going to do;
- when a crack appears, or even single potholes, the circle must be immediately replaced; the same should be done with discs that have an irregular shape;

- when the circle is replaced, a start is carried out for 30 seconds in a trial mode; if during this time no unusual noises, vibrations or beats are noticed, everything is in order;
- do not leave anything in the work area that can easily catch fire, be very hot or explode;
- work should only be done in good lighting on a stable platform (support);
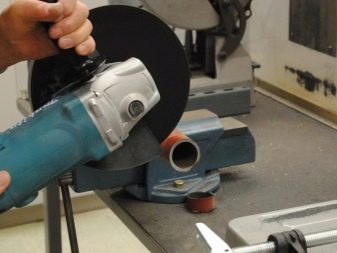
- you cannot hold the workpieces to be processed - they are either clamped in a vice, or instructed to hold someone with adjustable wrenches.

Important! Compliance with these simple rules allows you to avoid injuries and extend the time of using the grinder, postponing the repair.
For information on how to repair a grinder with your own hands, see the next video.


The comment was sent successfully.