Mounting the mirror to the wall: mounting methods
Glass is a very capricious material to use. But at the same time, it turns out to be very popular in interior design. In particular, in the form of a product such as a mirror.
It is difficult to overestimate the wide opportunities that mirrors provide to people, in addition to their direct purpose - to reflect us. They contribute to the visual expansion of the space, help to establish a special "diffused" light in the premises, and so on. Therefore, it is very important to understand how to correctly place the mirror on the surface chosen for this.
Peculiarities
Before moving on to the methods of assembling mirrors with our own hands, we will dwell a little on the features of the surface on which they are supposed to be attached.
- Concrete - the most common material found in most building structures. To work on concrete, you will need a hammer drill, and before gluing anything to a concrete wall, you need to prime it.

- Drywall - the material is not very durable and may not withstand heavy loads or repairs. Therefore, it is necessary to carefully monitor the weight of the product: the weight of the mirror sheet should not be more than 20 kg, and you will also need special accessories.
On average, the weight of 1 square meter of a mirror, depending on its thickness, ranges from 7 to 15 kg. This must be taken into account when choosing a fastening method and type of fittings.

How and with what to attach?
Hidden fasteners require some effort. In this case, you can do without nails and do not spoil the wall. The product is best glued to a plasterboard surface. Nails can be used for a brick wall.
So, the mirror can be glued or hung.
Glue
Mirror panel sticker is a fairly easy process. There are several ways to paste it.
The advantage of this group of methods will be the absence of visible fastenings on the surface of the mirror, the ability to use the product without a frame, the ability to decorate the interior using small figured models in the form of butterflies, flowers, polygons and other things.
Gluing is a relatively simple method, great for small items.
At the same time, this method of strengthening the mirror in different variants of its use will have three serious disadvantages:
- In many cases, the glued product cannot be removed from the wall - it will have to be broken.
- The surface on which you intend to place your mirror must be flat and stable. And if the first is not difficult to check, then it is rather difficult to predict that a wall (especially a newly erected or newly plastered one) will not shrink, which will lead to the destruction of the product.
- It can be glued on far from all surfaces and not in all rooms. It will not stick, for example, on tiles, and changes in temperature and humidity in the bathroom or in the kitchen can destroy the adhesive layer over time.


For work, you need to use a special mirror glue - it does not contain acids that could spoil the amalgam. Before using another adhesive, the back of the product should be sealed with a sealant. Neutral silicone sealant can also be used in place of adhesive.
When gluing the product in the bathroom, you should use a special silicone sealant for aquariums, which costs a little more than usual,but contains antifungal additives and is originally intended for use in humid environments.


Prepare, level and degrease the surface. If you are going to glue the product on a vertical surface, be sure to prepare props that will help hold the canvas in place until the glue hardens. In this capacity, you can use planks, or several screws temporarily screwed along the lower edge of the marking so that the mirror sheet rests on them.
The glue can also be combined with several strips of adhesive tape, which will serve the same purpose and additionally secure the canvas before the glue hardens.
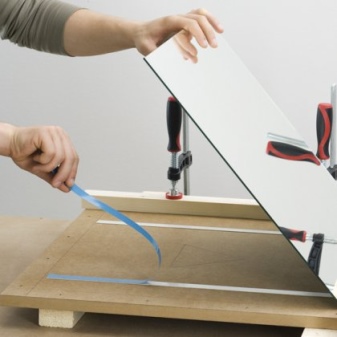

If you want to glue the canvas to the front door or cabinet door, then it is better to place them horizontally, removing them from their hinges - this is more convenient. You will not need to use props, and the mirror sheet will definitely not move until the glue is completely cured.
You cannot glue the canvas onto the wallpaper - there is no guarantee that they, in turn, will stay on the wall. Therefore, the wall must be cleaned of wallpaper, other unstable coatings and primed.


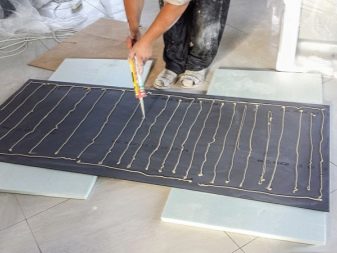
Apply glue in strips, leaving a gap of 8-12 centimeters between them, depending on the size of the canvas. The glue can also be applied in a snake, checkerboard pattern, or dots all over the back of your mirror. Try to avoid the edges - the glue can run out untidy and can be difficult to remove from the wall afterwards.
Be sure to mark the wall where you intend to glue the mirror, it will help you navigate. Use a spirit level to check if it is evenly applied.

Attach the mirror to the wall, referring to the markings. Be careful: the glue hardens quickly, and you may not have time to correct the position if you attach the mirror incorrectly. Hold the mirror for a few minutes, pressing it firmly, then substitute the supports - they can be removed in a day or two.


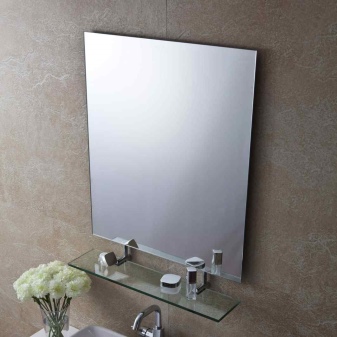
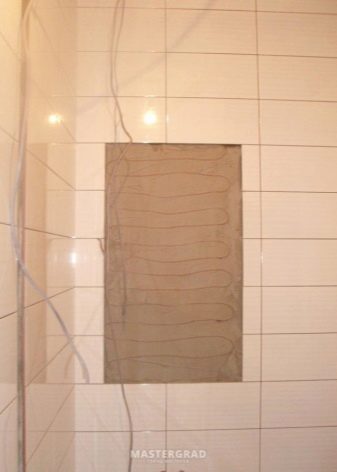
You cannot stick a mirror on a tile: therefore, usually when installing tiles in a bathroom, a free section of the wall is left in advance to match the size of the future mirror. If you haven't, you will have to remove the tiles or choose another way to attach the mirror to the wall. To compensate for the difference in height, if the thickness turned out to be different for the tile and for the mirror (most often, the mirror is thinner), an additional layer of plaster is applied under the product, or a sheet of waterproof drywall is installed between it and the wall. Joints can be sealed with glue or sanitary sealant.

If the canvas is large, then additional precautions must be taken. So, the surface of the wall under it should be very well leveled, and a special film should be glued to the surface of the mirror: now, if it breaks, it will not be fraught with serious injuries.
Mirror walls of several large canvases are mounted with a small gap between the canvases so that the mirrors do not break during installation or if the walls shrink slightly during use.


Small mirrors can be glued without glue, only using double-sided mounting tape. The advantage of this method is that the foamed base of the tape compensates to some extent both the unevenness of the surface under the mirror and its possible movements. This gluing method also allows the mirror to be dismantled.
But the assembly tape must be wide, of high quality and designed to withstand heavy loads. The amalgam of the mirror must withstand the same loads: in some cheap models, it can begin to flake off during operation, and there is a risk of damaging it during installation. These mirrors are generally not recommended to be glued.

Just as before using the glue, first you need to prepare the surfaces - remove dust and wipe with alcohol for degreasing.The adhesive tape is glued to the surface evenly, but it should not be placed along the perimeter or horizontally in stripes - the pieces of adhesive tape are placed vertically in a checkerboard pattern. A few extra stripes can be added closer to the top edge of the mirror.


Hang up
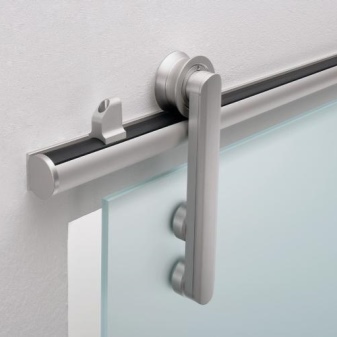
If the mirror is without a frame, then you can use various types of fittings presented in stores: brackets, profile, brackets, clips and strips. With the help of them, the mirror can be mounted both close to the wall and located with an extension - with an interval from 5 mm to several centimeters between it and the wall. This can be useful if the surface under the mirror is uneven and cannot be leveled.
There are two types of mirror mounts: through and blind.


The through fastening method implies installation with dowels through holes made directly in the mirror sheet. If your mirror already comes with special holes, or the store provides a glass drilling service, you just need to install the dowels into the wall and screw the mirror.


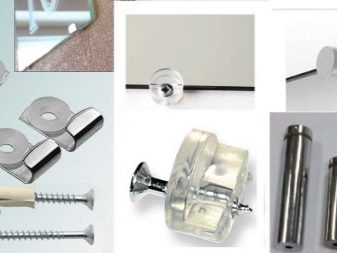
Usually a dowel for mounting mirrors (and not only) consists of:
- Sleeve made of hard plastic that fits into the wall, expanding and fixing well in the wall when the screw is screwed in.
- Screw.
- Special pressure pads that fit between glass and wall, glass and screw head, and do not allow damage to the mirror when tightened.
- Decorative caps, which are made of metal or plastic and hide the bolt heads.


When hanging the canvas with dowels on ceramic tiles, a wall sheathed with wood or pasted over with PVC panels, be sure to note that fastening to the tile is not enough - you need to go deeper into the base wall, for which longer dowels are used, or it is better to clean the wall from the coating in the place where you plan to mount the mirror.
If the type of surface allows you to directly screw a screw into it (wooden furniture), then you can do without a dowel sleeve.
If the wall is fragile (chipboard, drywall), use special dowels.

If there are no ready-made holes in the product, but the through installation method suits you, and you want to make them yourself, you will need a special diamond glass drill, a low-speed drill and a little patience. Before drilling, fix the blade on a flat, preferably wooden, surface so that it does not move, degrease the surface with alcohol and mark with a marker the places where you will drill the holes.


The product may crack from heat during the drilling process. In order to avoid this, you have to work at a low speed - from 250 to 1000 drill revolutions per minute. To prevent the canvas heated during the drilling process from cracking, mold a plasticine "cup" around the marking and fill it with water or turpentine. The liquid will cool the glass and trap the glass dust generated during operation.


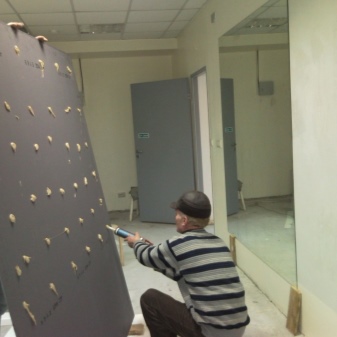
If you want to mount the product with blind fasteners, then the installation algorithm for all types of such fasteners is approximately the same. The larger and heavier the canvas, the more bindings you will have to use.
Pay special attention to the bottom fasteners - they must be able to withstand the greatest load.
Usually the fastening elements are installed from below - at a distance of 2-3 centimeters from the intended angle of the mirror. And on the sides, so that the mirror is kept in this "pocket" under its own weight. It is possible to install the fittings, in which the fasteners are installed at the bottom and top, and the mirror is "embedded" from the side.


The lower elements are installed strictly horizontally along the markings, the side ones - usually so that the mirror on one side passes freely into their grooves. Usually this is 2-3 mm from the intended side edge of the mirror, but the distance depends on the specific type and style of fittings you choose. Be sure to check that the mirror cannot fall out at the maximum shift to one side.
Sometimes, for reliability, a decorative profile is used as the lower element of the fittings, which can be combined with any other method of attaching the upper edge - brackets or through dowels.


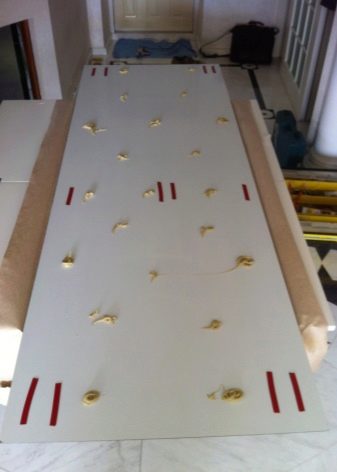
If you want to give the mirror sheet additional strength, you can stick it on a sheet of plywood or chipboard: such a measure will not only prevent the mirror from breaking just by careless pressure, but will also make it thicker, take this into account separately during installation.
When hanging a mirror, stick adhesive pads on the back of its corners: they are sold in stores, they are often glued, for example, on furniture legs. With this precaution, the mirror will not "dangle" in the mountings.
If you are installing a mirror in a bathroom or kitchen, treat the back and ends of the glass with sanitary sealant.


Mirrors, taken into the frame, are most often already supplied by the manufacturer with rings or hinges, you just have to install a suitable counterpart on the wall, for example, hooks. You can also buy hinges or hanging plates from the store.
A mirror in a heavy wooden frame without ready-made fasteners can be mounted on the wall at the top edge using two slats with a section of approximately 50 x 20 mm, with longitudinal cuts at an angle of 45 degrees, which interlock into a "lock".


One of them is mounted horizontally on the wall, the other - to the back of the frame at a height of about 4/5 of the mirror (at some distance from the top edge). The mirror will be "locked" under its own weight.
When installing wall models, be sure to take into account the characteristics of the room. So, in the nursery, even on small mirrors, it is worth sticking an anti-splinter film to avoid injury.

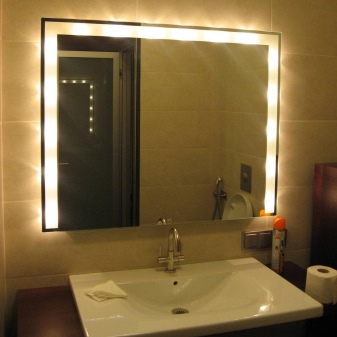
In small and dark rooms, install a mirror on a wall perpendicular to the window. The horizontally placed mirrors visually expand the room, and the vertical ones make it higher. Before mounting a mirror, be sure to check that it will reflect.


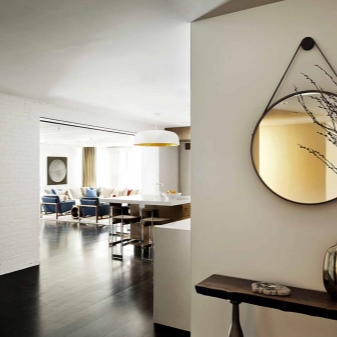
Beautiful examples and options in the interior
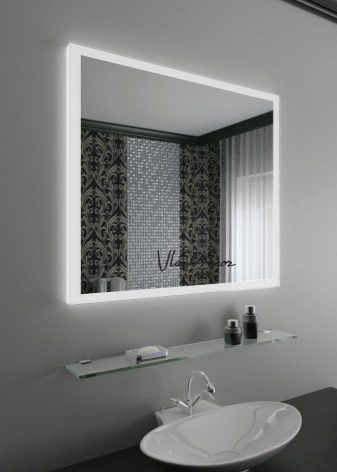
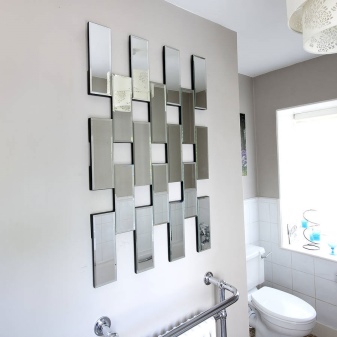
A composition of several mirrors is suitable for the corridor.
The bedroom means decor in restrained colors.
In the living room, you can give a riot of imagination and show your design skills.


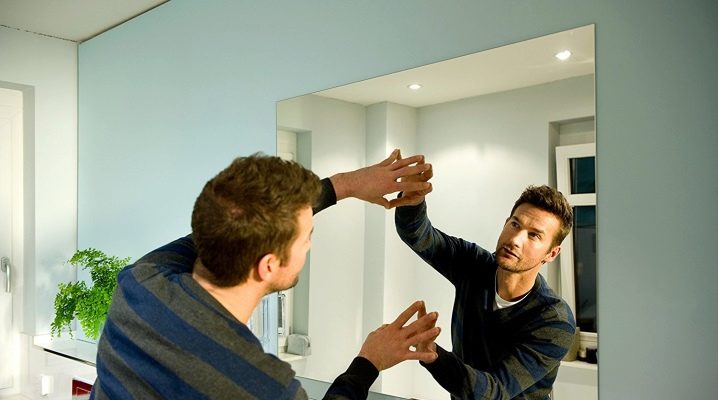
For information on how to hang a mirror, see the next video.


The comment was sent successfully.