How to make garlands for a wedding with your own hands?
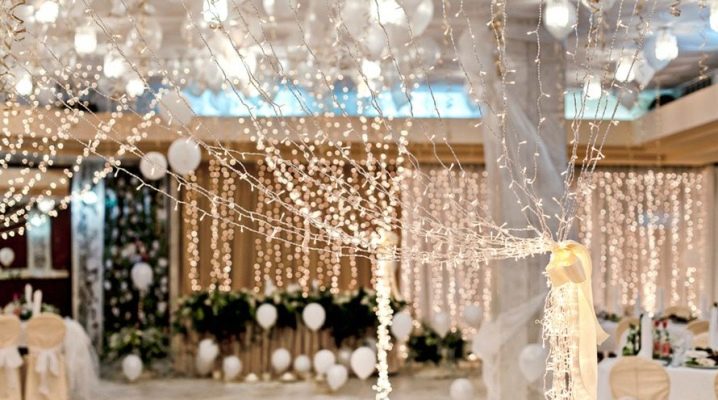
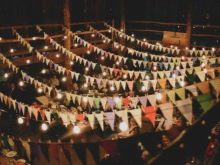
Garlands for a wedding are an essential attribute of a solemn event. They will be appropriate as a decorative decoration of a cafe hall, a place for photography, a bride's room.

Peculiarities
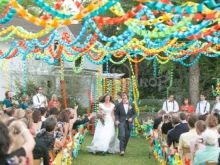
The trend for the design of weddings has been going on for decades. Today, a huge number of master classes are presented on the Internet, thanks to which you can make a wedding garland with your own hands. You can choose any materials for decoration in accordance with the venue of the wedding: closed room, terrace, nature. The length and shape of the garlands can also be absolutely any: long, short, embossed or flat.
If it is assumed that garlands will decorate an open space, then they should be made not of paper, but of moisture-resistant film. Otherwise, sudden rain can ruin all the beauty.
The details that make up the garlands must be consistent with the parameters of the hall. The more spacious the cafe, the more details can be made. Conversely, in small spaces, jewelry should look compact and neat. The color of the decoration should correspond to the general color scheme of the solemn event. Bright colors or pastels can be used. The dominance of two adjacent shades is possible: white and lilac, white and pink.

As a basis for hanging decoration, you can choose:
- colored and corrugated paper;
- cardboard;
- newspapers;
- foil;
- the cloth;
- felt;
- polyethylene;
- Balloons;
- tree lights;
- cardboard cups;
- vinyl records.
You can fix decorative ornaments using satin ribbons, twine, woolen threads, plaits, lace, fishing line.

Paper decorations
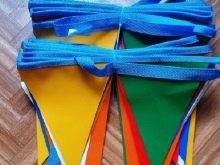
From colored paper, you can make flat decorations like flags or voluminous ones - in the form of flowers, balls, pompons. To fasten the elements, use threads or transparent glue.
In the form of flags
For creating such decoration will be required:
- scissors;
- multi-colored paper;
- Double-sided tape;
- strong thread.
Cut out 10x20 rectangles from paper. Cut off a long piece of thread. Fasten the rectangles by folding in half and gluing with tape from the inside. After that, make a V-neck on each figure to make a flag. The garland is ready. Using this method, you can make a garland of letters and words.
First, the letters must be prepared: print on a color printer or draw yourself. Then glue onto the rectangles. The rest of the process is repeated as described above.

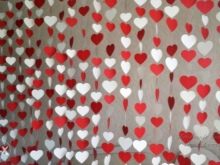
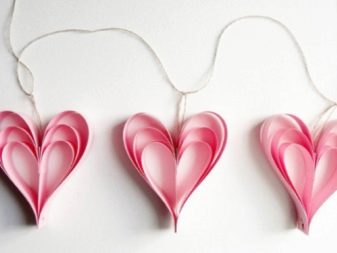
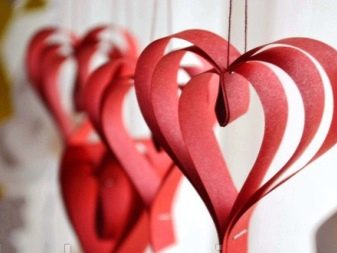
Of hearts
To make this decoration, you need to take colored paper of two colors that go well with each other. You will also need: scissors, a rounded contour object, a strong thread. Sketch the heart on paper by stroking the outline. Fold the resulting figure with an accordion. Then fold the opposite edges to the center. Make the rest of the hearts in the same way. Their number is determined by your desire. There is an easier way to make hearts - just cut them out of paper and fasten them to braid. In the center of the decoration, you need to make two large hearts with the name of the newlyweds.


To create such a decoration you will need:
- stapler;
- paper strips of different lengths - from 5 to 20 centimeters;
- thin twine.
Fold one strip in half. Insert twine inside. On each side of the central strip, attach two elements 20 centimeters long.The edges of the parts must match. Then we apply two more strips 15 and 10 centimeters long.
At the top and bottom of the stack of strips we fasten with a stapler. It turned out to be a heart-pendant.
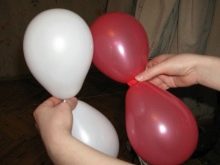
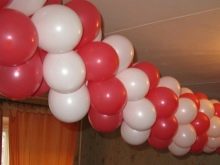
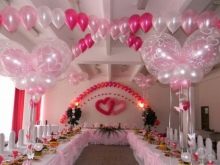
Balloon decor
Inflatable products should be quite dense so that by the middle of the celebration some of them will not deflate or burst. You can use a pump to speed up the inflation process. All balls must be the same size. The use of two close shades, for example, dark blue and light blue, is encouraged.
Balls of the same color must be tied in pairs. It is recommended to fasten them with a fishing line. Tie two pairs of colored balls together so that the colors alternate. Inflate and fasten the rest of the balloons in the same way. Bind each composite element to the base. The length of the garland is adjustable as desired.
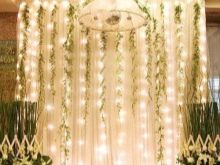
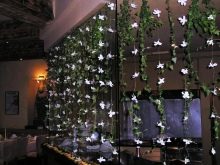
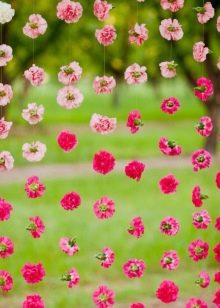
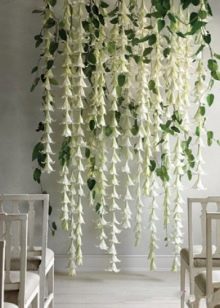
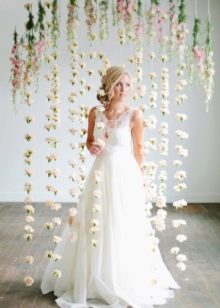
Flower garlands
Such decorations can be made from natural and artificial flowers.
Materials you need:
- flowers (any, but chrysanthemums, asters, daisies and gerberas will look brighter and most harmonious);
- threads or thin lace tape;
- needle;
- scissors.
The stem is trimmed at the base of the bud. With the help of a needle, the flowers are strung on the braid in a pre-planned sequence. If you plan to place the jewelry vertically, each bud must be separated from the neighboring one with a large bead or knot. If you follow this rule, all the flowers will remain in their places and will not represent something crowded.
In addition, it is better to make the decoration in advance and send it to rest overnight in the refrigerator. Then the next day, visually, the flower decoration will be as if the plants had just been cut in a greenhouse.
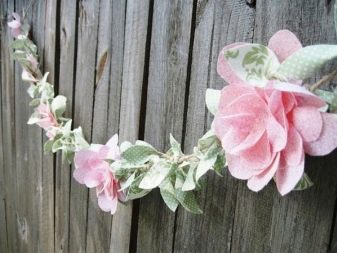
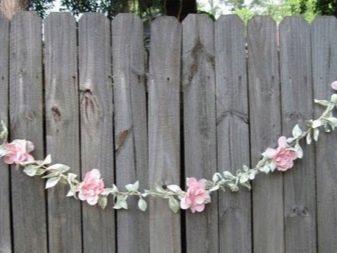
You can make a flower decoration from fabric.
Necessary materials:
- pink and light green fabric;
- felt pink;
- scissors;
- strong twine;
- hot glue.
Small circles are cut out of felt. From pink fabric - drop-shaped petals of different sizes, from green - leaves. Cut the string for the base of the garland. Cut off another piece of material and cut it into small pieces, each of which tie on a long piece. Leaves will be attached to short lengths of string. To do this, wrap the base of the leaf around the thread and fix it with glue. This procedure is repeated with all sheets.
To make a flower, it is necessary to place fabric petals from the edges to the center on a felt mug. Larger details are located at the edges, the closer to the core of the flower, the smaller the petals should be. Fasten the entire structure with hot melt glue. Ready-made floral elements are attached to the garland in any order.
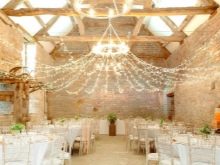
Retro style jewelry
A garland made in this style allows you to create a very romantic atmosphere at a festive celebration. The decoration is based on standard incandescent lamps. Such garlands will look especially original at a wedding in an eco-style or in a loft style. They will illuminate a room or a garden well and will give the whole celebration a special zest.
Materials that will be required to create a retro decoration:
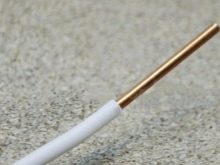
- installation wire PV1 1x0.75 - 40 meters;
- dimmer - 600W;
- drill;
- fork;
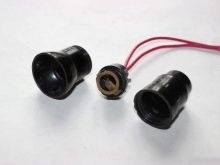
- carbolite cartridges E-14;
- flat and Phillips screwdriver;
- nails - 2 pcs.;
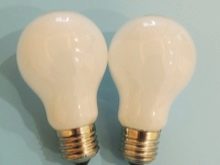
- opaque incandescent bulbs 25W E14 - 15 pieces;
- short blade electric knife;
- pliers, pliers;
- fork;
- soldering iron, soldering acid and tin;
- hot gun with silicone tubes;
- felt-tip pen;
- patch.


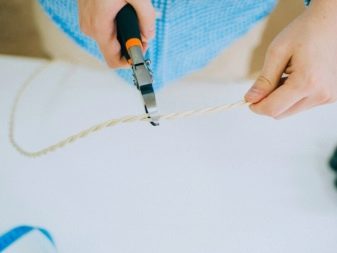
It is necessary to decide what distance will be between adjacent lamps. It is necessary to add another 15 centimeters to this figure, since after all the manipulations on mounting cartridges and twisting wires, the initially taken length will be reduced. Optimally, if there is 65-70 centimeters between the lamps.
Fold the wires in half and secure with adhesive tape. Divide the wire (with a felt-tip pen) into 80 centimeters and add another two centimeters to the connection. Cut the wire sheath with pliers. In the same place, on a two-centimeter segment, remove the insulation with a knife.
Repeat a similar procedure along the length of the entire wire every 80 centimeters.
Cartridges must be inserted. To do this, in the place of the bare wire, make a loop (a nail will help) and connect the wire to the cartridge. Connect to contacts. Remove the screw and leave the nut. It is necessary that the hinge is in the middle of the contact and the nut. Align the screw guide using a nail. Place screw and tighten. Do the same with the second wire, but on the other side. All other cartridges are mounted in a similar way.
The advantage of the parallel mounting method is that if one lamp burns out, the rest will shine. Pull and twist each piece of wire between the cartridges. Using a hot gun, silicone is applied to the wire, which will protect the product from moisture. Then, at the base of each cartridge, a wire is tied with a special knot. This procedure will give the garland a more reliable and prettier look. It remains to install the dimmer and plug. A chic garland for the festive ceremony is ready.


For information on how to make a retro garland, see the next video.


The comment was sent successfully.