How is audio cassette digitized?
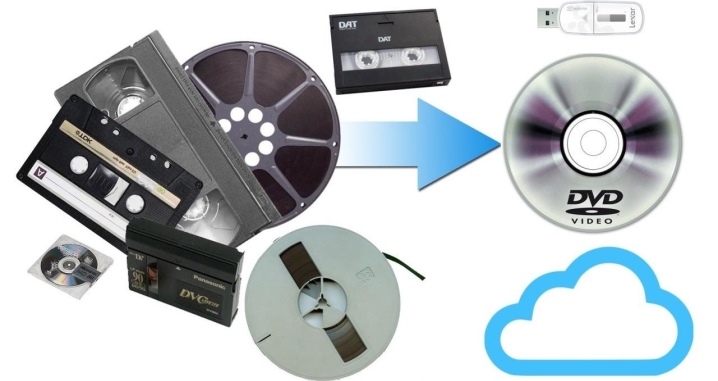
Many Russian families still have audio cassettes with important information. As a rule, sending them to a landfill simply does not raise a hand, but listening on bulky turntables is very inconvenient for most. Moreover, such media are becoming obsolete every year, and after some time it will simply be impossible to use audio that is of value. However, the solution to this problem is quite simple - it's time to digitize all the available data.
What is this process?
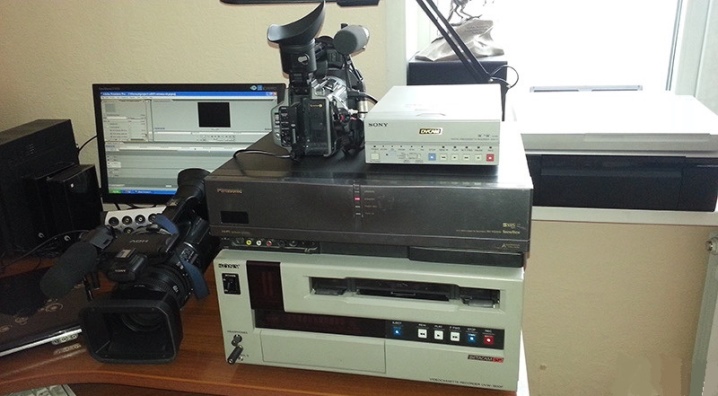
Digitization itself is a translation of an analog signal into digital form and further recording of information on an appropriate medium. Today it is customary to digitize the “old stocks” of both audio and video cassettes. Despite the fact that this process is easiest to entrust to a specialist, many people prefer to carry out the procedure on their own at home.
The quality of data saved digitally cannot be degraded in any way, even with continuous copying. As a result, the storage period and safety of information are practically unlimited.
Digitization is carried out on various equipment, the choice of which is largely reflected in the quality. In principle, during the process, you can even significantly improve the quality by using signal filters and stabilizers. Many people are worried about whether to choose their own home digitization or go to the professionals.
The required result will be obtained in either case, therefore, it is quite possible to rewrite home archives with your own hands, but at the same time pay enough attention to subsequent editing.
Technique and programs
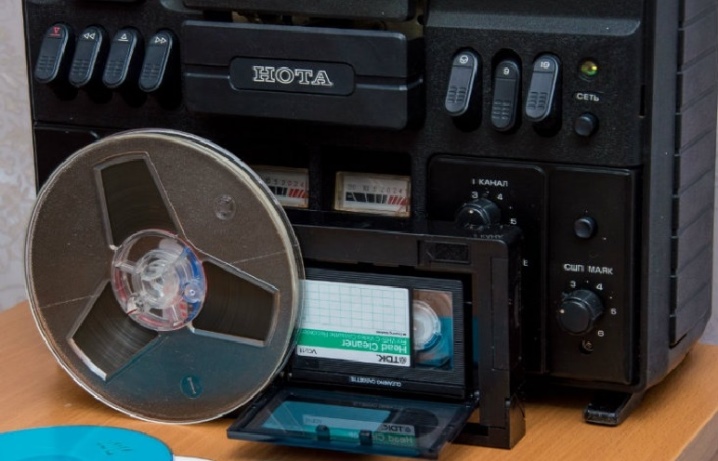
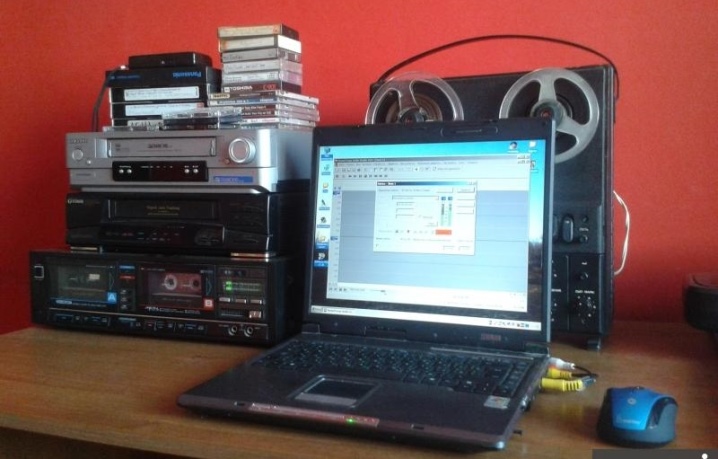
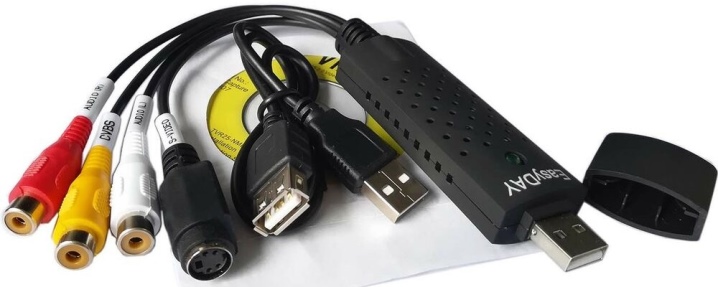
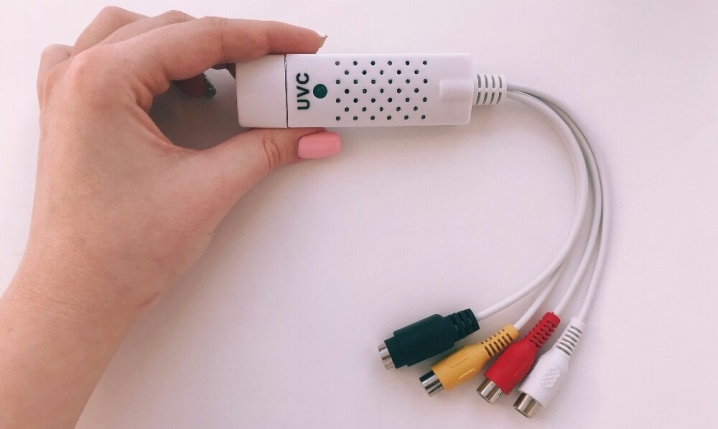
There are several ways to digitize audio tapes, and you don't even need any serious equipment. The easiest way to do this is through a laptop, in addition to which you will need a cassette recorder itself and a special cable that can connect the two devices. In addition, you must first install a special program, just the same designed for digitizing audio cassettes. In this case, a cassette player can also become an alternative to a cassette tape recorder. The year of production is practically unimportant, but, of course, the device must be in working order, performing all functions.
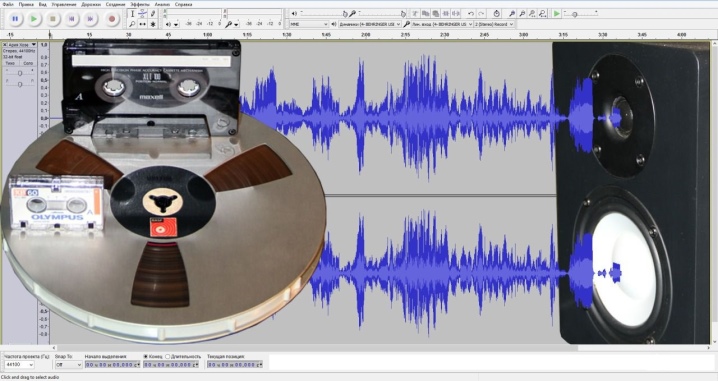
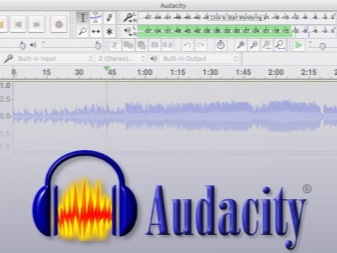
Of course, it is better to download the tested programs, but purchasing an expensive version is not at all necessary - a large number of free versions are easily found on the worldwide network. The most popular is the free Audacity program, which not only allows you to transfer audio to digital format, but also edit the recording. Audacity is easy to use, plus it works for both Windows and Linux. The result is a recording in wave format, which will then have to be converted to mp3 format using a converter.
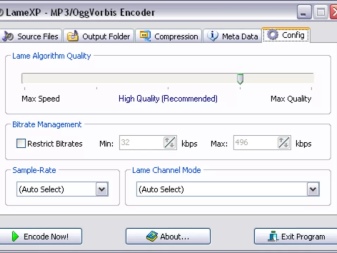
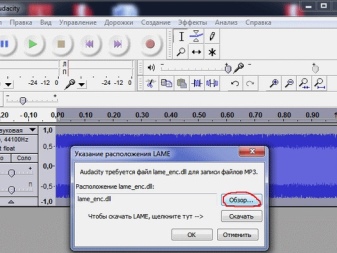
It's even easier to get the format you want by downloading the Lame MP3 Encoder library and downloading it after installing Audacity.
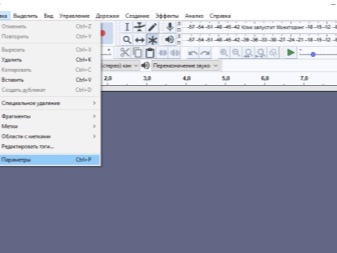
When both programs are installed, it will be necessary to adjust some parameters. First of all, in the Audacity Edit menu, select Device Settings and note that there are two channels in the Recording subsection. Then the menu item "Libraries" is found and the presence of Lame MP3 Encoder is checked.If it is absent, then you will need to click the "Find Library" button, and then independently find the folder on your hard disk containing the lame_enc file. dll.
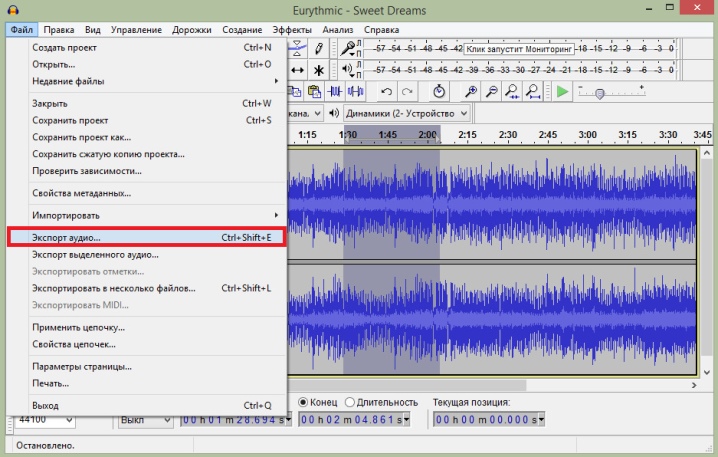
To export a finished digital recording in this program to mp3 format, you will need to perform the following sequence of actions: "File" - "Export" - export direction - "File type" - mp3. In the "Parameters" you will need to set the bitrate equal to 128Kbps for audiobooks, as well as 256Kbps for music pieces.
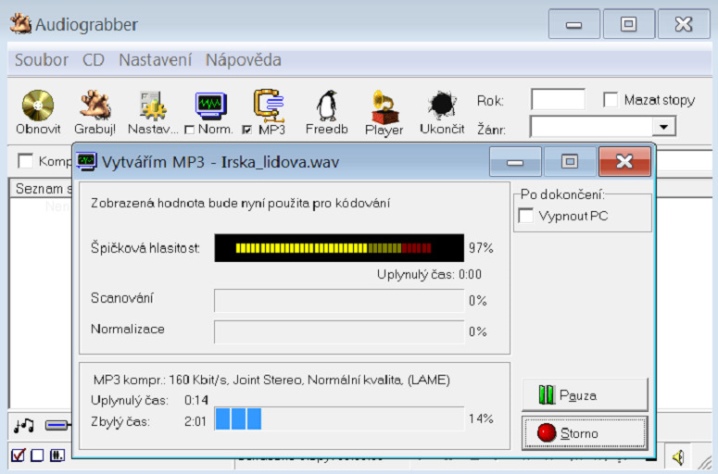
Another good program for digitizing cassettes is Audiograbber. Its advantage, compared to Audacity, is the ability to save the resulting sound recording in any format. You can also purchase Audition v1.5 or Adobe Audition v3.0.
In approximately the same way, information is recorded from an audio cassette to disk. By the way, instead of a laptop, you can use a stationary computer equipped with a sound card. To connect the device to a music center or any unit that plays music, you need a properly selected adapter. To select this part correctly, you should examine the rear wall of the musical device, covered with sockets. To work, you will need those next to which Line out or just Out is indicated.
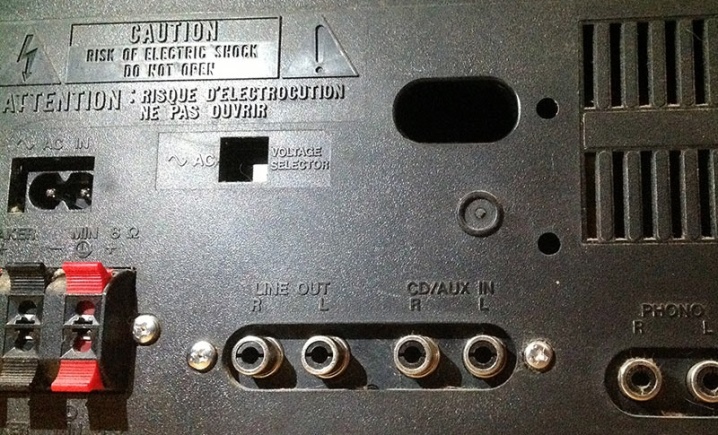
Most likely, the jacks will be RCA-type, which means you need an adapter with the same connector. On the other hand, the cord should have a special Jack 1/8 connector, which connects to the internal sound card.
In the event that a sound card of a different type is used, a different connector will be required.
A practical guide
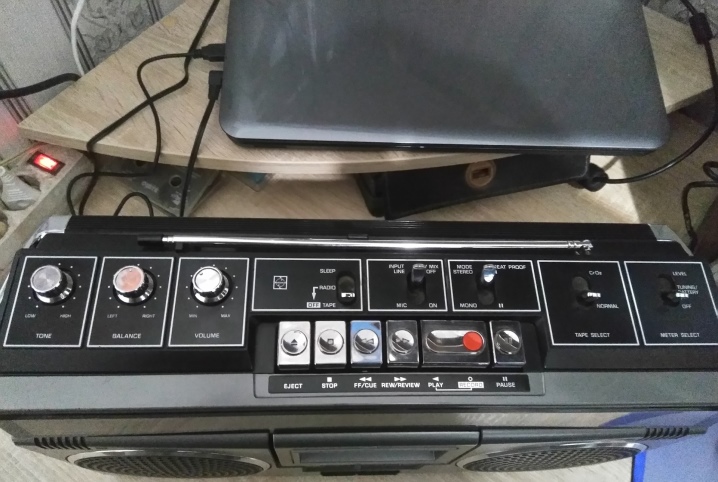
To transfer information from an audio cassette to a computer, you need to follow a fairly simple scheme. First of all, a cassette recorder or player is connected to a computer or laptop. How to choose a wire with the appropriate plugs has already been described above, and you can buy it at any electronic goods store.
One part of the cord is inserted into a special socket on the back of the player or the headphone jack, while the other is usually inserted into the blue line-in jack located on the back of the system unit. When a professional tape recorder is used, then the output to the speakers should be sought. Since the laptop does not have a line-in jack, the microphone jack has to be used. In this case, the device will prepare itself for the recording mode.
At the next stage, it is necessary to deal with direct digitization. To do this, you must simultaneously turn on the music center and activate the required program on your computer or laptop. In most cases, it is enough to simply start recording in the program, after which all the audio will be saved on the hard disk.
Using the same program, the resulting audio is edited, for example, by setting the correct sound parameters, and then it can be converted into a convenient format for use. You can simply save the result to your hard disk, or you can also burn it to a USB flash drive or CD.
It should be mentioned that the entire cassette being played will be recorded in digital format as a single file. To divide it into separate songs, you will need to use the appropriate program that allows you to split the music track into separate tracks and save them in the required format. Despite the apparent complexity, the process of isolating individual songs is fast. - the endings of the musical compositions are perfectly visible on the music track.
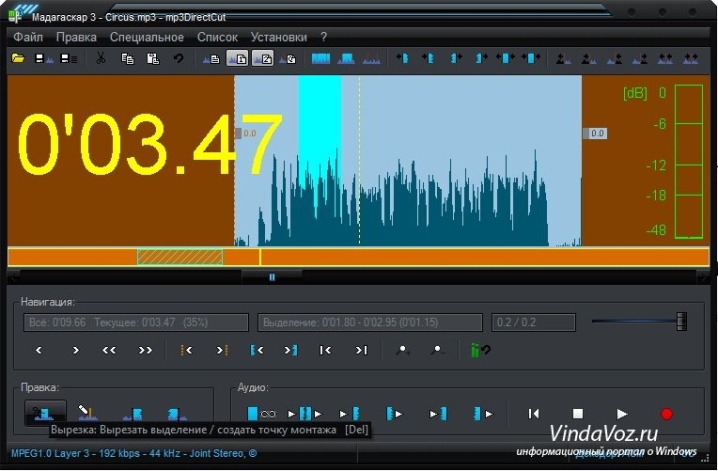
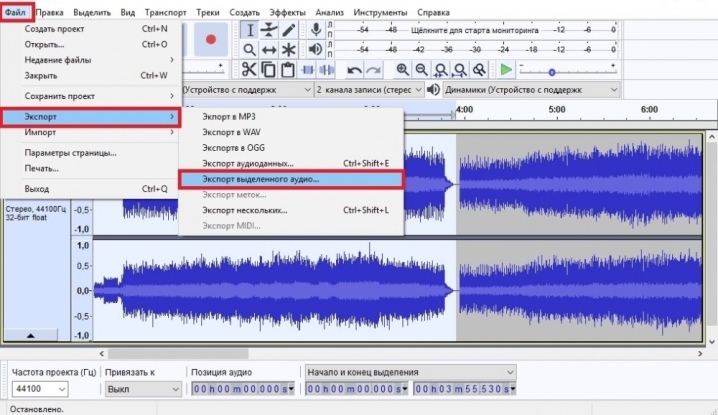
It's even easier to operate in Audacity. In order to separate a part of the general record, you need to select the required fragment by clicking the right mouse button. Next, the user goes to the "File" menu and selects the "Export selection" item.
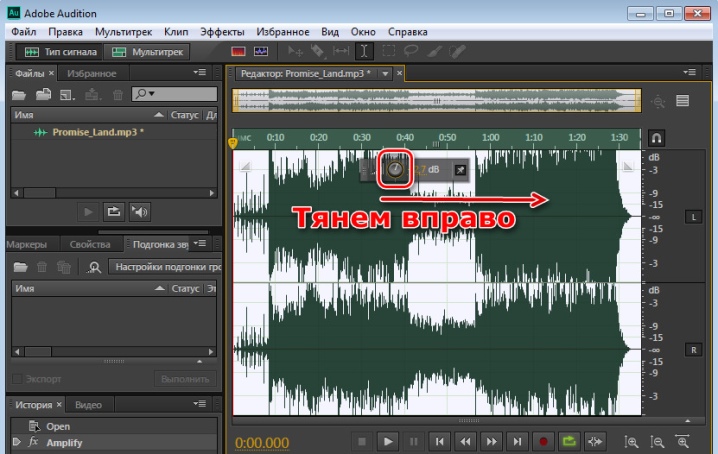
The finished digital recording must be "put in order". For example, When working in Adobe Audition, you will notice that the volume levels of the left and right channel signals are different. Experts recommend in this case to normalize the loudness of first one channel in terms of loudness by 100%, and then the other.
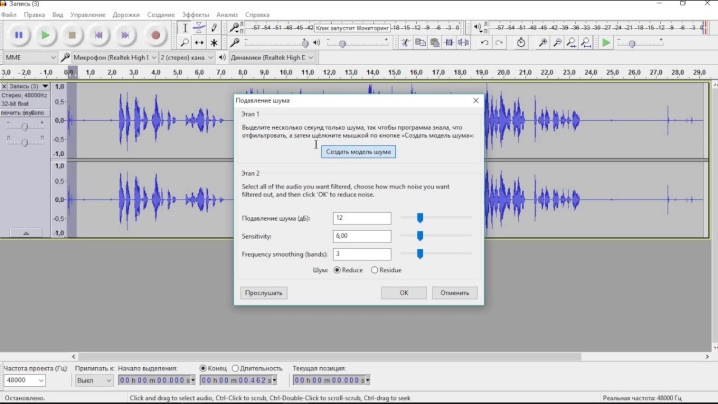
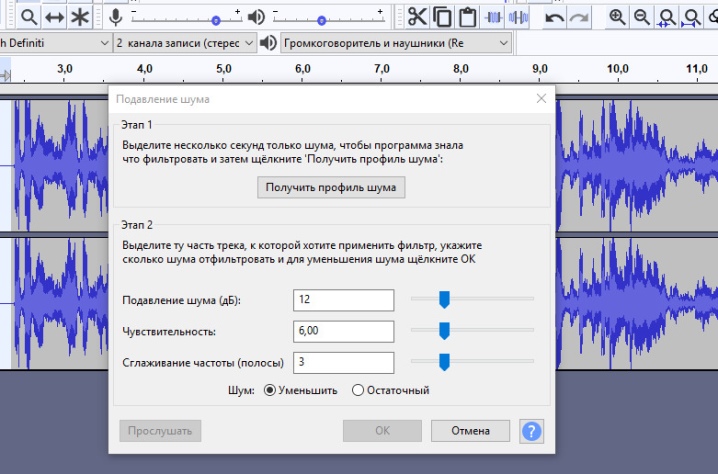
No less important is getting rid of phase distortions of the signal arising from the magnetization reversal of the magnetic head. Finally, the resulting digital recording should be cleaned of noise.
This procedure, unlike the previous ones, is practically mandatory.
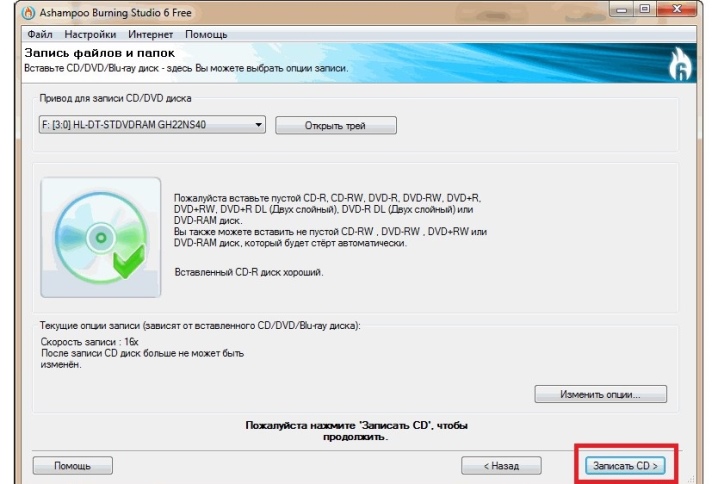
If the finished file is to be written to a CD, then it should be converted into a special format by changing the sampling or sampling frequency from 48000 to 44100 Hz. Next, the CD-matrix is installed into the corresponding drive, and in the window that appears, the required file is dragged into the project window. By clicking on the Write CD button, you will only have to wait for the completion of the work. In the case when the recording is left to be stored on the hard disk, you can limit yourself to the usual mp3.
You can get acquainted with the procedure for digitizing audio cassettes at home in the following video.


The comment was sent successfully.