How to make a bathroom in a wooden house with your own hands?
Making a bathroom in a house is not an easy task, especially if the house is wooden. We have to solve problems that are not faced by those who equip houses from bricks or blocks.
Peculiarities
Difficulties are associated with the fact that the construction of a bathroom is not just the installation of plumbing, but also the creation of "infrastructure" (water supply, sewerage, protected electrical wiring with a water heater and ventilation). Considering that communications are installed in a wooden building, you should approach the matter with special care.
A bathroom in the log house has replaced the amenities in the yard. Accustomed to doing everything themselves, the owners of wooden houses, when starting to build a bathroom, should familiarize themselves with the rules and sequence of operations. You also need to acquire the necessary tools and materials so that you do not have to disassemble and redo the structure later.
The arrangement of a bathroom in a log house requires skills in different areas. The construction itself in a house from a bar consists of a number of stages and differs in some features.
One of them is shrinkage. To solve this problem, dampers are used. It is recommended to build a sliding frame in the house.
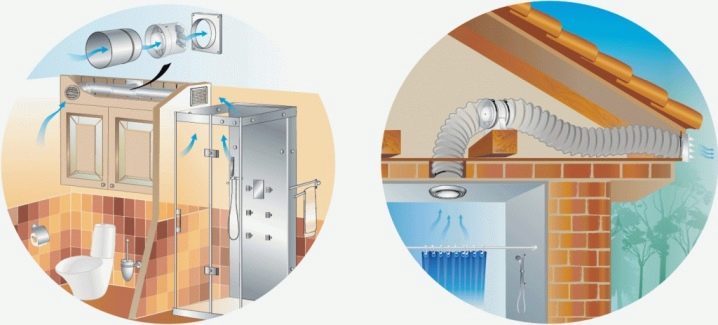
The next important feature is hygroscopicity and the risk of fungus due to high humidity. It is almost impossible to bring it out on a tree, so it is necessary to prevent its appearance. To do this, at a certain stage, an antiseptic treatment of the room is carried out, in which a bathroom is arranged, and ventilation is also installed. Simple ventilation can be done by making a hole in the ceiling. By installing a forced draft, ventilation efficiency can be increased.

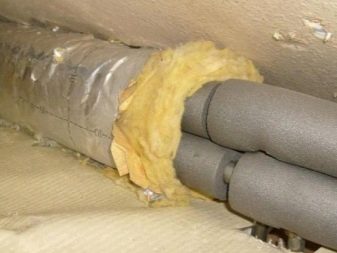
Another feature is the need to protect pipes from freezing. Both traditional pipe insulation materials and modern heating cables can be used. The pipes are equipped with a tap for draining water.
Layout
The placement of a bathroom in the country can be very diverse. If this is a two-story house, then a shower and a bathroom can be placed under the stairs in the attic. Sometimes an extension of about 5 square meters is used for these purposes. m.
The location of the bathroom in the house relative to the points of connection to the water supply and sewerage system is important. It is necessary that at least one of the walls is outside (for the installation of ventilation equipment).
The bathroom should be removed as far as possible from the dining room and kitchen. It is most convenient if it will be located next to the dressing room or bedroom. It's not bad if it is located not above the living rooms, but above the kitchen. The entrance to the toilet should not be in the living room.
If the bathroom is combined, its area should be at least 3.8 m2. Separate - 3.2 m2 bathroom and 1.5 m2 toilet. If desired, you can make the room larger. The layout should take into account the communication scheme, unhindered access to them for control or repair.
To make the plumbing convenient to use, you need to place it so that there is enough space in front of the devices. When placing a shower, bath, it is important to leave a distance of 70 cm to the opposite wall. Passages - at least 60 cm. Devices should not be located closer to each other by more than 25 cm.


To build a bathroom, you need to draw up an entire project, since its specifics and the laying of communications affect the whole house.If a sink and a toilet are placed in the room, this is a toilet, it takes up a smaller area, requires less cost and effort. Installation of a shower cabin, bath, water heater and installation of communications will cost much more, take up more space, but provide a different level of comfort.
If the house has more than one floor, bathrooms are arranged at each. It is advisable to arrange them one above the other (it will reduce the cost of laying communications). The room should have a door that opens outward. If the area does not allow you to put a Euro bath, you can try to place a domestic one (shorter by 10 cm) or a corner one. Instead of the latter, you can install a shower stall.
Communications
Their installation must begin with the summing up of the sewage system. To avoid displacement (and, as a consequence, pipe breakage), damping devices must be installed in the communication system due to shrinkage. It is possible to set expansion clearances when installing the system.
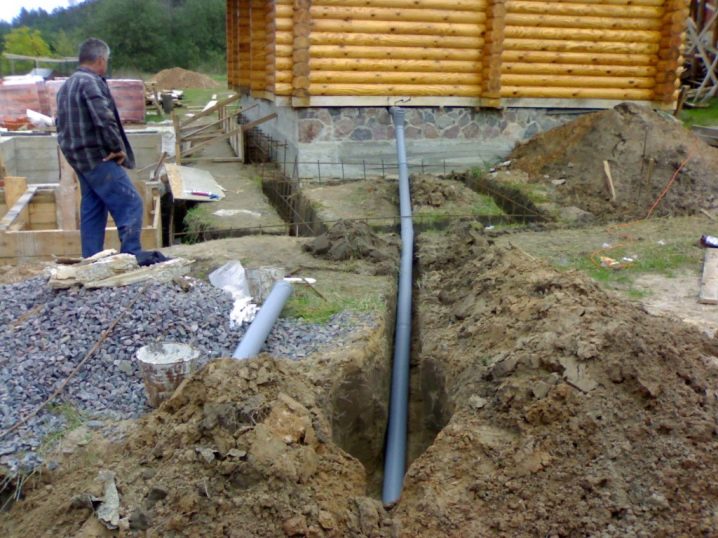
The supply pipes must be located on a solid base and be securely fixed. Sewerage outlet - through the gutter in the foundation. It cannot be attached to the wall. If you need to remove the sewer pipe from the second or higher floor, you should use elastic suspensions to exclude the possibility of depressurization.

Leaks in a wooden house are unacceptable. Therefore, the floor is arranged a few centimeters lower than in living rooms. The sewage system is installed from plastic pipes. They are easy to install, they can be quickly repaired and cleaned.
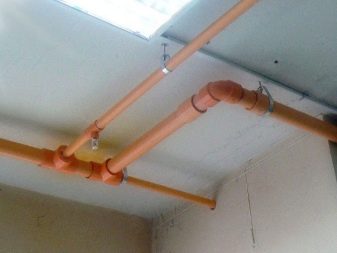
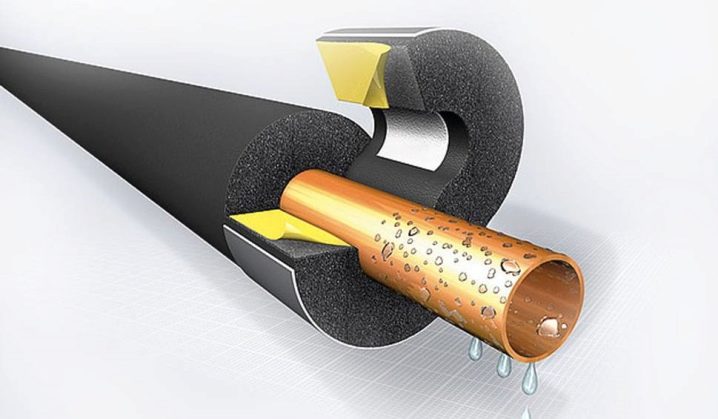
When installing a water supply system in a wooden house, it must be remembered that condensation will accumulate on the cold water pipe. If it does not matter inside the bathroom, finished with moisture-resistant materials, then moisture will accumulate at the points of entry of pipes into wooden walls or the floor. Therefore, it is necessary to wrap the pipes in these places with heat-insulating materials.
Having a bathroom with at least one outer wall, you can equip it with the simplest ventilation system, but in order to achieve maximum efficiency, a complete air ventilation system should be installed.
At the same time, certain rules must be observed:
- all elements of the system (fan and pipes) must be made of non-combustible materials;
- the design of the ventilation system must be protected from deformation due to shrinkage;
- ventilation elements should not come into contact with wood, for this it is necessary to fasten them with special brackets during installation;
- ventilation equipment is best placed in the attic.

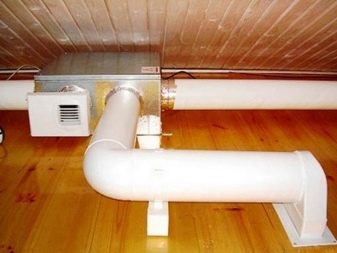
The ventilation system must have "iron" fire safety. A specialized fan should be installed for the bathroom. In order to prevent the inflow of air in the event of a fire, fire dampers should be integrated into the system. The wiring must be hidden in a corrugated metal tube.
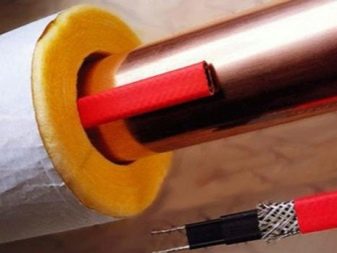
It is better to use heating cables to protect the pipes from freezing. They are equipped with automatic regulators and maintain the set temperature, are invulnerable to corrosion. They can also be used for underfloor heating.
Materials and tools
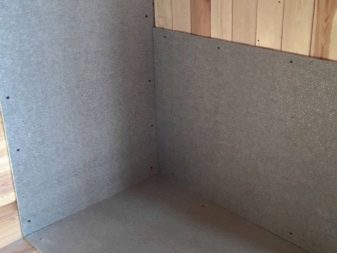
For covering the bathroom, you can use both drywall and DSP boards. They are less vulnerable to moisture and are suitable for walls, floors, ceilings.
Doors will do any suitable size. Usually they use panel boards covered with plastic or veneer. It is important that the coating protects them from changes in temperature and humidity levels. The ends of the door leaf below and above must also be protected from moisture. Glass (matte) doors with metal or wooden frames and seals are suitable.
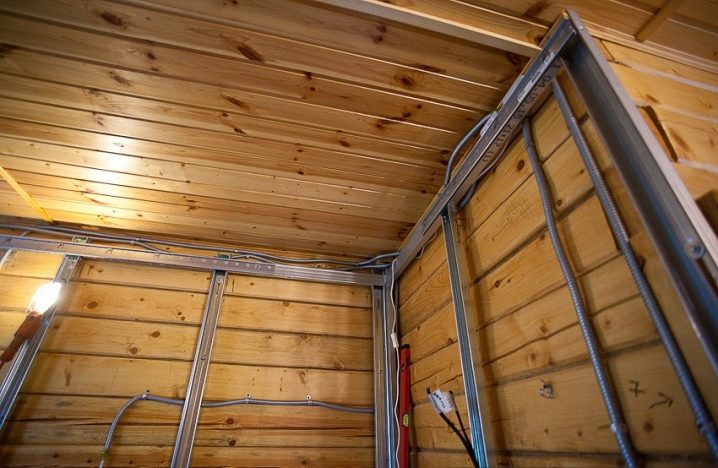
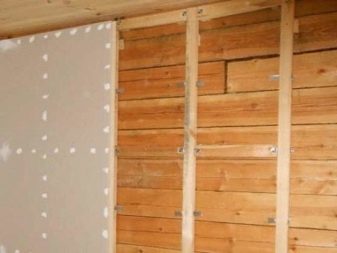
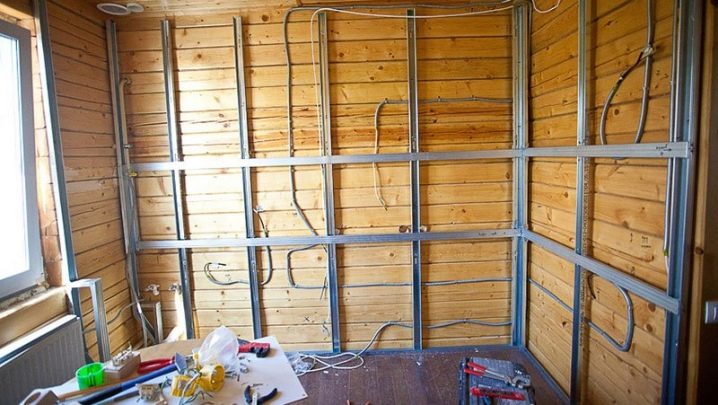
Cladding frames are made of galvanized metal profiles. They are easy to use: the frameworks of them are quickly erected, they allow you to hide communications, install installations. The result is perfect surfaces to suit any finish.The space of the partition between the sheet materials is filled with sound-absorbing materials. At the same time, sound insulation is higher than that of a brick wall. On such a wall, you can install a cabinet, a mirror. But to install the water heater, you need to mount additional metal holders in the wall.
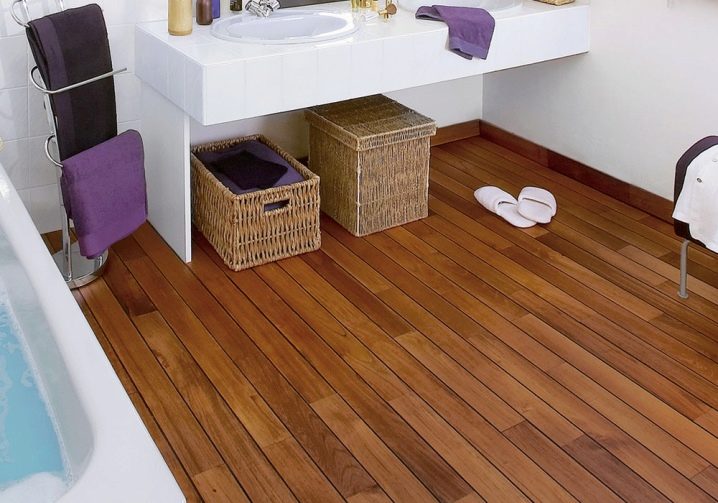
For the floor, laminate is suitable, which has good reviews.
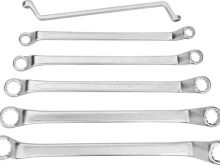
To perform all work with proper quality, you need to acquire a set of necessary tools: circular saw; hacksaw for metal; wrenches and wrenches; stick with dies; vice; plunger pumping; calipers; flat-blade screwdrivers. You will also need a pipe bender, a clamp, locksmith tools and several accessories.


Connecting pipes with a thread is better than welding, since this method allows for dismantling if necessary. A vise and a knob with dies will help to cut the thread.
For assembly and disassembly of pipe connections, wrenches 14x22, 19x22, 17x19 and heads for the union are required. Adjustable wrenches and pipe wrenches are required.


The working process
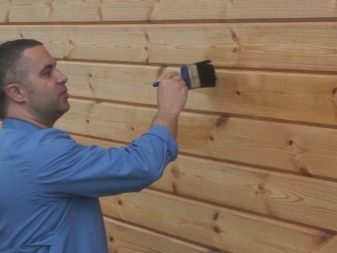
Before starting the arrangement of the bathroom, you need to study the step-by-step instructions. The installation of a bathroom should start with waterproofing. It is necessary to pre-soak the tree with an antiseptic. All surfaces from the inside are treated with a water-repellent compound.
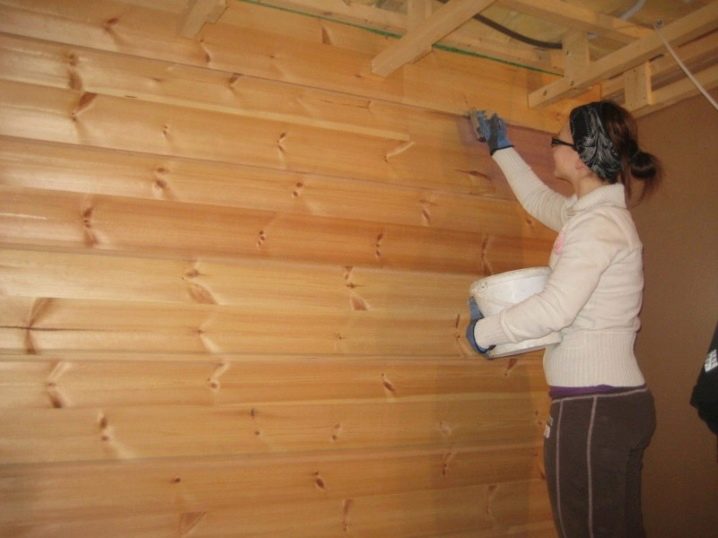
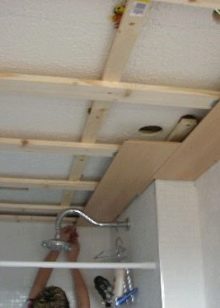
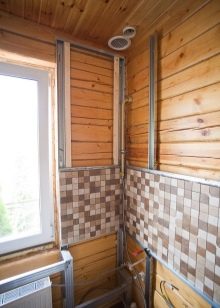
Then the metal frame is installed. It is covered with a moisture resistant material. The connection points are also processed. The brand of the composition and the method of application are selected depending on the type of surface.
Roofing material is not the best choice for indoor waterproofing (high cost, non-environmental friendliness). Better to use a water-repellent mixture. Thanks to it, the surface is covered with a moisture-impermeable membrane.
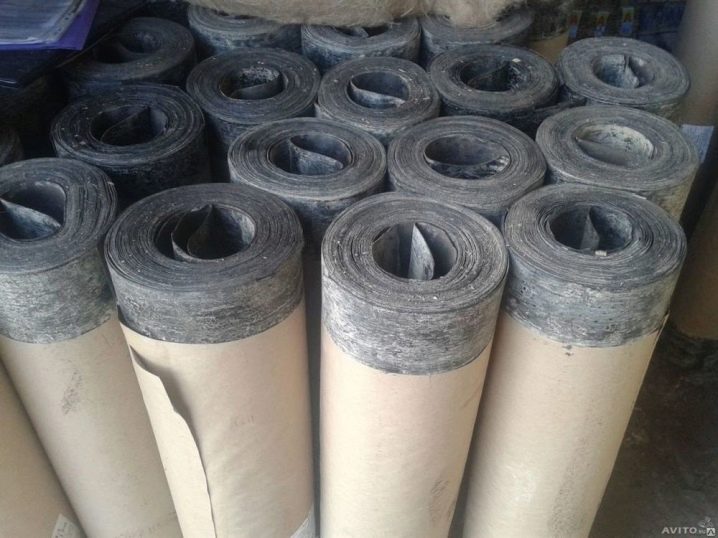
Roll materials can be used. Adhered to the surface, they protect it from moisture.
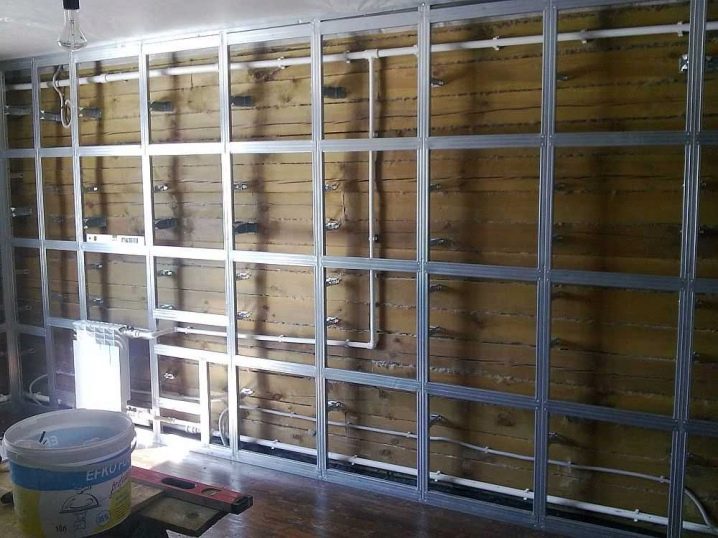
The floor and ceiling are the most vulnerable to moisture. You can additionally protect the areas exposed to it with ceramic tiles. It is glued to a leveled surface. A suspended ceiling will allow you to hide ventilation ducts and install lamps. The walls are sheathed with waterproof plasterboard, it is fastened with self-tapping screws to a frame made of a metal profile. The frame is made of "box" profiles (two connected U-shaped profiles). Pre-drilled holes in the plates for the installation of electrical wiring. You can lay out ceramic tiles for finishing. Sliding frame - shrinkage compensating structure. They make it according to the markings on the walls from a metal profile.
The gypsum fiber sheets are cut. They break easily along the cut line. Metal guides are cut with a grinder or special scissors. The installation of the frame is carried out using self-tapping screws. The inner space is clogged with stone wool. After sheathing with sheets, the seams are putty.
Finishing
Wood is exposed to temperature and humidity in a private log home, and finishing materials are another protective barrier.
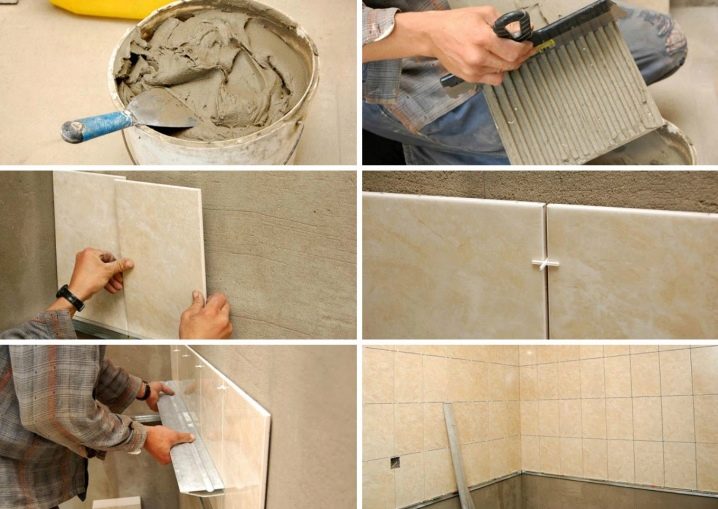
The optimal material for finishing a bathroom in a wooden house is ceramic tiles, panels. It should be laid on the surface of moisture-resistant gypsum fiber, pre-treated with the "Betonokontakt" compound. The tiles begin to be laid from the bottom, moving upward. First, level the floor using a building level. Having finished laying the tiles, they begin to join the joints. This is done with a special solution, rubbing it into the seams between the tiles with a rubber spatula. This solution hardens quickly, so you need to work quickly and treat small areas at a time. Excess mortar can be easily removed with a soft cloth.
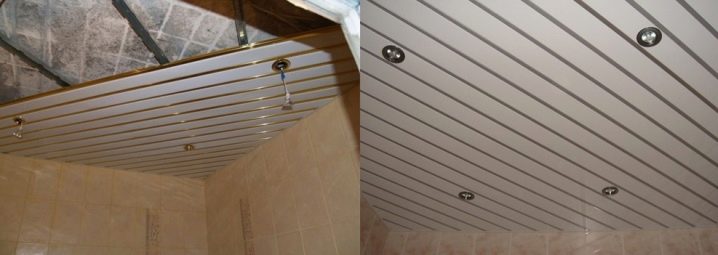
It is better to make the ceiling suspended. For this, a frame is mounted from a metal profile. To make the line of the junction of the wall and ceiling look good, a polystyrene foam plinth (ceiling) is installed around the perimeter. It is glued with assembly glue.For a perfect installation of the skirting board, you need to cut out the corners with a miter box.
For decoration, lining is also used, paint it.
Another option to quickly and inexpensively sheathe the inside of the bathroom is plastic panels. Attach them correctly to the lathing or liquid nails.
This will require: a drill; screwdriver; drill; hacksaw; construction level.
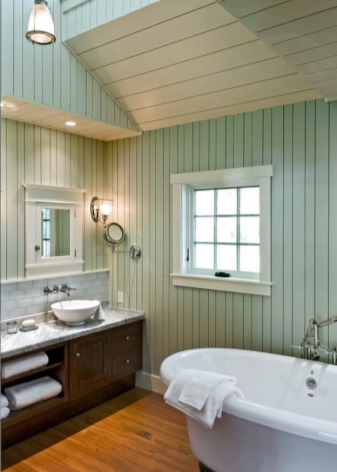
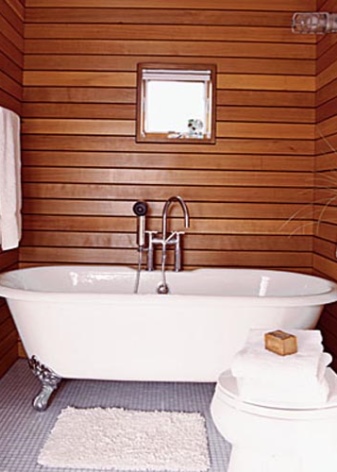
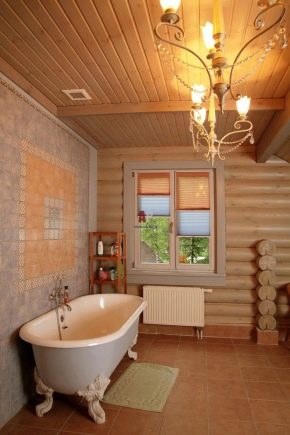
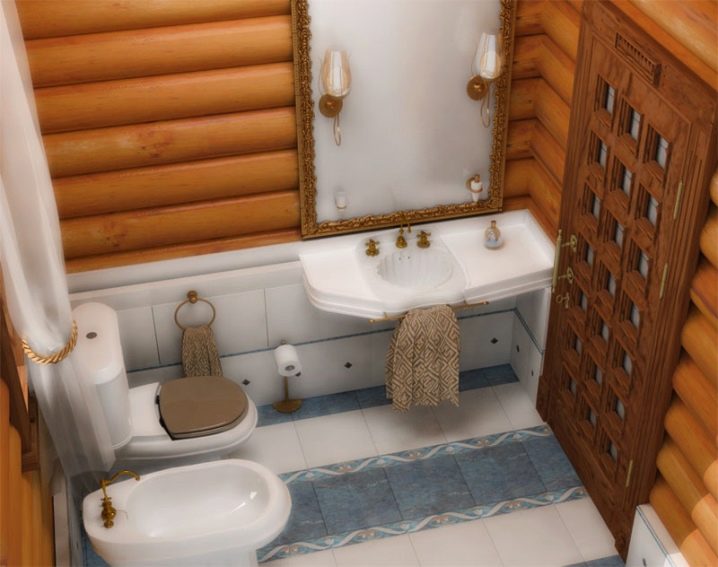
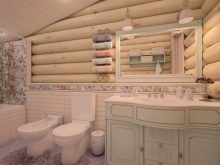
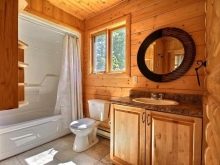
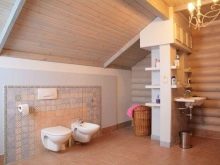
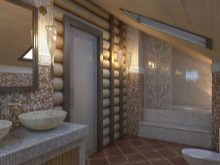
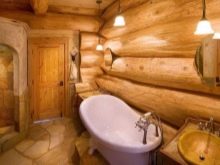
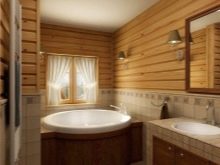
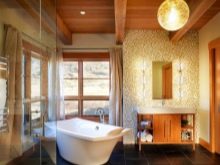
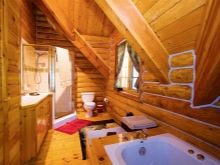
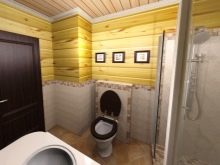
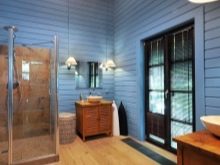
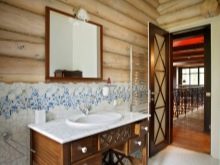
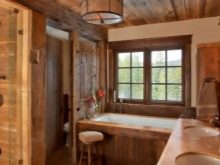
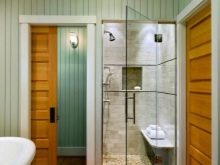
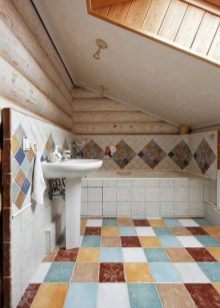
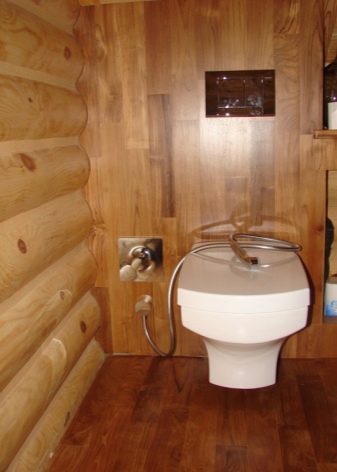
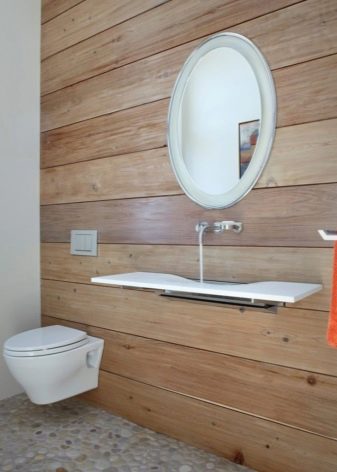
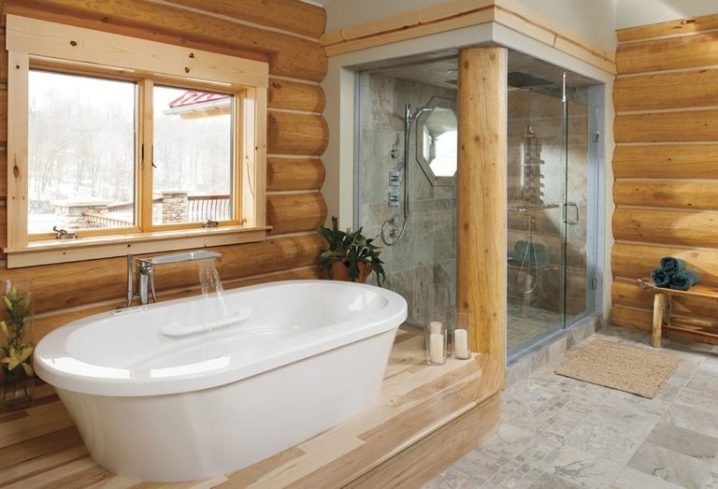
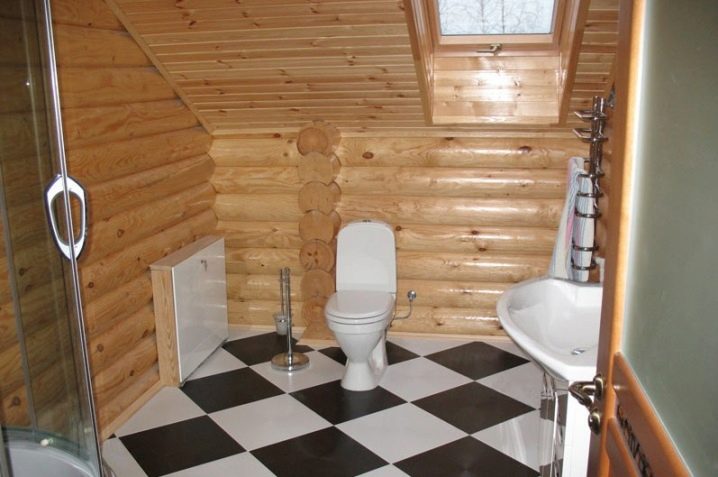
Examples of finished interiors
You can install your own toilet installation and choose the appropriate bathroom style.
If space permits, you can install both a bathtub and a shower stall.
Inexpensive and functional.
In the next video, you will see how to make a modern bathroom and toilet in a wooden house with your own hands.


The comment was sent successfully.