All about the huts in the forest
Fans of outdoor activities need to take into account the rules for building a hut. Sometimes such a self-contained shelter can be an excellent defense against adverse weather. For example, if a person, making a route, realizes that rain is coming, he needs to take cover. Building a hut does not require special skills - in the article we will consider options for its creation.
Features of the hut
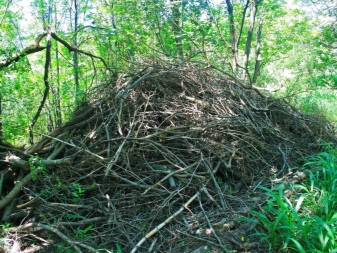
A hut is a shelter that protects from adverse weather conditions. Usually it is built in the event that you do not have a tent with you and you need to hide in the forest. Sometimes a shelter is built to decorate the site - a small cozy house looks very attractive and resembles a wigwam. Since the structure is built from branches, you will have to find the right amount of them.
When building a shelter, weather conditions are taken into account. They also choose smooth glades, where there are trees and densely spaced shrubs, rocky slopes.
It is important to remember that a shelter cannot be built near a lake, about which nothing is known, since the water level can change and flood the hut. For the construction, as a rule, heights are chosen. Lowlands are not suitable.
Species overview
It is advisable to choose the type of hut depending on the requirements. For example, a winter hut is significantly different from a summer one. Forest huts are easy to make if you follow the rules.
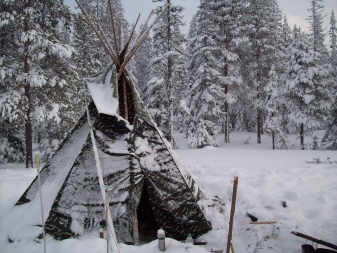
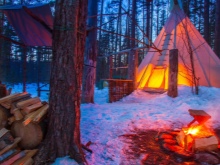
Winter
In winter, an overnight shelter must have thermal insulation properties, so efforts must be made to keep it warm. Construction must begin in the morning, as it gets dark early in winter. The easiest thing to do is to find a snowdrift and dig a depression (cave) in it to fit your parameters. The winter hut is made small, because the shelter will quickly get cold. If a strong wind blows, the entrance is covered with snow from the inside, leaving a couple of holes for air circulation.
It is important! You cannot spend the night on bare snow. It is necessary to make a polyethylene bedding or use spruce branches. So during the night, clothes will not get damp and will remain warm.

Summer
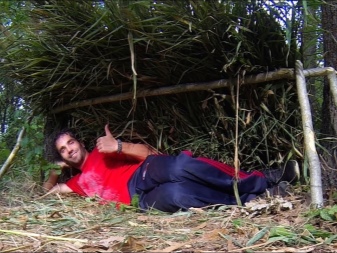
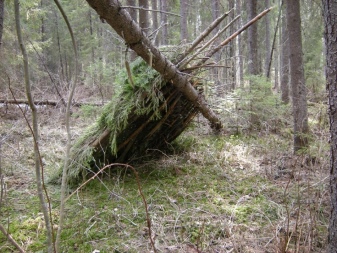
For summer time, a lean-to hut is ideal. This is a canopy that protects a person from the sun's rays. It should be noted that such a shelter is suitable only for the warm season, since one side is completely absent in it. Such a structure is suitable for short-term rest. A gable hut differs from a gable hut in that it is more convenient and suitable for a long rest. It can be used as an overnight stay or you can place things in it for storage.

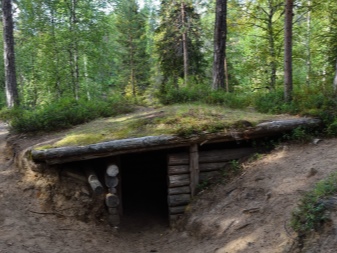
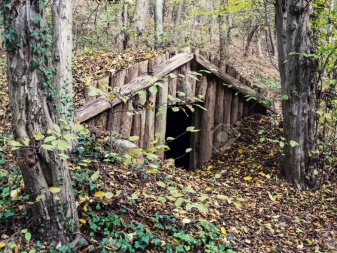
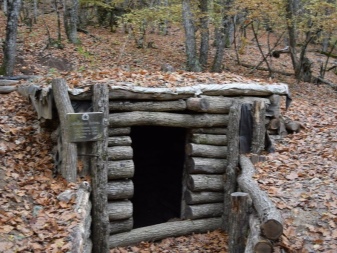
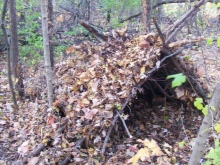
Hidden
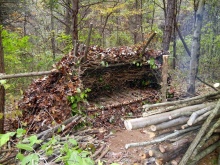
The temporary shelter looks more like a dugout - a hole is dug in the ground for its construction. In summer it is convenient to do this with a shovel, in winter it is harder, since the ground is harder. Inside the recess, a bed is made of spruce branches, and a “roof” of brushwood and thin poles is installed on top. This type of hut is considered hidden - it is invisible, because the top will be covered with a "roof".
Note! Going on a long journey through the forest, you need to take the necessary things with you: waterproof cloth, polyethylene, twine, fuel for a fire. They do not take up much space, but they can be very helpful.
Child
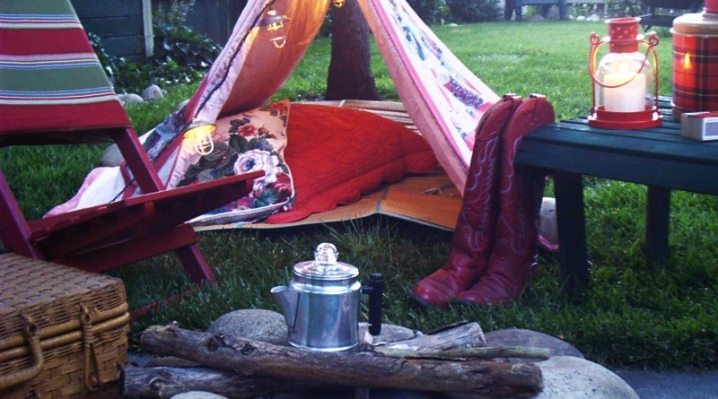
Children love to play and hide in huts. Often they build a house from available tools: boxes, blankets. A simple shelter for a child can be made at a summer cottage or suburban area. To do this, you can tie a rope to wooden posts and pull it, and hang the fabric across the rope. The corners are tied to hooks. Also, a hut can be built from ordinary branches in a conical shape.
Tools and materials
You can build a tent from available tools: cling film, branches. It is important not to forget about some sharp object that will easily cut branches from trees. A camping hatchet or large knife is fine for this. A cozy shelter is built from a variety of materials, it all depends on the source area.
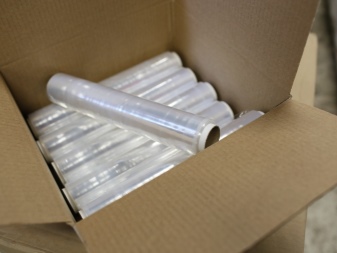
Often, branches, straw, spruce branches, sticks, leaves are taken for the construction. Having grabbed a large roll of stretch film (in case of rain), you also need to take care of the presence of a thin rope - with its help the structure is fastened.
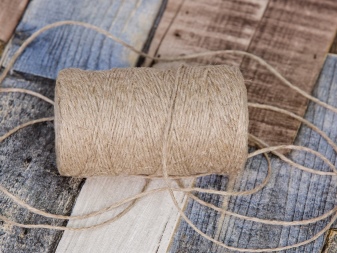
A strong twine is also useful for tying felled branches. Such a set of materials and tools will help you build a shelter in which you can spend the night and shelter from the rain.
How to build a hut with your own hands
It is not difficult to build a homemade hut and you don't even need to have blueprints with you. Only one thing is important: remember or save the instructions. Construction is faster if you familiarize yourself with all the nuances in advance. It is worth noting that shelters built in the winter in a forest or other area are different from those built in the warm season. If it's winter outside, you should definitely take a bedding in the form of polyethylene or spruce branches with you.
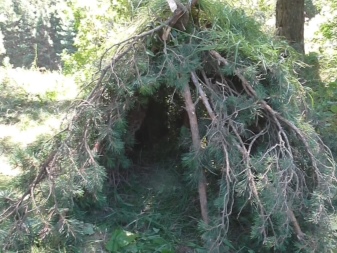
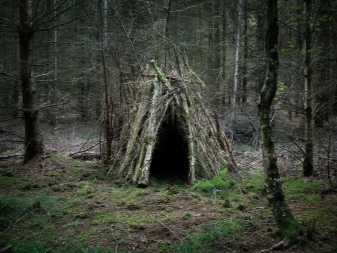
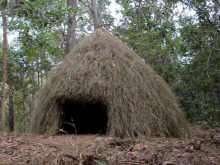
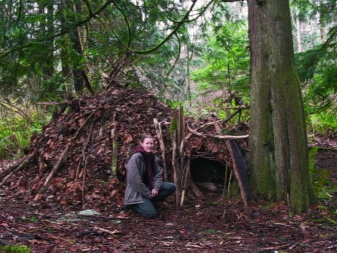
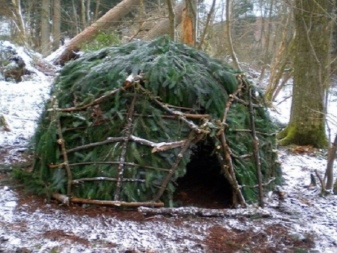
From the branches
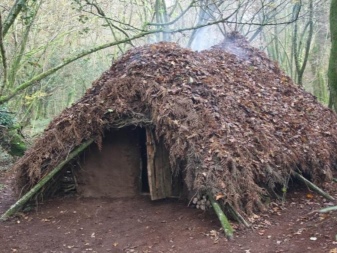
Today, many enthusiasts go to nature to enjoy the silence and touch the beauty. Vacationers often take their children with them. Children can make a hut in the same way as adults. They will love the idea of a secret hideout. For the structure, you will need branches and a support in the form of a tree (you can do without it). If you add a hole on top, you can light a fire inside the building.
This design is distinguished by high comfort: it retains heat and does not allow precipitation to get inside. The first step is to correctly model the circle. We drive in large sticks in the formed shape so that "on the roof" they all touch each other. Add small branches horizontally - this will make the shelter more stable. You can add moss, leaves or twigs.
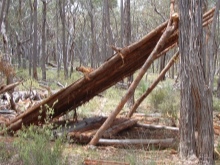
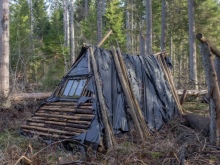
Single slope
This type of hut is one of the simplest.
A canopy can protect you from the scorching sun, but will not protect you from gusts of wind or rain.

It is usually built quickly in favorable weather.
- First of all, we find a pole or a long branch (for the base of the building).
- Find 2 trees in a pine or other forest and place it between them. On one side, we lay branches at an appropriate angle: 60 degrees to the ground.
- We tie the joints with plant stems or a rope. We lay the rods across the branches in such a way that a mesh is formed.
- Now we place some material on the formed surface: moss, fabric, cling film or hay.
- It is also important to take care of the sides of the structure - we also cover them. For the flooring, we use spruce branches or straw (any suitable material).
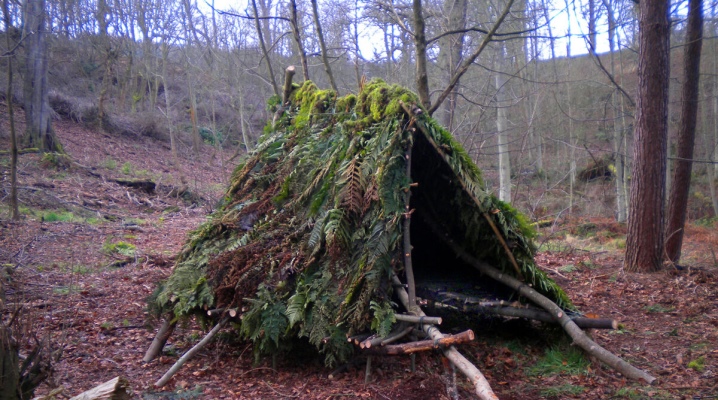
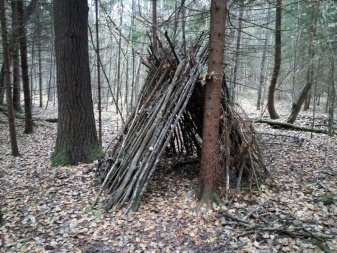
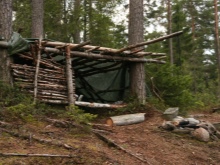
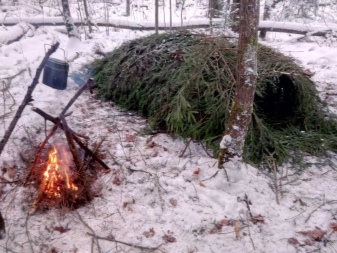
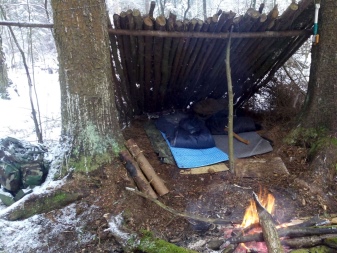
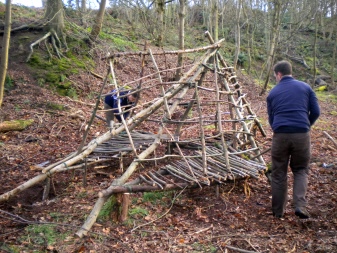
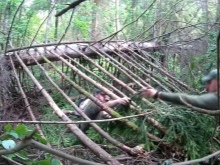
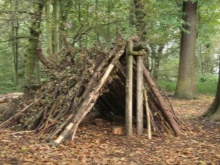
Gable
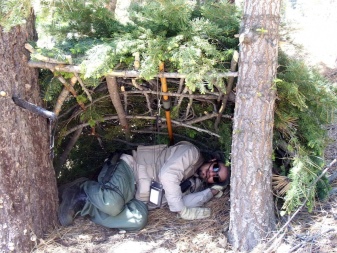
Unlike a gable shelter, a gable shelter is suitable for spending the night. Protects from strong winds and even hail. It is built in various ways, it can be a canopy on supports: one or two. It takes longer to make a gable shelter, but it is more reliable. You can use nearby trees or sticks as supports.
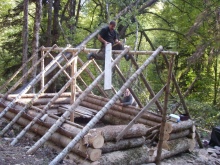
- We put two supports on the ground (preferably sticks with a spear at the ends) and put a stick between them. We make ramps (it is important to observe an angle of 60 degrees).
- It is best to use trees instead of supports for the construction - such a shelter will be more reliable and will save you from the stage of preparing supports. In this case, we lay a horizontal stick between them and set the slopes.
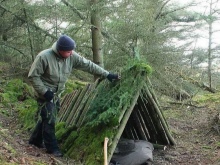
- Next, we combine: we put one edge of the stick on the tree, and the other on the constructed base.After unfolding the sticks, the shelter is covered with moss.
- If you have to save yourself from the rain, plastic wrap is perfect. It is laid on the first layer of branches, covered with another, and then on the "roof" they make a flooring of leaves.
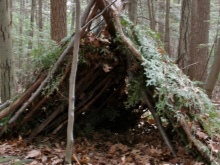
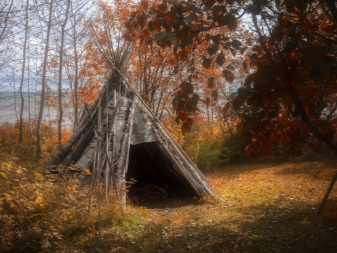
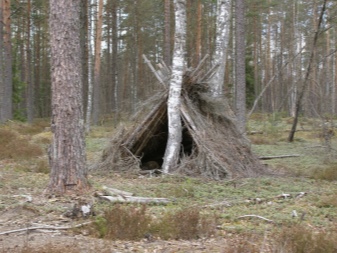
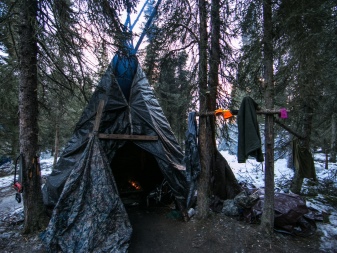
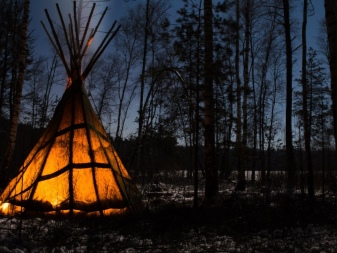
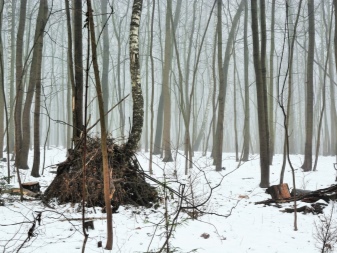
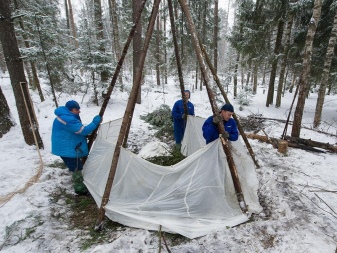
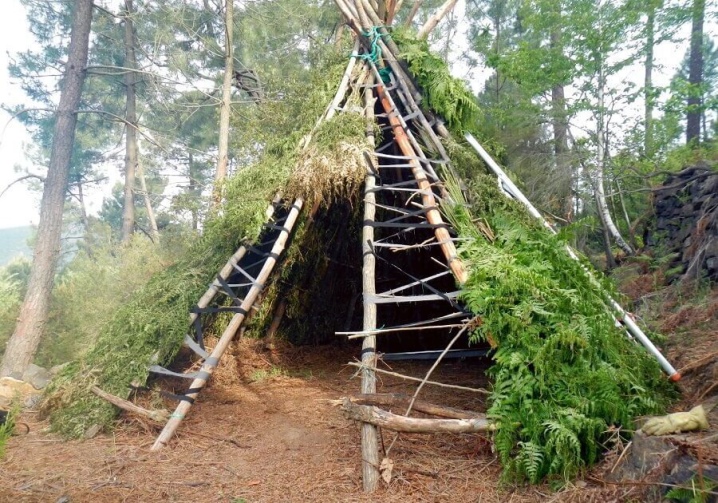
Tent
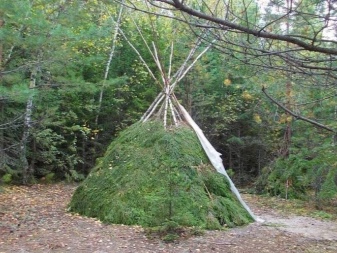
To build a tent hut, it is advisable to find such an area where there is an abundance of young and flexible trees. We bend the tops of such a sprout in one direction and fix it firmly. We take the ropes and tie them to the transverse stiffeners. You get something that looks like a dome. The design can turn out to be flimsy - in this situation it is necessary to cut out a number of poles.
We stick the thick bases into the ground, and weave the "tops" into the dome of the structure. In the main part, you can place a large trunk, which prevents the top of the tent from overturning inward. We cover the walls of the shelter of young trees with grass or leaves, and lay fir branches on top.
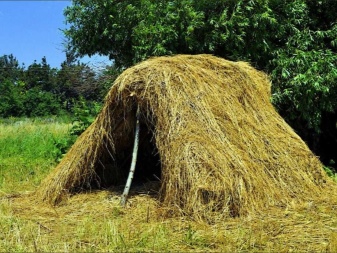
It will be very pleasant to warm up by the fire inside the hut, but for its implementation it is necessary to leave the top of the dome open (for the smoke to escape).
Going into nature for the purpose of spending the night, be sure to take all the necessary tools with you. If you plan to light a fire inside the hut, do not forget about safety rules, do it only at a safe distance from the wooden building. Don't worry if you can't build a perfect "house" the first time - everything will come with experience! Enjoy your stay.
How to build a hut in the forest, see below.


The comment was sent successfully.