Types of huts made of branches and their construction
The ability to build huts from branches will be useful for parents who want to please their children, as well as people who like to relax in the fresh air. The construction of a hut in the forest is easily carried out from various natural materials. After reading the article, you will learn about what kind of huts from branches are and how to build them.
Primary requirements
Huts must provide protection from precipitation, sunlight, insects. A well-built structure made of branches retains heat. It should not be stuffy inside: if the shelter is covered with rather dense material, it is necessary to provide for gaps.
It is necessary to ensure that there are no sharp elements in the hut, about which you can accidentally injure yourself. This advice is especially relevant if the structure is intended for children: they are very mobile and usually less attentive. All attachments should also be hidden from children. If possible, sand the tree and cover it with paint and varnish so that the splinter does not accidentally fall into the child's hand.
Varieties
To build a hut, you need to choose the type of shelter. At the same time, you need to focus on the available resources and on the specific needs of the people for whom the structure is intended.
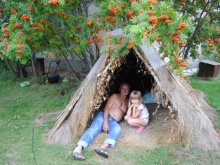
Classic
A standard hut looks like a blank for lighting a fire. Two sticks are placed in an upright position, and the third element is placed horizontally. Materials are tied up with improvised means: bending branches, stems of herbs.
There are several installation options. You can, for example, cut a pair of branches with a knife, set them at an angle to each other and place the main pole horizontally on them.
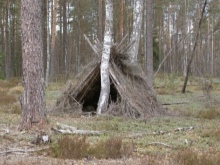
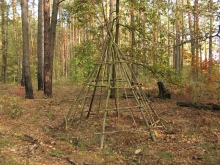
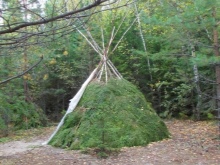
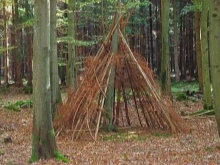
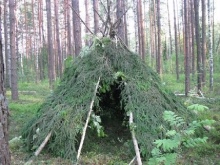
You can build a "wigwam": put branches, forming a circle.
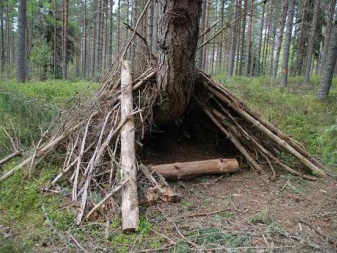
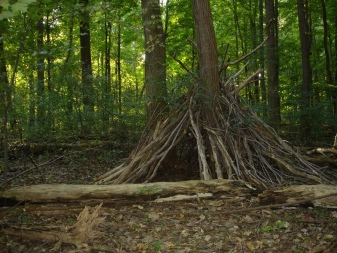
Attached
This includes, for example, a "wigwam" installed around a tree. It can also be a structure created on the basis of branches that rest on a rock. The walls are usually made like a regular hut.
The main advantages of the attached structures are the high speed of work and small savings in "building materials".
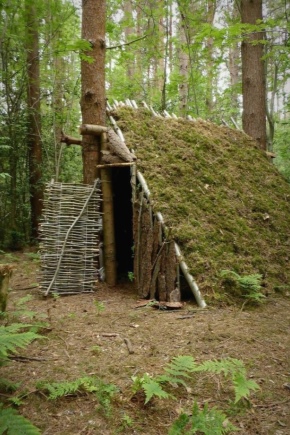
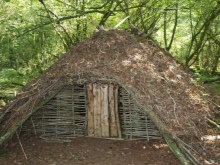
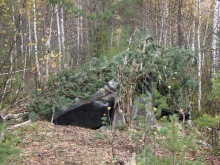
In-depth
A recessed shelter is an ordinary recessed hut. Such a structure resembles a dugout. It is not recommended to build a deep hut in a ravine or lowland: rain can destroy it or simply cause a lot of problems.
To provide lighting inside, you can make the roof collapsible in some places or use a candle.
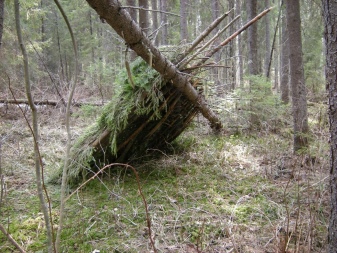
How to choose materials?
Spruce, pine or any other branches can be used to create a hut. From the inside, the shelter can be covered with leaves, dry grass, so that you do not have to lie or sit on the cold ground. Some people prefer to support the sticks at an angle on a fallen tree to ensure the stability of the hut.
Flexible willow is well suited for creating tent huts.
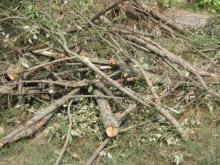
For the construction of a shelter in the forest, you can use not only branches, spruce branches, grass, leaves, but also other materials: for example, bark, plant stems, clay, straw. In general, it can be noted that the choice depends on the specific area where the hut is planned to be installed. Many people prefer to use not only natural, but also artificial "materials: fabrics, polyethylene, plastic, pieces of rope, and so on.
Materials must be resistant to moisture and other external influences.
Seat selection
A flat area is suitable for the construction of a hut. If possible, it is better to opt for a location near low trees and bushes. It is not recommended to install huts in areas where there is a lot of moss (the air there is usually very humid), in lowlands (they can be heated), on a sandy slope.
Huts should not be placed next to steep, steep earthen slopes: due to precipitation, landslides can occur. As a result, the earth will fill up the roof of the structure. It is recommended to build a shelter as far away from water bodies as possible. In an open glade, you will not be able to protect yourself from hot sunlight, rains, and strong winds.
Ideal if you have materials nearby to light a fire and running water.
To ensure the safety and comfort of the people for whom the hut is being built, it is necessary to remove garbage, small stones and leaves from the territory.
How to build with your own hands?
You can build a hut on the street or in the country near the house in different ways. To make your work easier, you can prepare a detailed drawing in advance: it will allow you to foresee even minor trifles. However, you can easily build a good hut without a diagram, you just need to take into account some important recommendations. Let's consider in stages the most common ideas for building shelters from branches.
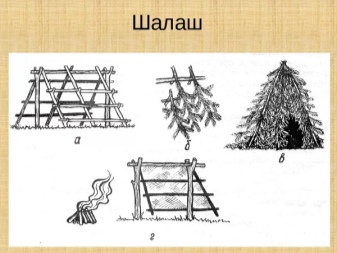
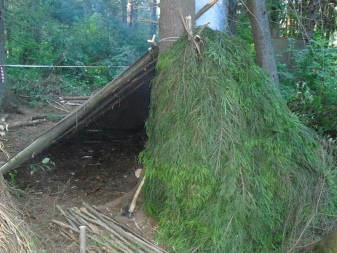
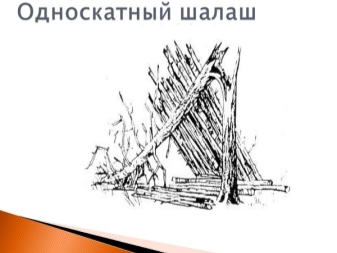
Single slope
It is very simple to make a lean-to hut, this design is considered the simplest. This structure consists of only one inclined wall, which is at the same time a roof. A lean-to hut is temporary: it can save from precipitation, sunlight, but not from wind and severe cold weather. You can use oilcloth for additional protection, but this option will still be suitable only for warm weather.
The instruction will help you build a hut correctly.
- Choose an area with trees opposite each other. If there are none, just drive 2 tall and rather large sticks into the ground.
- Place the bar over the junction. If the frame does not seem very strong, it needs to be strengthened: tightly tie the trees (sticks) and the crossbar to each other.
- Find some straight sticks to place on the bar in approximately 25 cm increments. These poles must be secured at an acute angle.
- Put small twigs, branches, twigs horizontally on top, on the forks of the sticks.
- On top of the wicker frame, sketch and secure branches with needles or leaves. It is better to cover all the holes. Remember: the better you cover them, the less likely the hut is to let in moisture or gusts of wind. This design is attached.
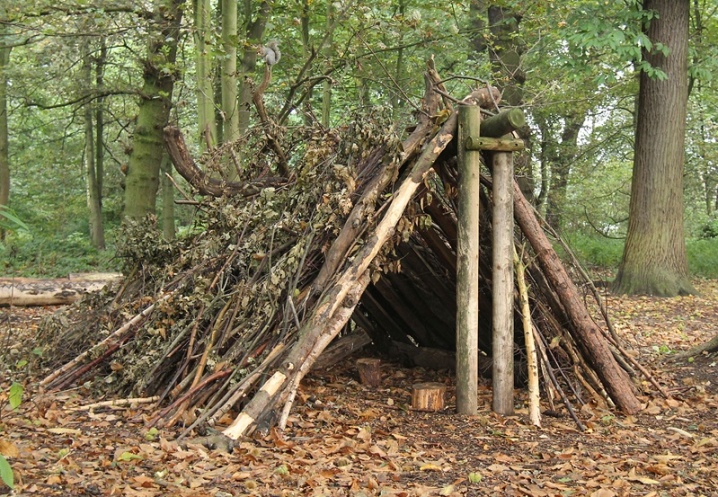
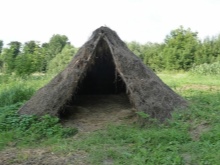
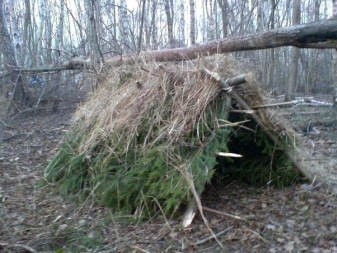
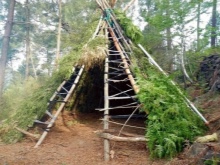
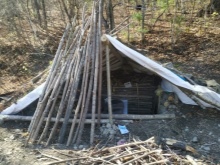
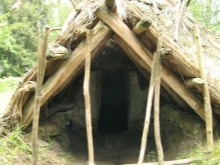
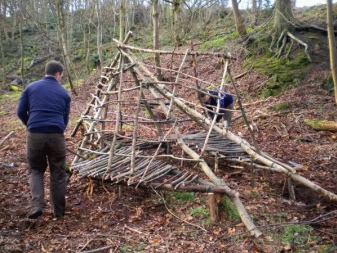
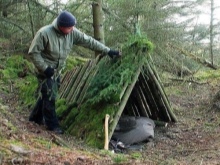
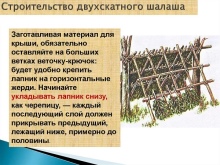
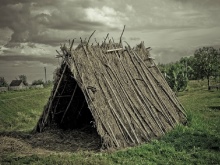
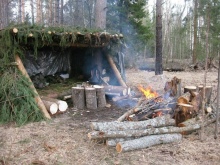
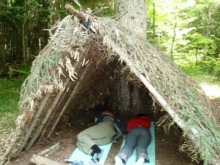
Gable
Such a hut is more functional and convenient than a lean-to. You will spend a little more effort, but you will receive a structure that provides protection from a fairly strong wind, rain, cold weather and heat. Such a hut is ideal for spending the night outdoors.
Consider the process of erecting a structure.
- Large wooden rods must be driven into the ground on both sides of the frame.
- The back wall is formed from straight branches. In order for the rear part to take the shape of a triangle from above, you will have to cut off these branches a little. With the main sticks, which are located at the edges of the product, the rods are connected with a rope from above.
- In order for the opening to have a rectangular shape, and not a triangular one, you need to slightly cover the entrance with sticks.
- Using small branches, close the cracks in the shelter. The protective layer should be quite thick, but you need to make sure that the supports are strong enough. The remaining cracks should be covered with moss.
- Use natural materials to make a lounger about 25 cm thick.
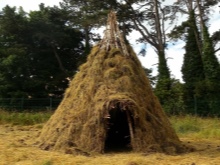
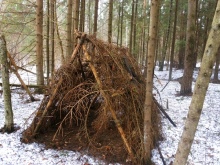
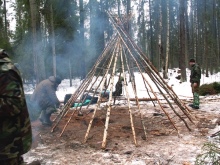
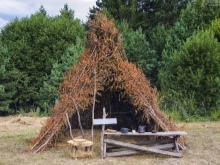
Circular
Such a hut can be compared to a wigwam. It protects well from precipitation.
The construction process is simple.
- Dig deep into the middle of the hut with a thick support.
- Drive sticks in a circle at a distance of 1 m from the post and place them on the top of the support.
- Tie something around the top of the hut and pull it off. Cut off excess sticking out branches.
- The structure will need to be overlaid for insulation with various natural materials.
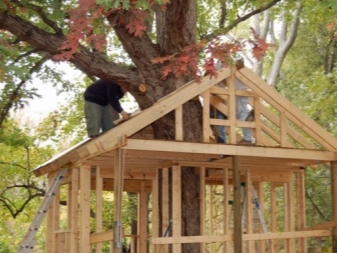
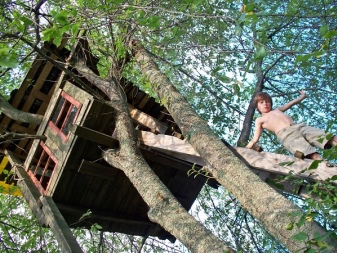
On the tree
You can equip a children's hut on a tree: children of 10 years old and of other ages like such "headquarters". Children will rest and play there. It will even be a full-fledged house, not a hut. In this case, it is necessary to comply with safety rules, because damage, fractures in the event of a fall from a tree are very severe.
Consider a plan for manufacturing a structure.
- Select a large, branched tree to set up the base.
- Make a fairly large board from the planks and attach it to the strongest branches.
- Screw the posts with self-tapping screws at the corners of the site and form the walls using boards.
- Build a roof using metal or roofing felt. Slate is not recommended because it is too heavy.
- At the end, attach a ladder (made of wood or rope).
Internal arrangement
To make it warmer in the hut, you can cover the walls inside with foil. Cover the entrance with a layer of polyethylene. At a safe distance (at which the polyethylene will not melt), make a fairly large fire in front of the structure. Entering the shelter, heat will be reflected from the surface of the foil, and the film will not allow it to go outside. This will create a greenhouse effect in the hut.
You can also create coziness inside the hut. First you need to lay a layer of dry grass, and then you can lay air mattresses, blankets. It would be nice to find places where you can hang a flashlight.
If the hut is spacious, you can easily put a small camp table and a chair so that, for example, you can have hot tea when it is raining outside.
Useful building tips
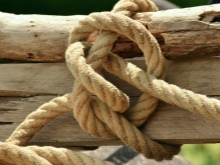
It is better to take a compact folding saw with you on a hike, rather than an ax. With the help of this tool, it will be much faster to make a hut. Using tape or strong rope to fasten the sticks together will greatly facilitate your work and also speed up the construction of the structure.
It is recommended to pay particular attention to the size of the shelter. Choose its width, focusing on the number of people who will be there.

You can find out how to make a reliable hut out of branches with your own hands from the video below.


The comment was sent successfully.