We make a children's slide with our own hands
The arrangement of a playground is impossible without a slide. But you need to choose the design very carefully and take into account all the nuances. This is safety, comfort, and ease of making with your own hands.

Views
Speaking about the types of children's slides, we must first distinguish two types: garden and indoor. Most often, home designs are placed in the bedroom. They can be made from randomly selected materials, even plywood or particle boards. On the street, this is unacceptable - there are too strong adverse meteorological effects. But the basic approaches to drawing up a design remain unchanged.
The difference may be related to the materials from which the slide is made. For her apply:
- PVC;
- wood;
- metal.
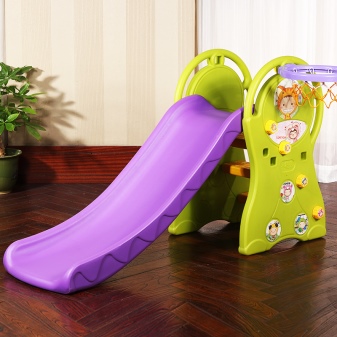
Plastic systems are recommended for children from 3 to 5 years old. Their main advantages are:
- ease of assembly;
- minimum occupied area;
- the ability to obtain a variety of forms;
- convenience and safety;
- seasonal versatility.
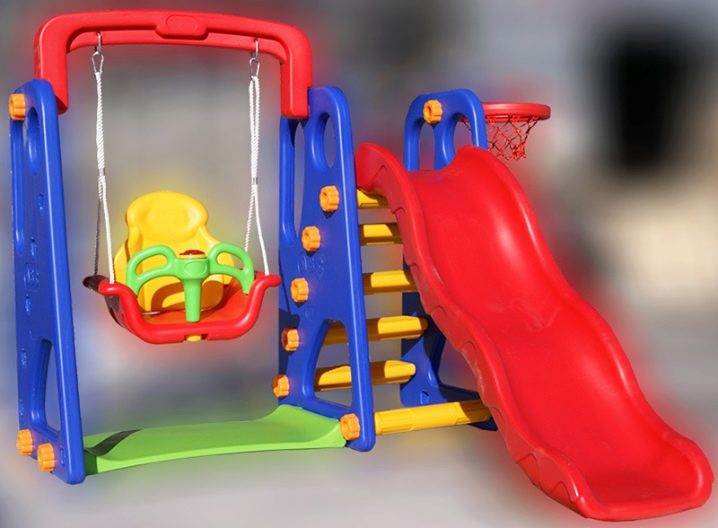
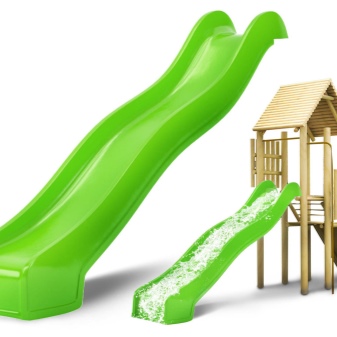
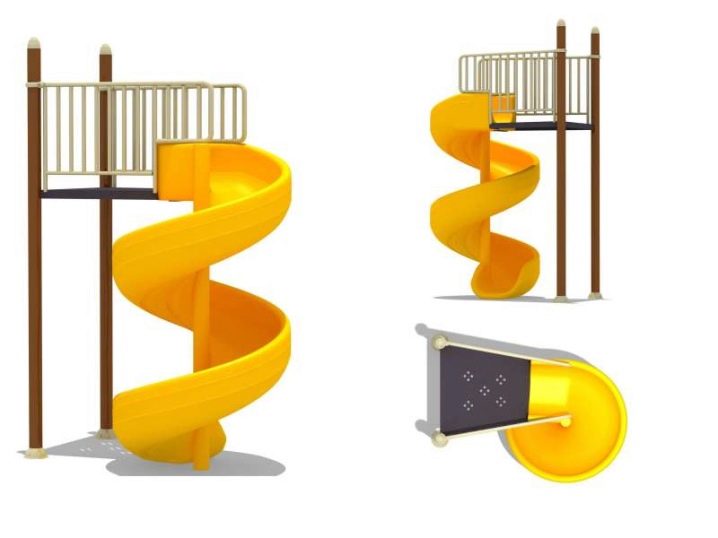
Plastic allows you to make slopes in the form of a spiral, pipe or wave. The excellent heat capacity of the plastic slope allows it not to overheat in summer, and also to maintain a comfortable temperature in winter. The work is very simple, you just need to assemble the parts in accordance with the instructions. However, plastic is fragile, especially when it comes to cheap Chinese samples. It doesn't last long enough.
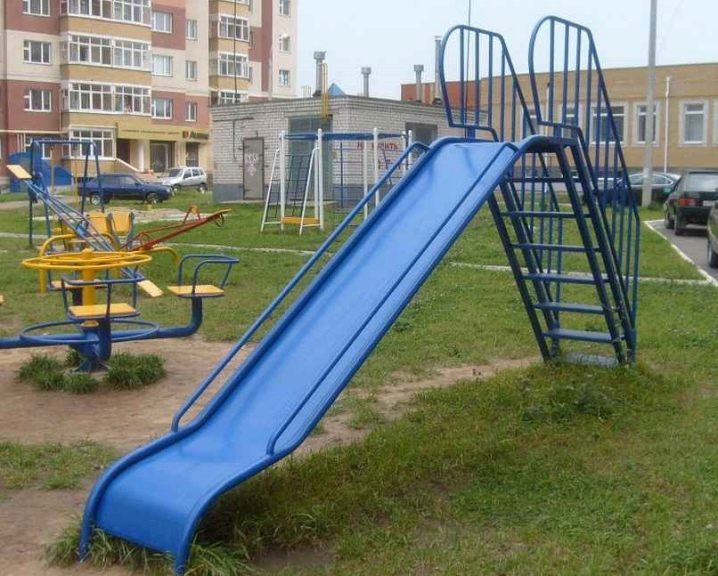
Often on the site near apartment buildings you can see slides made of metal. They are very durable and last a long time. Even with active operation, the attraction will work enough for several generations to use it. It is possible to make a structure with different heights and with an unequal length of the descent.
However, before choosing such a structure for your yard, you must take into account its weaknesses.
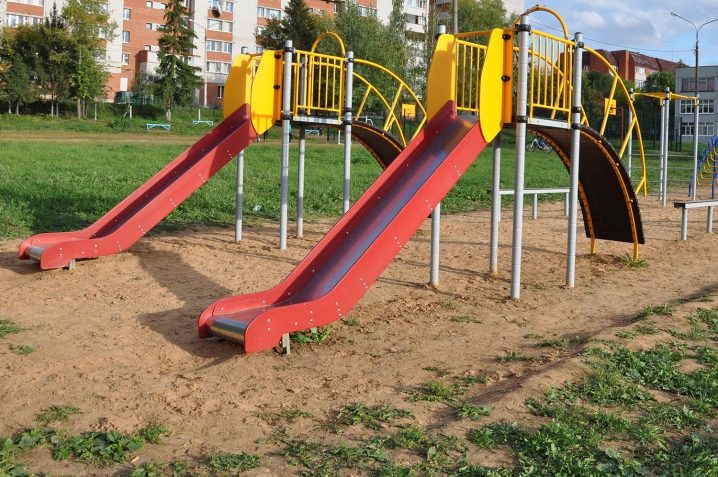
Metal conducts heat too well. In the heat, it gets very hot, and when the cold comes, the skiers easily freeze. This can lead to bad health consequences, even if they are not noticed in the heat of the game. You also need to remember that metal requires maintenance. And if the ramp is made of steel, it can corrode.
The tree is attractive for many reasons. It is environmentally and sanitary safe. Wooden structures are relatively light and can be delivered anywhere. Weather conditions do not preclude their use. But you need to understand that even the best wood can deform from dampness and temperature extremes.
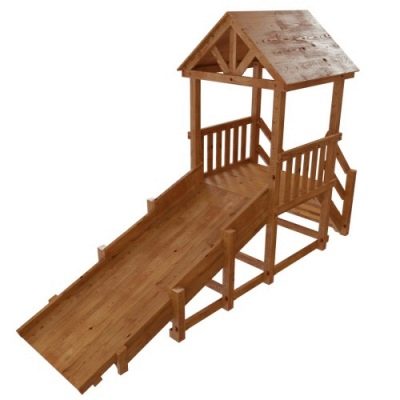
For protection, special treatment is carried out. However, it complicates and increases the cost of the construction process. In addition, it is necessary to carefully select the compositions for impregnation, since not all of them are safe enough. But the wooden slide can be easily repaired with your own hands. And during the construction phase, you will not need to use a welding machine.
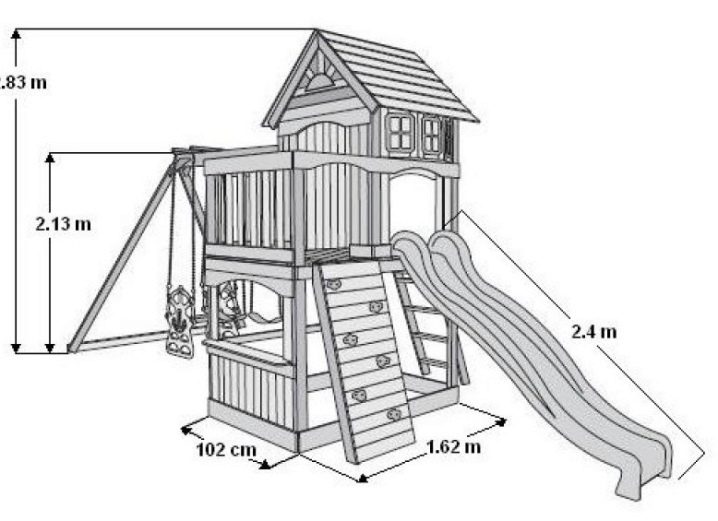
The large area occupied by the slide (especially together with the descent) requires a more thoughtful approach to the organization of this element of the playground. It is impossible to limit yourself to the choice of a suitable material. Often a house complements the slide. Not only does it become another playground, but it also provides shelter from the rain during the summer months. It is also worth mentioning that the types of slides differ both in the presence of the house and in the size of the structure.

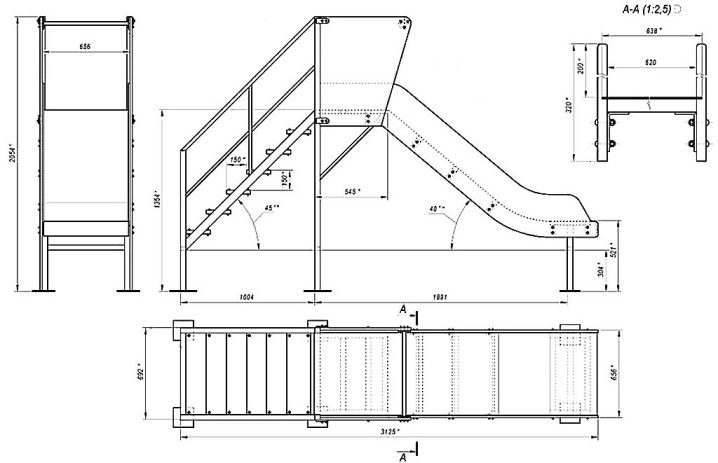
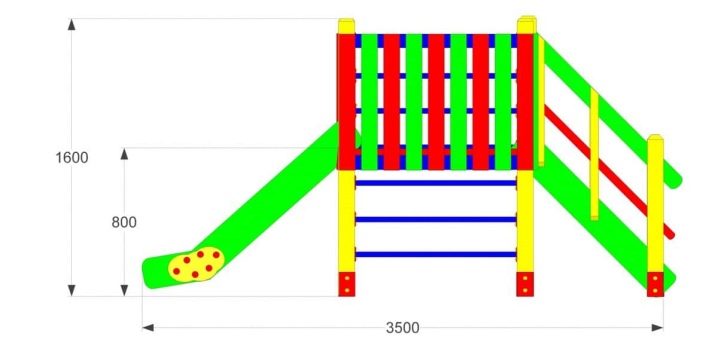
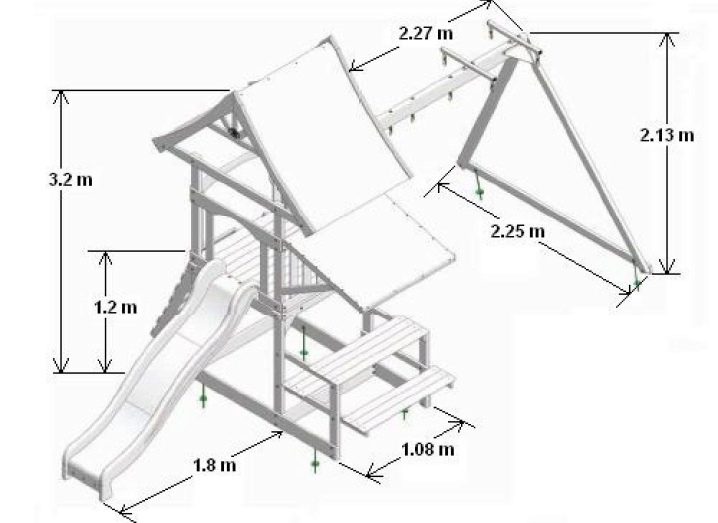
Drawings and dimensions
In order to properly build a slide for children at their summer cottage, it is imperative to draw up drawings and diagrams.If the slope profile found on the Internet does not suit the slope, you need to turn it clockwise (to increase) or counterclockwise (to reduce) the angle. The steeper the slope, the more pleasant it will be for children. In addition, this design will take up less space, which is especially important in the country.
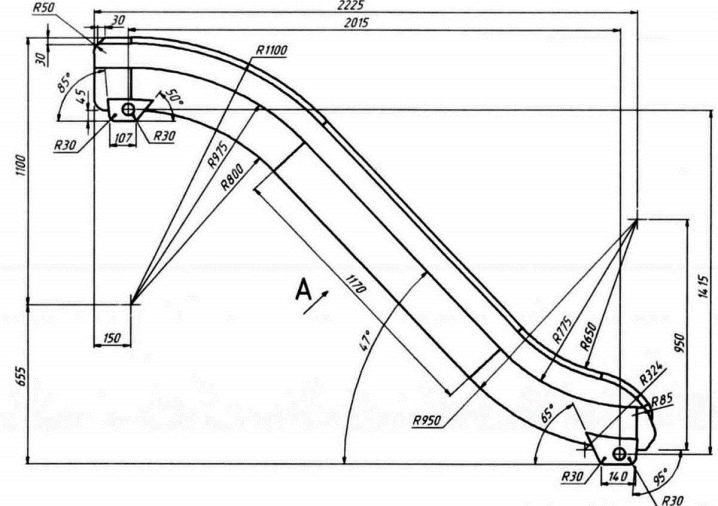
But when the slope of the hill is tilted by more than 40 degrees, it is necessary to carefully calculate so that the area for braking does not turn out to be excessively long.
Typically, profiles are drawn on a single scale, from bottom to top. At the same time, they try to ensure that the distances between the starting points coincide. After that, vertical secant lines are prepared, between which there must also be an identical distance. The ramp angle is determined by how large the free space is.
If there is a wall, pool or other dangerous places in the yard of the house not far from the descent, it is necessary to plan the construction of the steepest slide.
When drawing up drawings, it is required to take into account not only the available territory, but also the age of the children. So, if the structure is designed for a category of 3-7 years, you can make a playing surface at a height of more than 2 m.But at the same time, you will have to make metal barriers, the height of which will be at least 0.7 m.If children of any age can use the slide, fencing openings can be a maximum of 0.5 m. In this case, the height of free fall should be limited to 2 m.
When a fall from the upper platform is likely, it is necessary to provide a shock-absorbing coating during the design. Support structures are often not indicated in the figures. And also there may be no other deepening elements. The form should be as simple as possible, since it is difficult to build a structure with a sophisticated configuration. The drawing of the slide for the street should be made with such an orientation that the descent is not directed towards the carriageway.
Design
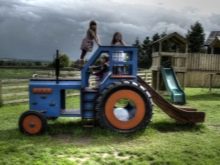
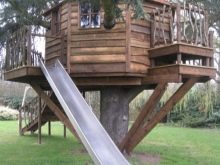
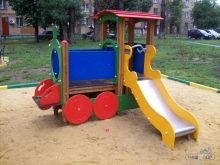
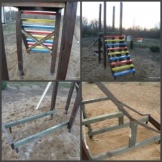
At an early age, children's imagination does most of the work by itself. It is able to "paint" a seemingly unremarkable element on the site, present it as a fabulous space. But the intention of some adults to help the imagination, to push it in a strictly defined direction, is quite appropriate. And if it is difficult to diversify the slope, then the ascent can be presented much more interesting than a simple staircase. Excellent solutions of this kind might be:
- slide in the form of a "tractor";
- a house on a tree;
- "Little train".
How to do it yourself?
On the Internet, it is easy to find many schemes for arranging a children's slide. But you should seriously pay attention only to such drawings and drawings, where the barriers are shown in detail. Children of any age play selflessly and lose their sense of reality. Therefore, both fences and railings must be required. Special attention should be paid to the materials from which the slide is constructed as a whole and even its secondary parts.
There are two main requirements: sanitary safety and a minimum risk of fire. All wood and metal structures must be sanded to minimize the risk of injury. Thinking over the future structure and erecting it, it is necessary to exclude any slotted partitions and gaps. While playing, children do not follow where they stick their fingers and even their heads. It is useful to imagine the slide through the eyes of a child, and then it will become clear where the dangers may lurk.
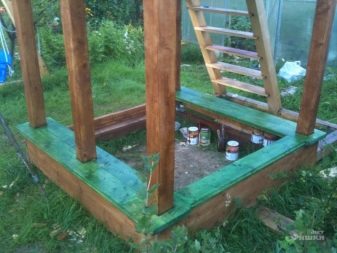
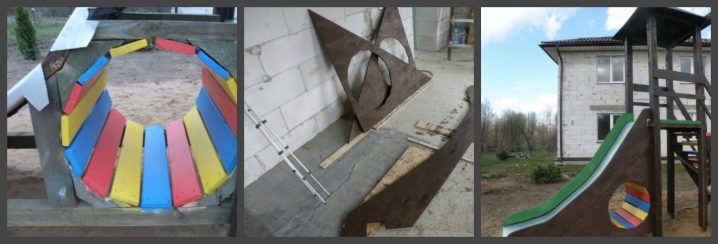
The step-by-step design of the sports equipment begins with the preparation of the descent. It is made from boards that are the same length and width. The wood is carefully sanded to ensure a safe descent. Bars placed from below are used to connect the boards. The next step is to attach the side parts of the structure to the descent.
In order not to scrupulously calculate all the proportions, you can simply repeat the standard dimensions of the factory slides. It is 1.3 m in height with a 55-degree slope. The boards of the side parts are selected and placed so that the ends are in the upper part of the site. They function as handrails that you can hold onto before descending.The sides are fixed on both sides with self-tapping screws so that they hold onto the base of the descent.
Important: the side parts must be thoroughly processed. All sharp corners are cut and even sanded with sandpaper. To spend less time and effort, you can simply take a grinder with a grinding disc. Next, you need to do the markup. At this point, you will need a drill for gardening.
The excavations in the ground obtained with its help are needed to install the timber. For your information: from below, this bar should be greased with mastic. Now the places where it was placed are being concreted. Only such a solution ensures the reliability and stability of the structure. It is recommended to mix the mortar on M500 cement in standard proportions.
In the upper part of the beams, the grooves are cut with a saw. They are needed to put the strapping strips. The parts are connected with self-tapping screws. Planks solve 2 problems at once: they increase rigidity and ensure the safety of children. Now you need to attach a pair of wooden beams to the frame.
A ladder is attached to them on one side and a prepared descent on the other. When this work is done, you need to build a wooden floor. In its manufacture, boards are laid, attaching them with self-tapping screws.
Important: the boards must not be placed close to each other. The clearances should be such that there is no danger of injury, but water flows freely.
If maximum strength is needed, the joints of wooden parts are reinforced with steel corners. It is recommended to make the slide twice as long as in height. When choosing a site, you need to look so that it does not end up in a lowland. When it rains for a long time, a "swamp" will form there. All wood and plastic parts must be impregnated with fire retardants.

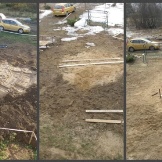
But the construction of a wooden slide can be done differently. An alternative arrangement is to first remove all soil and level the excavation. This is necessary if there is fertile land - then it will not be empty and will benefit somewhere else. Further, the site is covered with sand and after a while, when it settles, the entire territory is rammed. This time is not worth wasting, you can:
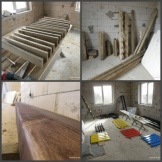
- prepare a tree;
- dry it;
- cut according to the drawing;
- sand;
- impregnate with protective components.
Steps, handrails, railings and boards that will be needed for the construction of the "tunnel" are painted twice with enamel. In the interval between painting, they need to be sanded. This is where the preparatory stage ends. It's time to build a foundation: fittings are placed in the holes prepared using a garden drill. It is certainly verified according to the building level.
When the reinforcement is placed, it is immediately concreted, and the corners are welded on top. The pillars that will be placed in the base must be sawn through in certain places. These recesses will allow you to fix the timber at the corners with self-tapping screws. Further, the pillars are connected with each other using jibs. The staircase is done like this: the stringers are fastened, and then the steps are stuffed over them.
But a ladder cannot be used normally unless it is supplemented with a launch pad. When this work is completed, it is required to prepare the base of the descent (it is made from a bar). A steel curved profile for the ramp is installed. A plywood board is placed on top of the base under the ramp. A sheet of iron is nailed onto this shield.
The outer edges of the sheet are folded over and fixed to the profile. Otherwise, injuries are inevitable. Now you can cut the gaps in the boards and wrap the edges of the sheet there. A boardwalk is being prepared under the ramp. The sides are sheathed with plywood. Now you can:
- put the boards;
- complement the staircase with handrails;
- build a hipped roof, cover it with plywood on top.
Not a single ready-made scheme, however, can be considered the only correct one. You can always retreat from it if the situation requires it. You don't have to use plywood to make the ramp itself. It can also be built from:
- plastic sheet;
- linoleum;
- galvanized steel 0.05 cm thick.
Laminate for stingrays is impractical to use.Under constant load or simply by contact with water, it is easily deformed. And here are some more recommendations:
- it is possible to increase the protection of wood from moisture by polishing with wax;
- for covering a wooden slide, oil paint is much worse than acrylic compounds and varnish;
- you cannot put a slide near poisonous plants and honey plants;
- you must immediately look so that there are no pipes and electrical appliances nearby;
- you cannot orient the slope towards the roadway, fence or main wall.
Beautiful examples
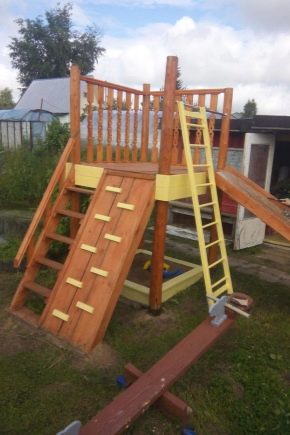
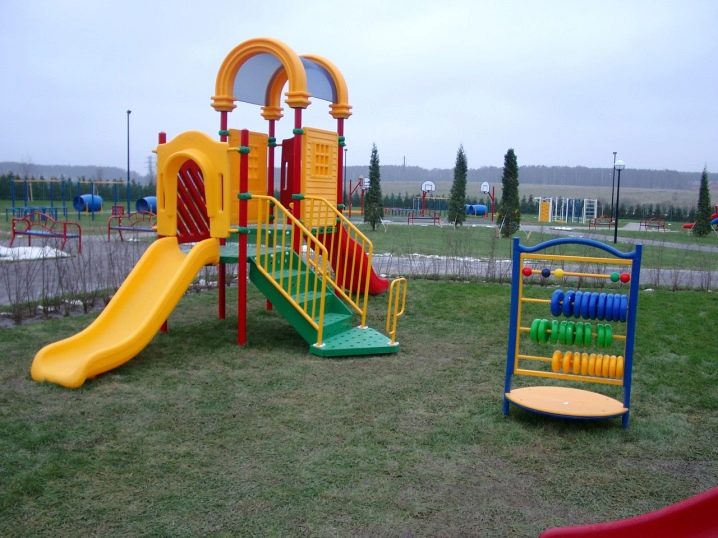
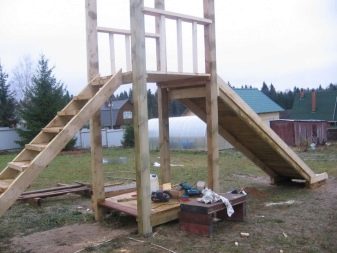
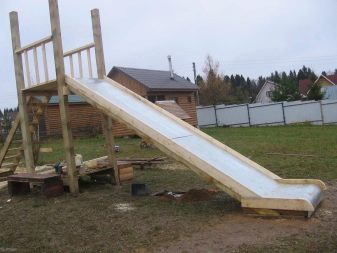
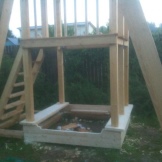
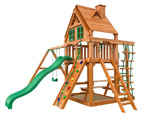
You can still list the rules for constructing slides and study the nuances for a long time. But it is much better to take the initiative and focus on ready-made design ideas. The photo below shows a simple light-colored slide built almost entirely of wood. Only the surface of the slope is lined with sheet metal. At the same time, the protective sides are completely wooden. Contrary to the fears of some people, this decision does not look dull at all.

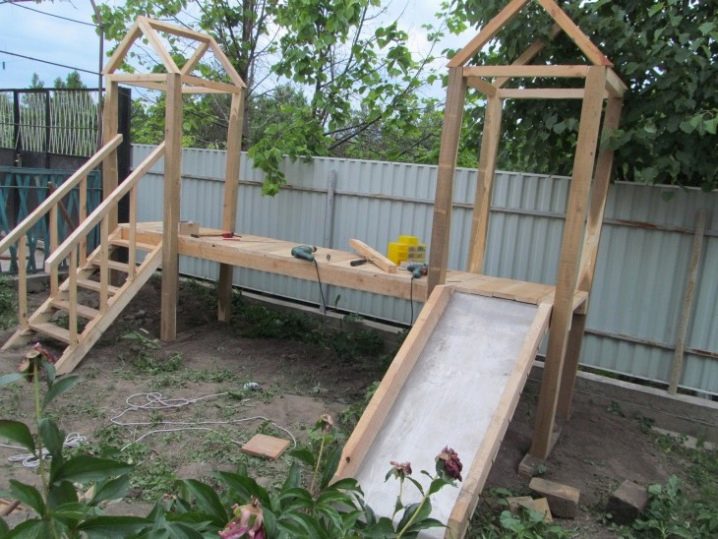
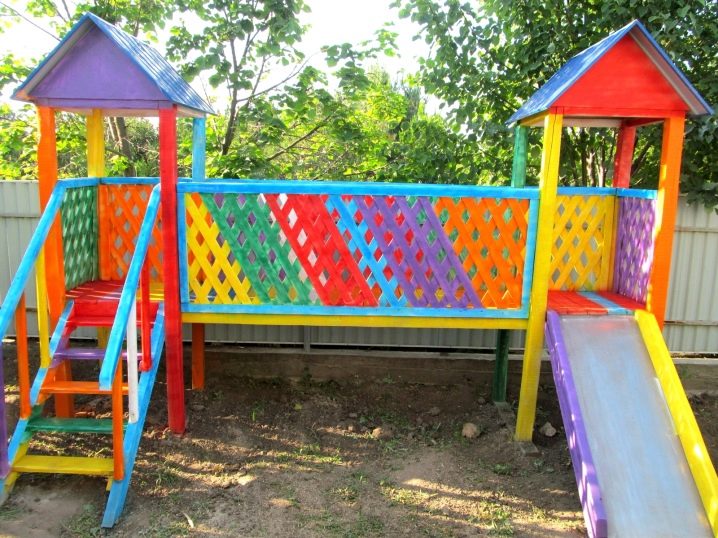
But you can also make a multi-colored colorful structure, even supplemented by a rather long transition between the ascent and descent. A pair of tent buildings allows shelter from not too heavy rain. There is an even simpler option, in which the entire surface is made of wood. Such a design must be chosen when only functionality is needed, and not a bright appearance.
How to make a slide with your own hands in one day, see below.


The comment was sent successfully.