Insulation of a loggia with PENOPLEX® plates
About thermal insulation material
PENOPLEX® Is the first and most popular brand of thermal insulation made of extruded polystyrene foam in Russia. Produced since 1998, now there are 10 factories in the manufacturing company (PENOPLEKS SPb LLC), two of them are abroad. The material is in demand in all regions of Russia and other countries. Thanks to the company, the word "penoplex" was fixed in the Russian language as a colloquial synonym for extruded polystyrene foam. Products manufactured by PENOPLEX are easily distinguished from products of other manufacturers by their orange plates and packaging, which symbolizes warmth and environmental friendliness.
Selection of high quality PENOPLEX thermal insulation boards® of all possible options for thermal insulation materials is due to the advantages of extruded polystyrene foam, which are discussed below.
Advantages
- High heat-shielding properties. Thermal conductivity in the most unfavorable conditions does not exceed 0.034 W / m ∙ ° С. This is significantly lower than that of other widespread insulation materials. The lower the thermal conductivity, the better the material retains heat.
- Zero water absorption (no more than 0.5% by volume - negligible value). Provides stability of heat-shielding properties, which are practically independent of humidity.
- High compressive strength - not less than 10 tons / m2 at 10% linear deformation.
- Environmental Safety - the material is made from those general-purpose polystyrene grades that are used in the food and medical industries with their high sanitary and hygienic requirements. The production uses modern CFC-free foaming technology. Plates do not emit any harmful dust or toxic fumes into the environment, do not contain waste in their composition, since only primary raw materials are used in production.
- Biostability - the material is not a breeding ground for fungus, mold, pathogenic bacteria and other harmful microorganisms.
- Resistance to high and low temperatures, as well as their drops. Range of application of PENOPLEX boards®: from –70 to + 75 ° С.
- Slab sizes (length 1185 mm, width 585 mm), convenient in loading and unloading and transportation.
- Optimal geometrical configuration with L-shaped edge to minimize straight cold bridges - allows you to reliably dock the slabs and overlap them.
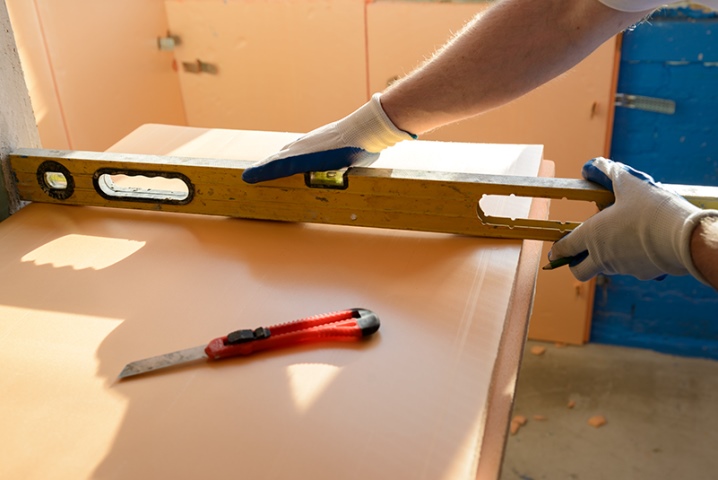
- Ease of installation - due to the unique structure, as well as the combination of low density and high strength of the material, you can easily cut and cut slabs with high accuracy, give PENOPLEX products® any shape you want.
- All-weather installation due to the wide temperature range of use and moisture resistance.
disadvantages
- Sensitive to UV rays. It is not recommended to leave a layer of external thermal insulation PENOPLEX for a long time.® outdoors, the period between the end of thermal insulation work and the beginning of finishing work should be insignificant.
- It is destroyed by organic solvents: gasoline, kerosene, toluene, acetone, etc.
- Flammability groups G3, G4.
- When the temperature rises, starting from + 75 ° C (see temperature range of application), the material loses its strength.
Required materials and tools
To insulate a loggia, two brands of plates may be required:
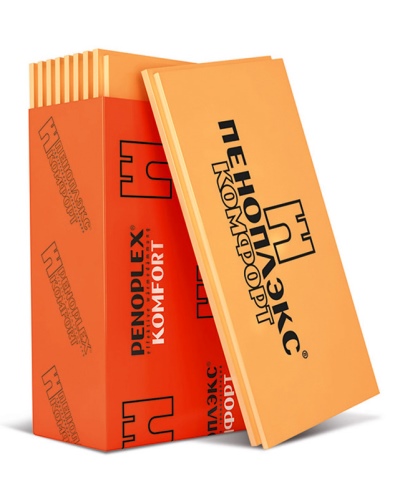
- PENOPLEX COMFORT® - for floors, as well as walls and ceilings when they are finished without the use of plaster and adhesives (in the jargon of construction workers, this method of finishing is called "dry"), for example, finishing with plasterboard.
- PENOPLEX WALL ® - for walls and ceilings when they are finished using plaster and adhesives (in the jargon of construction workers, this finishing method is called "wet"), for example, with plaster or ceramic tiles. Plates of this brand have a milled surface with notches to increase adhesion to plaster and adhesives.
In addition to PENOPLEX boards®, to insulate the loggia, the following materials and tools will be required:
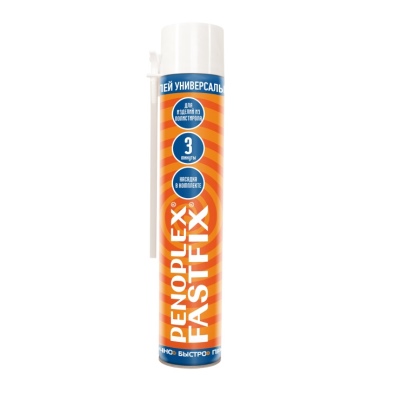
- Fasteners: glue (for thermal insulation boards, the manufacturer recommends using PENOPLEX adhesive foam® FASTFIX®), polyurethane foam; liquid Nails; dowel-nails; self-tapping screws; fasteners with wide heads; puncher and screwdriver.
- Tools for cutting and cutting insulation boards
- Dry mix for creating a cement-sand screed.
- Vapor barrier film.
- Antifungal primer and anti-decay impregnation.
- Bars, slats, profile for lathing - when insulating for finishing without the use of plaster and adhesives (see below).
- Duct tape.
- Two levels (100 cm and 30 cm).
- Finishing materials for floors, walls and ceilings, as well as tools for their installation.
- Means for flushing with nailers and for removing uncured foam and glue from clothing and exposed areas of the body. The manufacturer recommends the organic solvent based cleaner PENOPLEX® FASTFIX® in an aerosol can.
Stages and progress of work
We will divide the process of warming the loggia into three large stages, each of which contains several operations.
Stage 1. Preparatory
Stage 2. Insulation of walls and ceilings
Stage 3. Floor insulation
The second and third stages have two options each. The walls and ceiling are insulated for finishing with or without the use of plaster and adhesives, and the floor - depending on the type of screed: reinforced cement-sand or prefabricated sheet.
Typical thermal insulation scheme for a balcony / loggia
Option with wall and ceiling insulation for finishing with the use of plaster and adhesives and a floor with a cement-sand screed
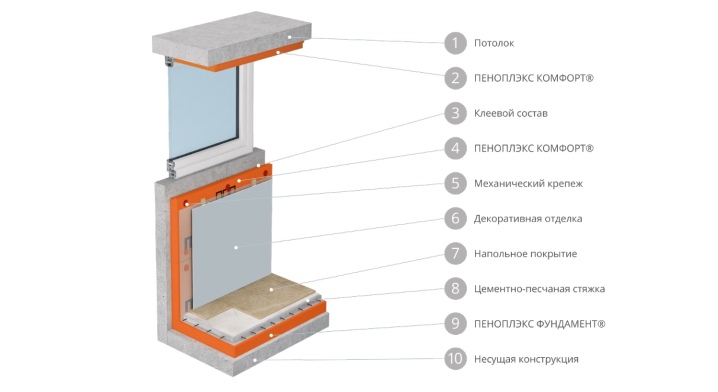
Note that here we do not consider glazing processes (necessarily warm, with double or triple glass units), as well as the laying of engineering communications. We believe that these works have been completed. Wiring should be packed in suitable boxes or corrugated pipes made of non-combustible material. Double-glazed windows must be protected from dirt or mechanical damage. They can be covered with ordinary plastic wrap. Some experts recommend removing the double-glazed windows from the frames for the duration of the work, but this is not necessary.
1. Preparatory stage
It consists in cleaning and processing the surfaces of insulated structures: floor, walls, ceiling.
1.1. They remove all objects (many things are usually stored in the loggia), dismantle shelves, old finishing materials (if any), pull out nails, hooks, etc.
1.2. Fill all cracks and chipped areas with polyurethane foam. Allow the foam to dry for a day, then cut off its excess.
1.3. The surfaces are treated with an antifungal compound and an anti-rotting impregnation. Allow to dry for 6 hours.
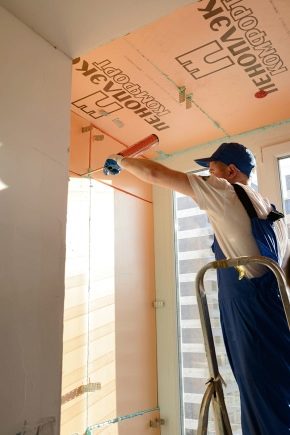
2. Insulation of walls and ceilings
We consider two options: for finishing with or without the use of plaster and adhesives.
The option of warming the walls and ceiling of the loggia with finishing without the use of plaster and adhesive compounds (in particular, with plasterboard).
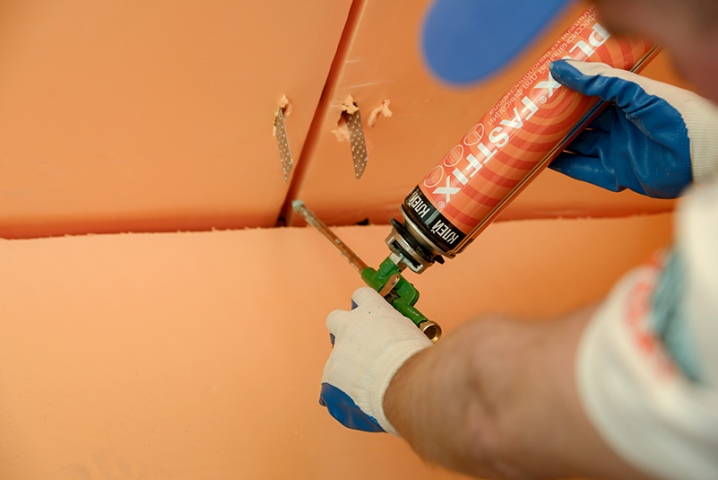
2.1. PENOPLEX glue-foam is applied® FASTFIX® on the surface of the plates according to the instructions on the cylinder. One cylinder is enough for 6-10 m2 the surface of the slabs.
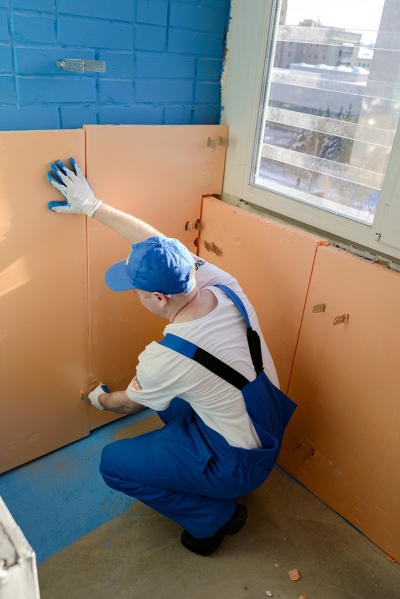
2.2. Fix PENOPLEX COMFORT slabs® to the surface of the walls and ceiling. Irregularities and gaps in the joints are filled with PENOPLEX foam glue® FASTFIX®.

2.3. Equip a vapor barrier.
2.4. Attach a wooden lathing or metal guides through the thermal insulation to the structure of the wall and ceiling.
2.5. Plasterboard sheets are mounted to guide profiles or dry slats 40x20 mm in size.

Note. Plasterboard finishing can be done without vapor barrier and guides, with adhesive fixing of sheet material to thermal insulation boards. In this case, PENOPLEX slabs are used. WALL®, step 2.4 is eliminated, and steps 2.3 and 2.5 are performed as follows:
2.3. Seams at the joints of thermal insulation boards are glued using construction adhesive tape.
2.5. Plasterboard sheets are glued to the slabs. For this purpose, the manufacturer of thermal insulation recommends using PENOPLEX adhesive foam® FASTFIX®... It is necessary to ensure that the layer of thermal insulation to which the sheet material is glued is even.
2.6. The joints of the sheet material are processed.
2.7. Carry out finishing.
The option of warming the walls and ceiling of the loggia using plaster and adhesives for finishing walls and ceilings
2.1. PENOPLEX glue-foam is applied® FASTFIX® on the surface of the plates according to the instructions on the cylinder. One cylinder is enough for 6-10 m2 the surface of the slabs.
2.2. Fix PENOPLEX plates WALL® to the surface of the walls and ceiling. Plates are fixed with PENOPLEX foam glue® FASTFIX® and plastic dowels, with the dowels placed in each corner of the slab and two in the center; irregularities and gaps in the joints are filled with PENOPLEX foam glue® FASTFIX®.
2.3. Apply a base adhesive layer to the rough surface of PENOPLEX boards WALL®.
2.4. The alkali-resistant fiberglass mesh is embedded in the base adhesive layer.
2.5. Carry out a primer.
2.6. Apply decorative plaster or putty.
3. Floor insulation

We consider two options: with cement-sand reinforced and prefabricated sheet screed. The first must have a thickness of at least 40 mm. The second is made of two layers of gypsum fiber board, particle board, plywood, or finished floor elements in one layer. Until the arrangement of the screeds, the technological operations for both options are the same, namely:
3.1 Level the subfloor, eliminating unevenness more than 5 mm.
3.2 Install PENOPLEX COMFORT slabs® on a flat base in a checkerboard pattern without fasteners. Depending on the required thickness, the boards can be laid in one or more layers. Where the screed must adjoin the wall, lay a damping tape made of foamed polyethylene or fragments of PENOPLEX COMFORT boards® 20 mm thick, cut to the height of the future screed. This is necessary, firstly, for sealing when the screed shrinks, and secondly, for soundproofing, so that the noise from the fall of any objects on the floor of the loggia is not transmitted to neighbors on the floor and below.
Option for insulating the floor of the loggia with a reinforced cement-sand screed (DSP), further stages
3.3. Bonding the joints of PENOPLEX COMFORT boards® aluminum-based adhesive tape or plastic wrap. This will prevent possible leakage of cement “milk” through the joints of the thermal insulation.
3.4. Reinforcement mesh is installed on plastic clips (in the form of "chairs"). In this case, a mesh with cells of 100x100 mm and a reinforcement diameter of 3-4 mm is usually used.
3.5. Filled with DSP.
3.6. They equip the finishing layer of the floor - materials that do not require the use of plaster and adhesives (laminate, parquet, etc.).
Option for insulating the floor of the loggia with a prefabricated sheet screed
3.3. Lay sheets of gypsum fiber board, particle board or plywood in two layers in a checkerboard pattern on top of PENOPLEX COMFORT boards®, or carry out the installation of finished elements in one layer. Layers of sheets are fixed to each other with short self-tapping screws. The self-tapping screw should not be allowed to enter the body of the heat-insulating plate.
3.4. They equip the finishing layer of the floor - materials that do not require the use of plaster and adhesives (laminate, parquet, etc.).
If a "warm floor" is provided in the loggia, then it should be borne in mind that there are many legislative restrictions for the installation of water-heated systems in an apartment. The electric cable floor is mounted on the screed after it has been installed or cast.
Warming a loggia is a laborious multi-stage process.However, as a result, you can create a comfortable additional space (a small office or relaxation corner), or even expand the kitchen or room by dismantling part of the wall between the room and the loggia.


The comment was sent successfully.