Floor lags
If the floor is assembled for an already built wooden house, in which there is already a rough covering, then in some cases lag elements are dispensed with. In the presence of a concrete foundation, logs are still necessary.
Peculiarities
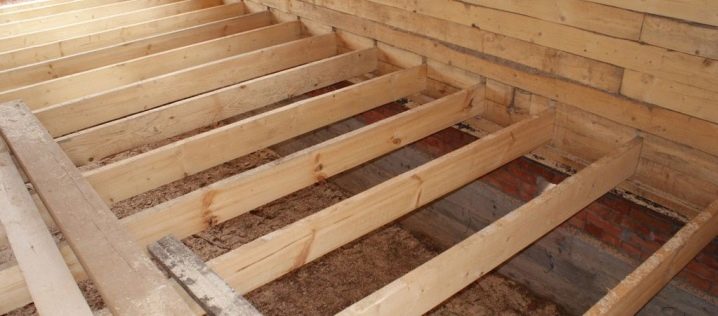
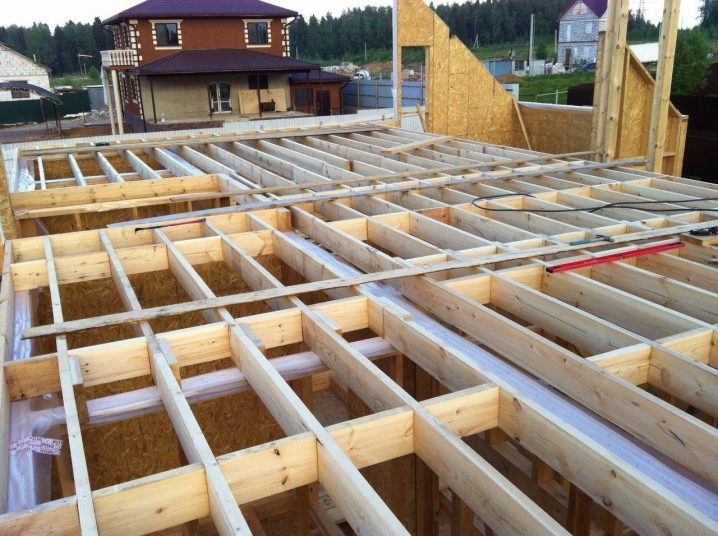
Floor joists, laid under the finishing sheathing, are primary (for the first floor) or secondary (for subsequent floors) transverse elements to which the sheathing is attached. The most suitable material for arranging a log is solid wood. With the development of building technologies, ready-made elements made of reinforced concrete or solutions based on polymer materials, for example, from hollow-free MDF, are considered acceptable options. Raw materials other than solid wood are rather an exception than an ordinary pattern.

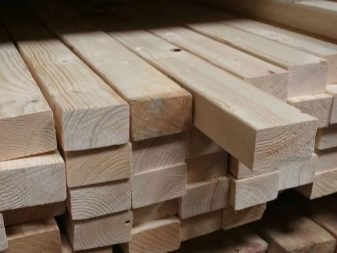
As a classic option, a square beam is used - or a rectangular one, set to one side. It is not recommended to use boards for lagged elements, since the rigidity of such a base is seriously inferior to a similar one made of timber.
An important advantage of a floor with logs is ventilation. The base, under which there is not a centimeter of free space, damp and collapses faster over time.
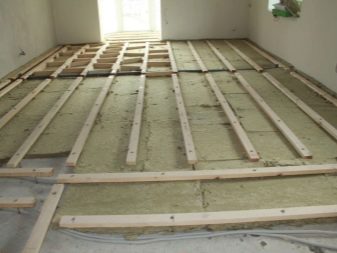
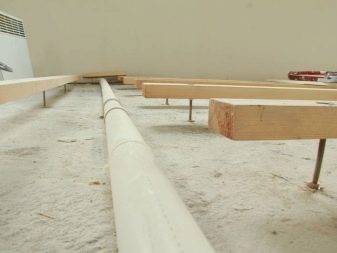
You can also hide cables and piping in the void under the main deck. Each room can be thermally insulated around the perimeter, fencing off the rest of it from the outer walls using a porous insulation placed in the voids. With a significant difference in the horizontal level (location height), the floor with lags is aligned parallel to the earth's horizon. The maintainability of a floor with lags is noticeably higher. If an ordinary board was used, and not a grooved board, then it is enough to replace the damaged fragment with a new one, without disassembling the entire floor, in order to get to the area to be repaired.
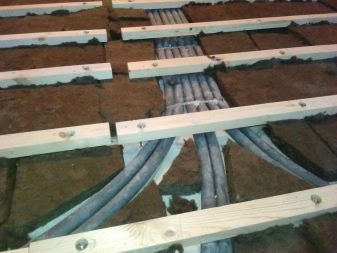
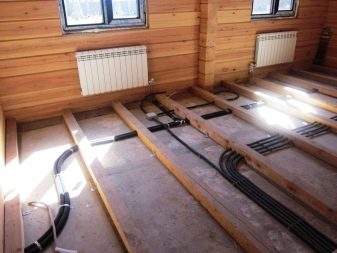
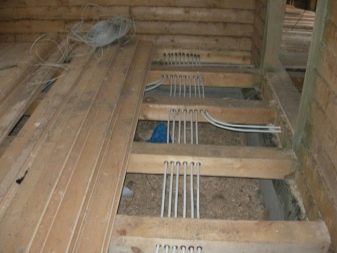
It is easy to hide a heating cable or water circuit under the floor installed on logs. This will make your stay in such a room most comfortable in the winter.
Base device
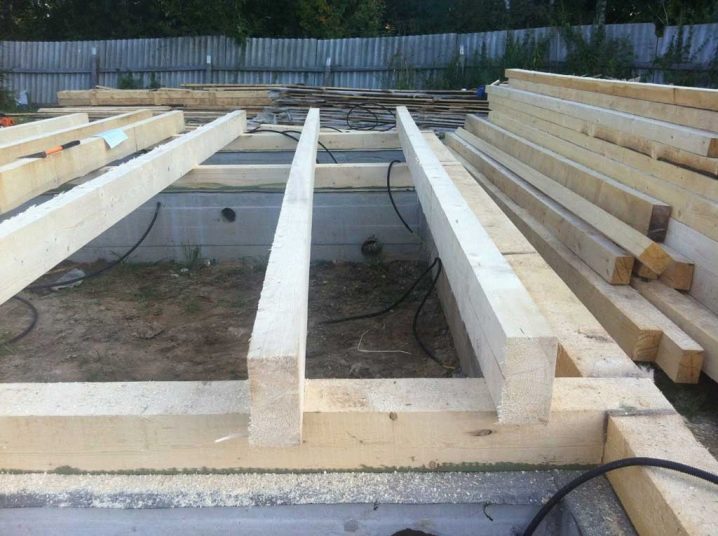
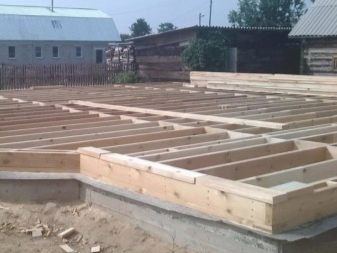
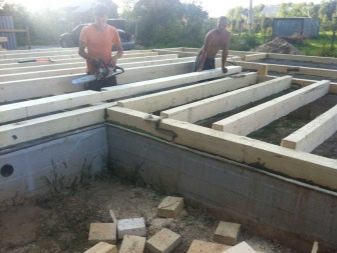
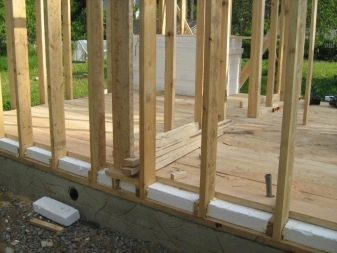
Country houses and country houses, for which a strip-monolithic (including the basement) foundation is already used as the basis, in general and in general, have already been prepared for the installation of lagged elements for the floor. However, after the end of the main stage of construction, pre-preparation is still required. To begin with, debris is removed from the subfloor obtained in this way, then the concrete base is inspected for cracks, chips and other damage.
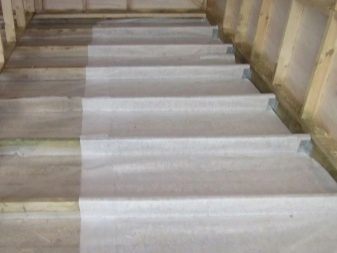
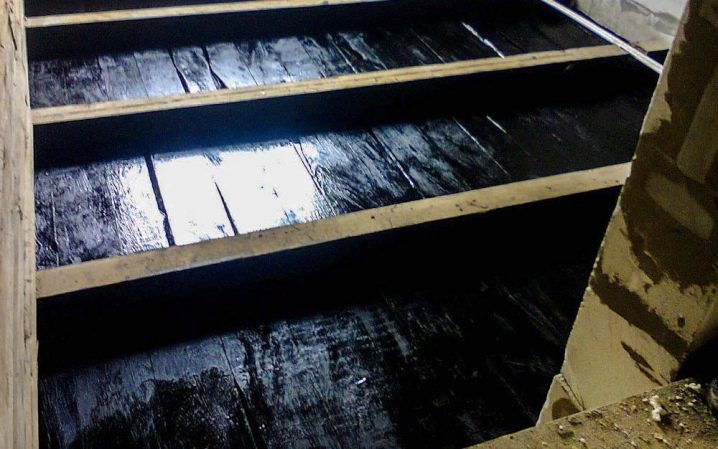
If any are present, then they must be cemented. It is even more useful to make a cement screed on an unprepared concrete base. In this case, the floor will become closer to a perfectly horizontal state. The base thus improved is covered with an antiseptic compound. For more reliable waterproofing, roofing material is laid on the screed (by the way, it may not be produced when the floor is already perfectly horizontal and without defects). The latter forms a more reliable waterproofing layer than a conventional polyethylene layer.
Having calculated where the logs will pass, pipelines and / or electrical (wire) communications are laid in the remaining sections.For example, the heating cable is hidden in the main area of the floor, for example, where the passage to the room is located (but not under the bed or sofa, for example), but around the perimeter - for example, signal wires and cables for home appliances and electronics can be run. An important circumstance is that the heating cable or water heating circuits are not laid in places where cables and wires are located: the insulation on those can crack, which is fraught with a short circuit and a source of ignition. Gas lines, for example, supplying natural gas to the oven in the kitchen, are not allowed under the floor, even when the pipe is steel. It is important to avoid intersecting lagged elements with communications.
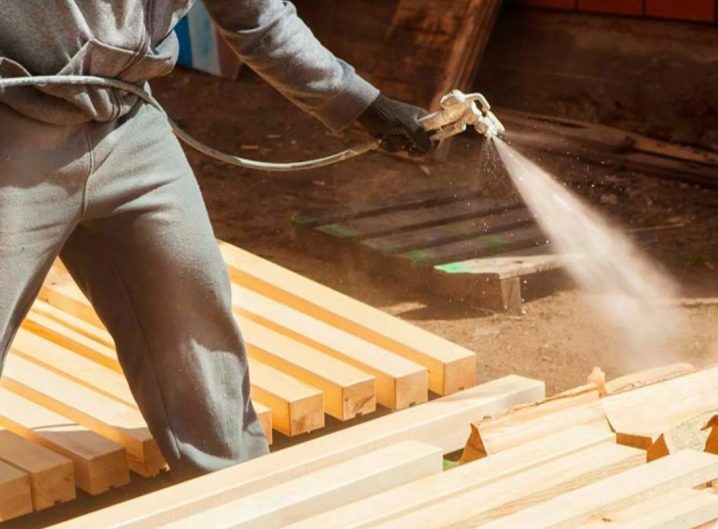
Having prepared the concrete base, treat the timber with an antiseptic and waterproof impregnations. This will protect the wood from damage by microflora and insect pests. The impregnation of the lags that have not yet been installed is carried out outdoors, for example, in the yard. After soaking the lagged elements, they need to be allowed to dry. Impregnation is carried out only after the tree has completely dried to the mass fraction of moisture not exceeding 11%.
Optimal dimensions
Before calculating the dimension of the elements and their location, the main attention is paid to the material. The maximum permissible moisture content in wood is not more than 15%. If it still contains more, then the raw material is pre-dried. It is better to use a drying chamber to speed up drying. The ideal option is to withstand it in the summer in the heat, in clear weather. Humidity greater than 18% will lead to deformation of the logs after drying.
Most self-builders and professional brand builders prefer pine logs. An alternative is fir or spruce. Second-class wood is suitable for lagged elements. But the third grade, containing a significant amount of knots (from several per linear meter), is not suitable, since such formations tend to fall out and crack, since they have high hardness, reduced elasticity and toughness.
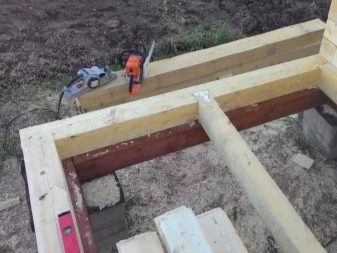
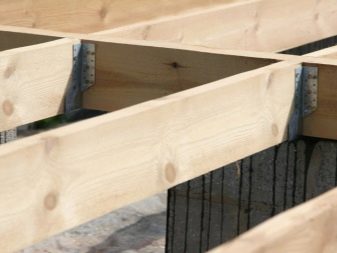
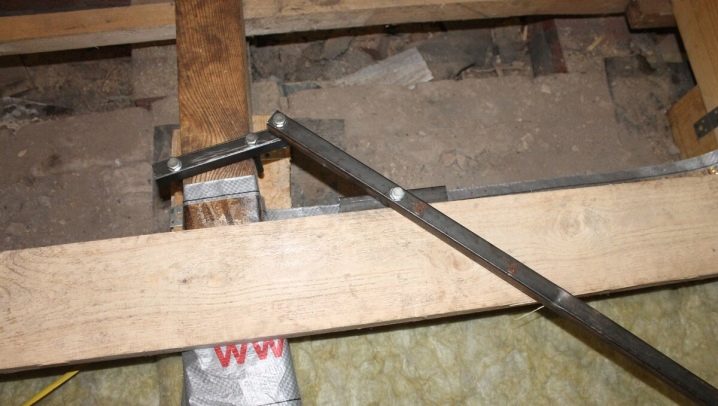
Having purchased - and, if necessary, sawing - log blanks into the required fragments, no assembly elements are used. However, there are cases when non-multiple, shortened fragments, for example, with a room length of 5 m, are connected to each other, since hardly anyone will like to throw away excess wood for waste. For this, the methods "half-tree" and "in the paw" are used. At the junction of short sections in one lag, the most reliable section of the base is used, without voids and gaps, otherwise this section will creak when a load is applied to an already installed floor, as a result, the joint will disperse.
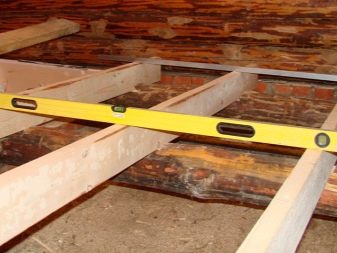
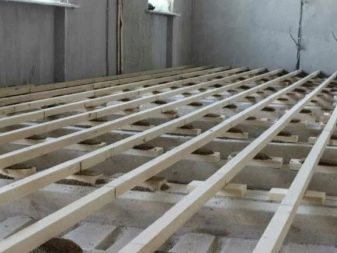
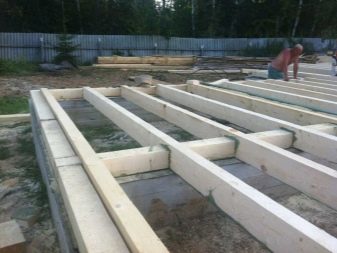
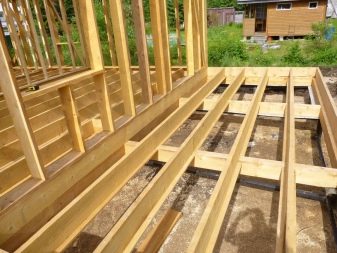
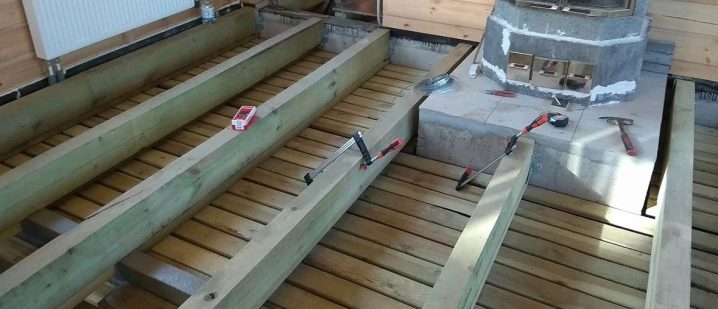
Lags are installed strictly parallel to each other, it is advisable to arrange them along the length, and not along the width of the room. Check that the quality of waterproofing (roofing material) under the lags is not compromised.
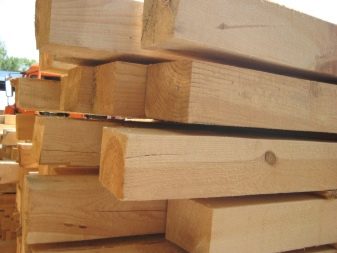
The size of the timber can vary from 140 * 140 to 300 * 250, depending on the amount by which the floor must be raised, and the safety factor (as a rule, a three-fold number of the standard value in kilograms of weight per square meter of the finished floor is chosen). The length of a piece of timber is chosen a few centimeters less than the length of the room - temperature and humidity fluctuations of wood are taken into account at the rate of up to 3 mm / m. If you do not leave at least a small gap, but lay the timber back to back, then in the heat, when there is no air conditioning in the house, the logs together with the floor can bend up a little, while tearing off the hardware (fasteners) with which they are screwed to the concrete rough base.
The distance from one of the edges of the extreme lagged element to the outer wall, to which it is parallel, should not be less than a few centimeters. This gap will create sufficient ventilation for the outside wall.It is unacceptable to put the extreme logs end-to-end with the sides, as well as the ends: with a temperature difference in hard-to-reach places, condensable moisture can accumulate. It is not necessary to dock the joists and the frame strapping of a wooden house - it performs a completely different function.
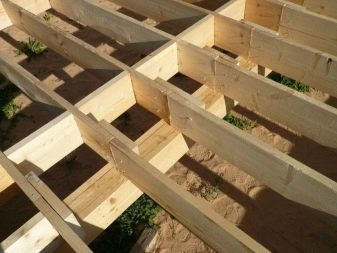
The distance between the lags can vary significantly, the main regularity is to prevent the flooring from sagging under a threefold margin of practical load. In this case, the floorboards should not creak. It is possible to somewhat reduce the distance between the logs, but in this case, along with the strengthening of the floor in terms of the weight load on it, the unjustified consumption of wood will also increase. For a room with a width of, say, 4 m, an additional lag will not turn out to be such a high cost, but two or more of the calculated value is already too much.
The overrun in the number of elements for each room is mainly due to the reduced value of the longitudinal gap between the lags. For example, in a room with a width of all the same 3.7 m, it was envisaged to arrange 8 logs with an interval of 0.5 m between their central straight lines, but the last of the spans turned out to be wider by 20 cm.In order to prevent the calculated decrease in strength, 8 -yu, proportionally decreasing the size of the span between any two adjacent ones.
What do you need to work?
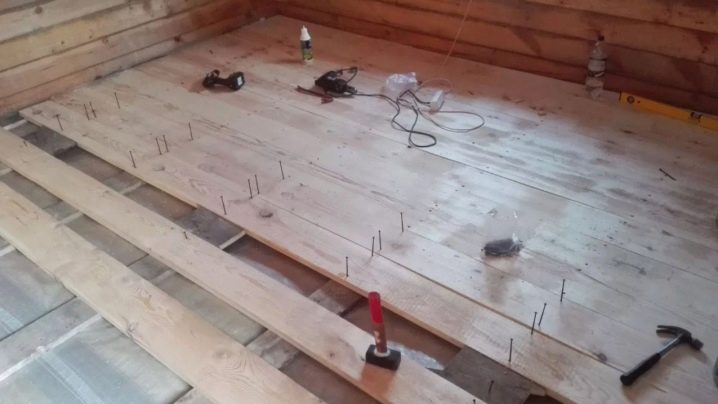
To assemble a floor based on a tongue-and-groove plank flooring, mounting wedges and a chock-stand, which is a support temporarily screwed to the logs, are useful. This is necessary in order to nail the grooved elements to each other with the highest quality, eliminating the formation of gaps between the boards, which could lead a little to the side during their preliminary drying.
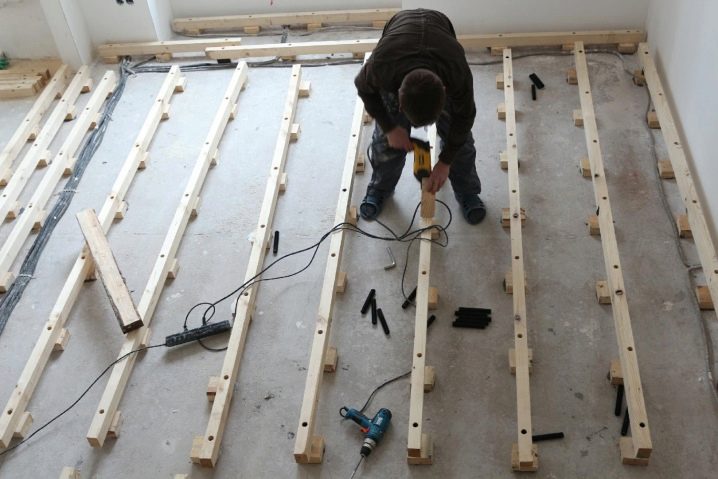
To screw the lags to the concrete floor, you will need reinforced self-tapping screws for concrete with increased length and cross-section, possibly screwed with hex keys or nozzles to a powerful screwdriver or perforator that works without shock vibration and at reduced speeds. To fix the nozzles to a screwdriver or hammer drill, you will need a special cartridge adapter with a shank suitable for the clamping shape of the original cartridge.
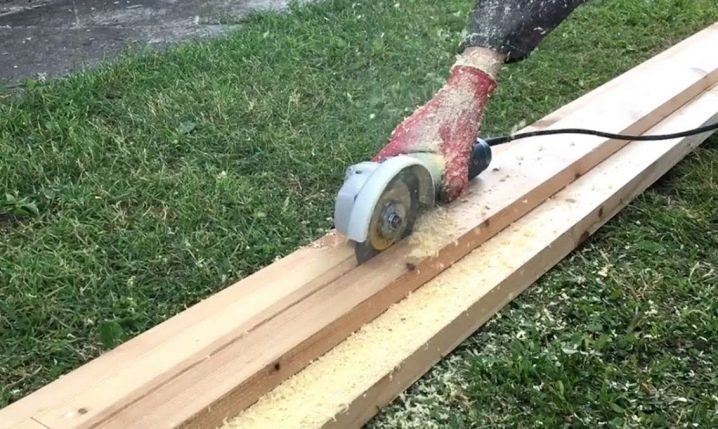
It is advisable to saw timber and boards using a grinder with a cutting disc for wood. Sawing wood with abrasive discs for metal is unacceptable - the timber and board will be burnt from the ends along the cutting line. An alternative is a jigsaw with a saw blade of the required "caliber" of sawing teeth. A stationery or simple kitchen knife helps to cut the roofing material (waterproofing material) into strips where necessary.
Also, the mineral wool is cut, stuffed along the perimeter between the spans of the already mounted logs. A brush or aerosol spray is used as an antiseptic dispenser. It is important that all sides of the lag are evenly impregnated with an antiseptic water-repellent reagent.
It is advisable to use a board or thick (from 30 mm) plywood (in sheets) as a flooring. The square footage of the finishing flooring is indicated in the project of the room and the house as a whole.
In addition to reinforced self-tapping screws for concrete and anchors, simple self-tapping screws for wood or metal are purchased for mounting the flooring on already installed joists. The screwing of wood elements to each other is carried out with preliminary drilling - the drill should be 1.5 ... 2 mm less than the conditional diameter of the self-tapping screw (the latter is measured along the threaded edges).
Mounting
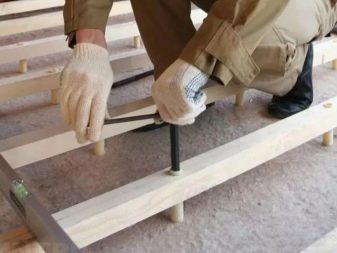
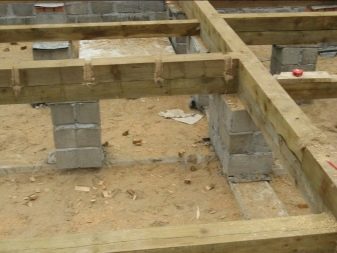
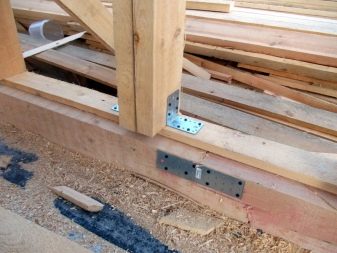
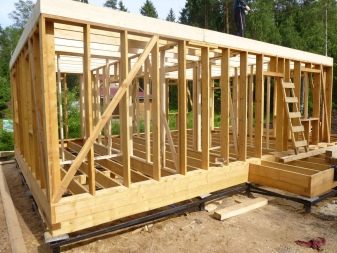
It is not necessary to attach the logs to the strapping beam in a private house with a reinforced concrete foundation and walls made of lumber material or logs. A strong base can be obtained already with the main fixing of the timber to the subfloor; other edges and support points are not required here. However, it is possible to level a slightly twisted and partially cracked timber in the same house under a concrete or wooden base using lining segments made of fiberboard or plywood blanks turned to thickness.

To get the most insulated building "pie" when arranging a high-quality floor that does not warp, a special windproof membrane made of plastic placed on roofing material is required as a vapor barrier. In the simplest case, it can also be polyethylene. It is impossible to use chipboard or DSP as a material for logs and finishing flooring, but they are placed only under the logs themselves, if there is no access to plywood.

On concrete
Despite the increased complexity, high cost and strict adherence to all the rules, floors installed on a concrete base will last several decades without any problems. Impregnation against mold, germs and fungus is not only desirable, but necessary. To protect against mold, not completely environmentally friendly materials are used - they are harmless to the consumer, since the logs are almost completely closed from the flooring in the room.
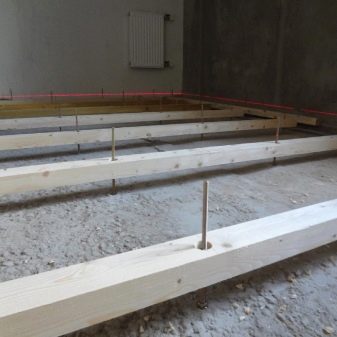
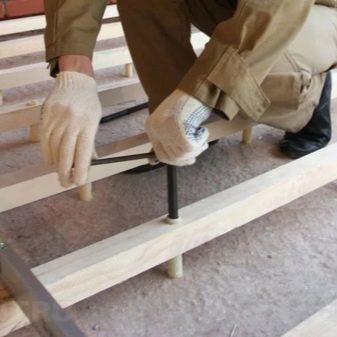
It is best to choose roofing material as waterproofing, some craftsmen supplement it with polyethylene. It fences off the concrete base, which tends to become damp, from the logs and flooring, preventing the latter from getting wet. Having marked the holes on the logs, drill them. In this case, the beam itself should already be laid in place. Drilling of the log and the concrete base is carried out using a concrete drill of the recommended diameter (for certain sizes of self-tapping screws or anchor bolts). Sections of the timber are fixed in pre-prepared places.
On the ground
Laying logs on the ground is not used for residential buildings, but it is often used when erecting household buildings on the territory of a particular site. For example, with the help of such lags, a base is formed under the flooring in a gazebo or a bath. For installation, use brick posts with a cross section of at least two adjacent bricks. In a reinforced concrete or brick foundation, additional ventilation channels must be made. They will help to avoid stagnation of moisture and dampness of the lag, which is extremely undesirable for them.
Water-resistant impregnation with daily pouring and wetting with water can last from 7 years before the wood material becomes so damp that it begins to deteriorate from the inside. It is able to protect the material from decay - provided that roofing felt waterproofing is used, and there is no direct access of wood to moisture. Fastening the lag on a ground foundation, on which additional supports are installed, is no different from attaching them directly to the concrete surface.
For information on how to make logs for the floor with your own hands, see the next video.


The comment was sent successfully.