Installation of compartment doors
Doors are an integral part of any room. Among the huge number of models of different plans, compartment doors stand out for their specificity. Thanks to their easy installation and functional features, compartment doors are gaining more and more popularity.
Design features
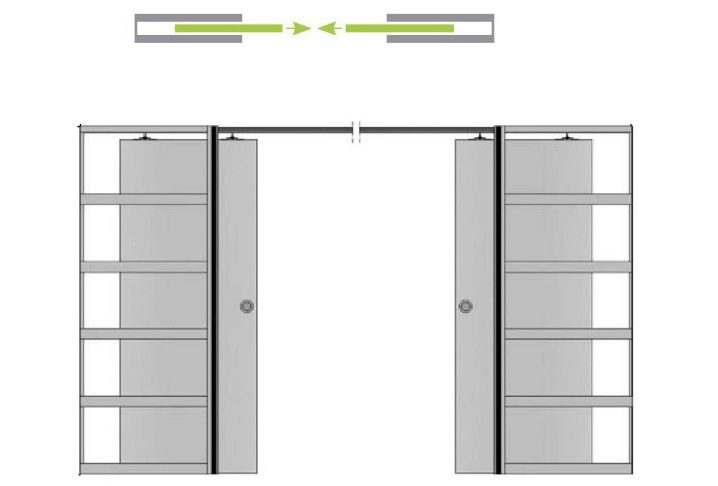
Compartment doors are sliding doors that are fundamentally different from the usual doors. If you try to imagine the action of such doors in a house, it may seem that only a specialist can install them, but there is nothing difficult in fixing and installing such a modification. In order for a coupe to be flawless in operation, you need to understand its design features and functions. Most often, single-leaf coupes are found, but the number of doors can be increased.
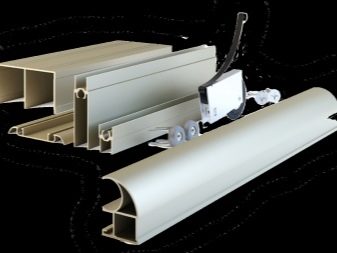
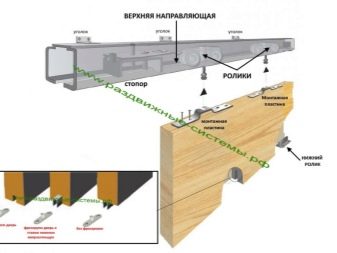
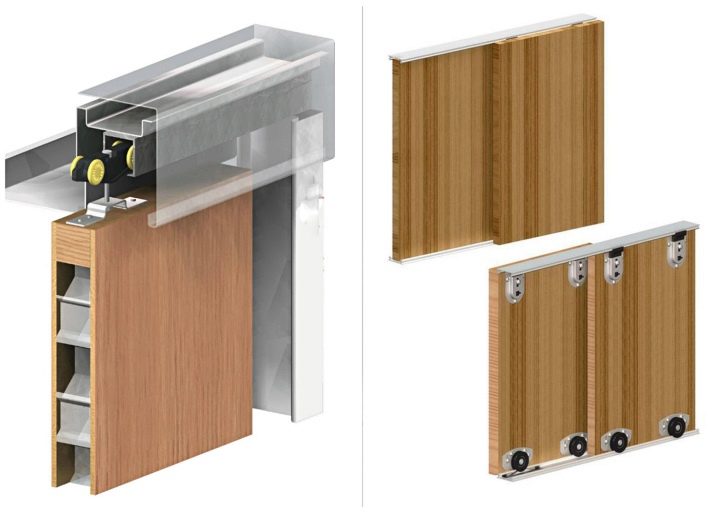
Regardless of the type, the design and principle of operation remain unchanged. The mechanism is based on roller elements that fit into the guide rails. There can be two or one guides, depending on the model. The door itself, with the help of rollers attached to it, will move along these guides.
Due to their characteristic differences, sliding doors have a number of advantages:
- Ease of assembly. With careful implementation of the procedure, it will not be difficult to assemble and install the structure;
- The absence of the likelihood of a sharp banging of the door due to a strong draft in the room;
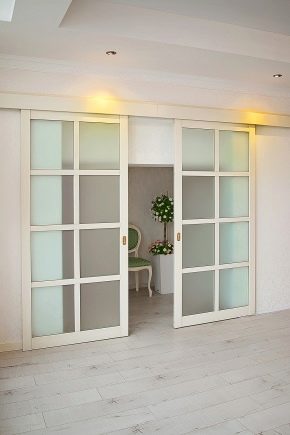
- Due to the fact that the compartment opens by sliding along the wall, the space in the house will not be lost.
- The growing interest in these types of doors provokes manufacturers to create a huge number of models. They can be matched to absolutely any style of the room.
Having an idea of such doors and their characteristic features, you need to dwell on the installation in detail.
What tools and materials are needed?
Before installation, you need to stock up on a complete set of necessary materials, which depends on the model of the selected door.
We bring to your attention a complete list of what is needed for the correct assembly of the structure:
- The door leaf itself, which can be made of wood, metal, glass and other materials;
- Door handles that do not protrude from the surface of the canvas;
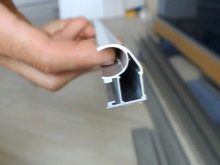
- Top and bottom guides. For correct operation, the length of the top must be twice the width of the sash (the margin is about 10 cm).
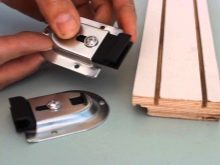
- Stop stops, which are fastened to the rails;
- Roller elements;
- Self-tapping screws;
- Locking nut bolts;
- Checkboxes;
- Staples;
- Carriages;
- Several platbands;
- A bar made of wood, the height and width of which is 5 cm, and the length is twice the width of the sash;
- Nails;
- Anchors.
It remains only to collect all of the above into a beautiful compartment door. Naturally, this requires a male set of household tools.
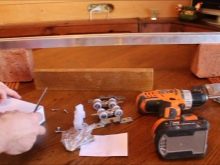
For installation, the arsenal should include:
- hammer;
- ring or open-end wrenches;
- drill;
- crosshead screwdriver;
- screwdriver;
- metric level.

If you know how to use all of these tools, you can gradually get down to business.
Preparatory work
Do not forget that the installation of a new door is carried out after all work on finishing the surfaces of walls, ceilings and floors has been completed.Also, do not postpone dismantling the old door on the back burner, because after removing it from the hinges and removing the door frame, it will be much easier to present a new design at the intended place. You will be able to estimate the dimensions of the doorway and thereby choose the right dimensions for the compartment door. Before installation, you need to assess the site on which the work will be carried out.

Be sure to make sure that the contour of the doorway and the floor near it are not uneven, as the protrusions will impede the movement of the compartment. It will jam, and with increased loads it may even become unusable. For uneven walls, clean and smooth the surfaces as much as possible.
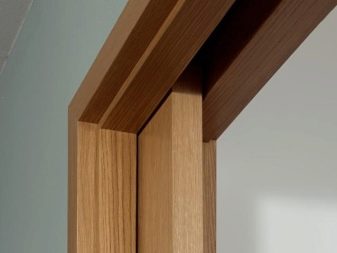
Next, you should start arranging the door space. It is necessary to carry out a cosmetic finish on the slopes or put a box if there is no time. If necessary, the dimensions of the box are adjusted to the length and width of the opening. After that, the correct installation of the slopes is determined by the building level. For the upper part, a deviation of up to 5 mm is permissible, and for the side parts - 0.5 cm for every 2 m.
Assembly
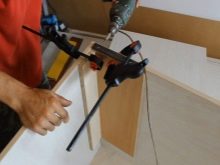
The assembly of the compartment mechanism begins with the creation of the door foundation. The required dimensions are determined and according to them profiles are cut, namely, vertical, horizontal and intersectional profile holders. The cutting must be done with maximum precision, this can be done with a saw or a hacksaw. Then special holes are drilled in the vertical profile for future connections.
When the cut parts are ready, you should start preparing the door filler: glass, chipboard or the like. In the case of glass, it is recommended to secure the material by pasting it with a protective film. The film will prevent it from scattering throughout the room when it is destroyed. Other substances do not require special care.
The next step is to shrink the filler into horizontal profiles. This is not difficult. The sheet of material must be fixed on a flat surface and a profile is applied to it.
The material must be firmly fixed by the profile. In order for the sheet to enter without damage, a flat bar is applied to the profile, on which precise blows are applied with a hammer with a rubberized head.
The next step is to shrink the filler into horizontal profiles. This is not difficult. The sheet of material must be fixed on a flat surface and a profile is applied to it. The material must be firmly fixed by the profile. In order for the sheet to enter without damage, a flat bar is applied to the profile, on which precise blows are applied with a hammer with a rubberized head.

Again, glass entry can be difficult. Care should be taken to correctly position the seal, which fills the space between the profile and the glass. In an extreme case, you will have to stretch the silicone in length, thereby freeing up some of the space. The assembly of the contours ends here, and the verticals are completed according to the same principle.
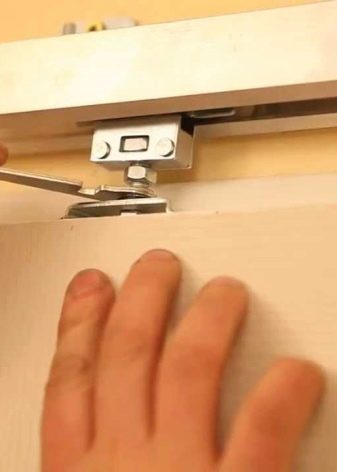
It remains to deal with the roller elements. First, the upper horizontal and one of the verticals are connected by incomplete screwing in a self-tapping screw. The unrealized space from incomplete screwing in is allocated for the installation of a roller in it. After that, the self-tapping screw is screwed to the end. Thus, the roller and profiles are firmly fixed. The lower roller is mounted in the same way. The only difference is that it is fixed with a hole at the bottom of the vertical profile and an adjusting screw. For a complete presentation, it is recommended to consider the assembly diagram.
Conventional models without design features are not difficult to assemble, but if you prefer the radius coupe model, it is worth considering several aspects of their configuration.Unlike simple sliding variations, which can be installed on supports and in a suspended form, radius doors need to be installed only as supporting sliding systems, since the profiles of such compartments create large loads that will be smoothed out by means of the lower support.
When assembling the sash of the radius blade, pay attention to the thickness of the holder. It must be at least 1.2 mm.
Make sure the rigidity of the aluminum profile, manufacturers often use artificially curved profiles from conventional linear models. The width and stiffness of the radius holders are prerequisites for durability. If these parameters correspond to the required quality, it means that such profiles were created specifically for curved coupes, they were calculated for all kinds of loads.
Installation methods
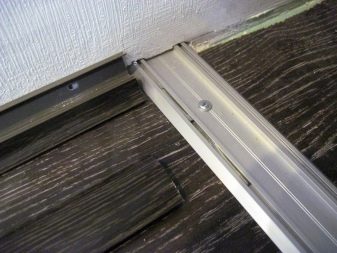
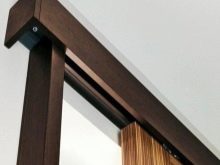
Almost the whole process of installing coupe doors is to install guides. This is usually the difference between systems. The top rail can be secured in several basic ways.
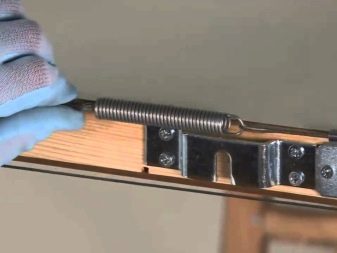
- Installation by means of a wooden beam. You should take a pre-prepared bar, the length of which should be greater than the length of the guide rail. The metal guide is attached to the lower end of the bar, after which the bar is fixed at the desired height, previously outlined by the level. Also, with the help of a beam, you can install the compartment directly in the doorway. In the upper wall of the opening, holes for the dowels are perforated, then holes are made in the bar for self-tapping screws in places that coincide with the perforation of the opening. As a result, the bar is fixed with self-tapping screws, which fall into the dowels and screwed in with a screwdriver.
- Using metal corners. For each meter of the wall, at least three such devices are needed. To use this mounting method, a special type of top rail must be selected, it must have an engaging element. This element is inserted into the grooves of the metal corners. This installation method minimizes the gap between the wall and the compartment.
- Attaching the rails directly to the ceiling. The method is possible thanks to the butterfly dowels.

The bottom rail can be mounted in four ways:
- Installing the guide on the bottom of the door. The slide roller will be on the floor surface.
- Fastening the rail in the groove of the sash end. The carriage is also located on the floor. The groove is made at the bottom along the profile. The advantage is the absence of a gap in the lower part.
- Fixing to the floor. Not recommended because of the drilling of the floor and, as a result, the formation of unevenness.
- Cutting a groove in the floor surface under the door. The roller is attached to the bottom of the blade and slides along a hidden guide. It also lacks a large gap at the bottom.
The procedure for installing do-it-yourself compartment interior products
The installation of the door kit begins with securing the rails. If a classic single-leaf compartment door is being mounted, the first step is to take a pre-prepared timber. Its length should be the same as the length of the guide rail. The metal guide is attached to the lower end of the bar using self-tapping screws screwed in from two edges, after which the bar is fixed at the desired height, previously outlined by the level.

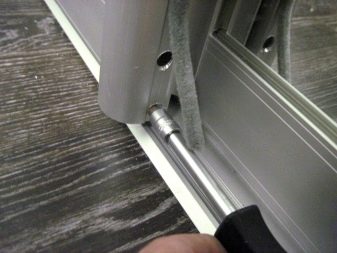
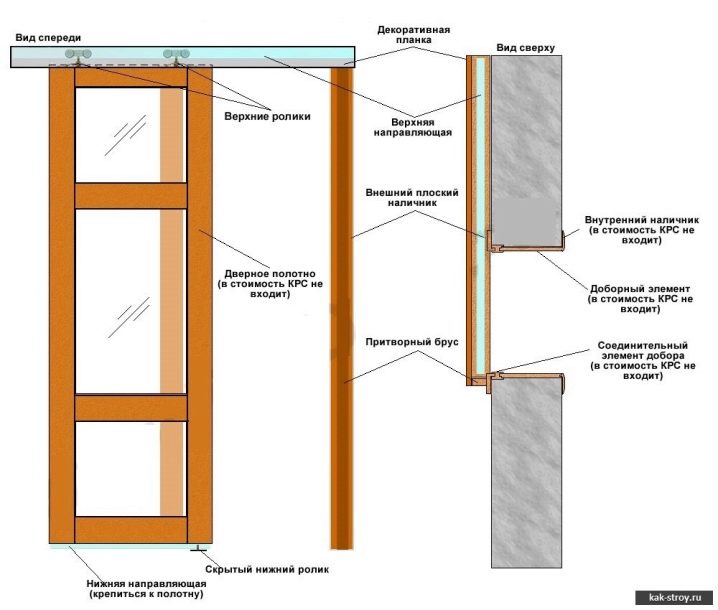
The previously created profile fastener to the carriages is installed in the guide. The rollers must be parallel, otherwise they will be difficult to slide. Next, the canvas is applied to the doorway of the wall to make sure that the dimensional calculations are correct. If everything is correct, the preparation of the lower guide begins, which depends on the model of the compartment door and the chosen installation method, for example, a groove on the end of the sash. On both sides of the lower part of the sash, holes are drilled 2 cm deep. The holes should extend from the edge by 0.5. Next, a groove is selected, which should be slightly wider than the sliding element.You can create a groove artificially using slats or a wall profile. At the end, restraints are hung on the top rail.
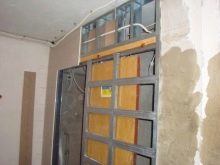
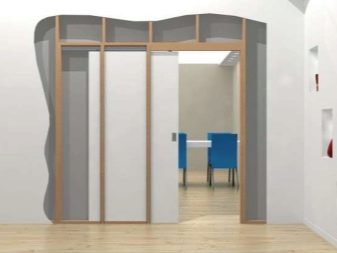
It is worth paying attention to the installation of a special design of compartment doors (the case when they go into the prepared niche). The design and installation have no fundamental differences, however, it will be necessary to align the internal surfaces and the floor. Artificial leveling of protrusions is more often used due to the imposition of chipboard panels or other materials.
A suitable alternative to a niche is a sliding door, mounted in a special case (cassette), in which the door is hidden. Their installation is complicated by the need to destroy a noticeable part of the wall, since the installation of the pencil case requires space. The entire structure must be strictly parallel to the cassette so that there are no obstacles to sliding. Upon completion, the cassette needs to be decorated with decorative material.
How to properly install the mounted model yourself?
Despite the fact that the mounted models are easy to assemble, to install them without the intervention of specialists, you must use the step-by-step instructions:
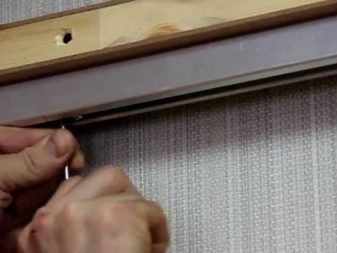
- You need to use a wooden beam, give it the right dimensions. It is desirable that the length be twice the length of the opening.
- From the bottom of the timber, the guide is fixed with self-tapping screws.
- Further, the web must be hung on the prepared place, that is, the profile carriages must be brought into the rail space of the upper guide.
How to install cassette doors on your own?
Installation of cassette doors differs from conventional hinged doors only in that you first need to break a part of the wall or punch an empty space in the wall, in which a niche will be arranged, and then cover the surfaces with decor.
Beautiful ideas in the interior
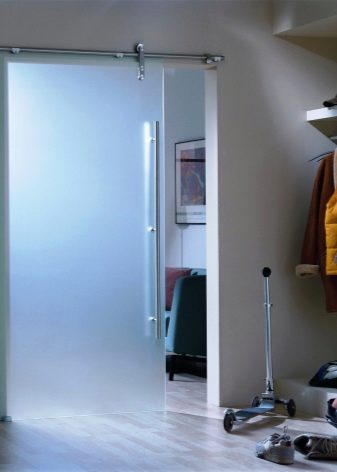
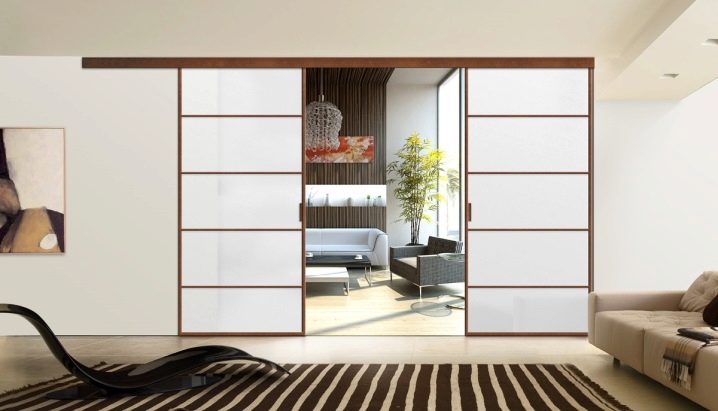
Due to the variety of manufactured models, compartment doors are often a design solution in the interior. The most popular premises for the use of compartments have become bathrooms, because the bathrooms are small in size, and the sliding canvases are aimed just at freeing up space. Also, the bathroom is the room where everyone puts themselves in order, which means that you need to see yourself there. Among the compartment designs there are also models with a mirror, which is another plus for the bathroom.
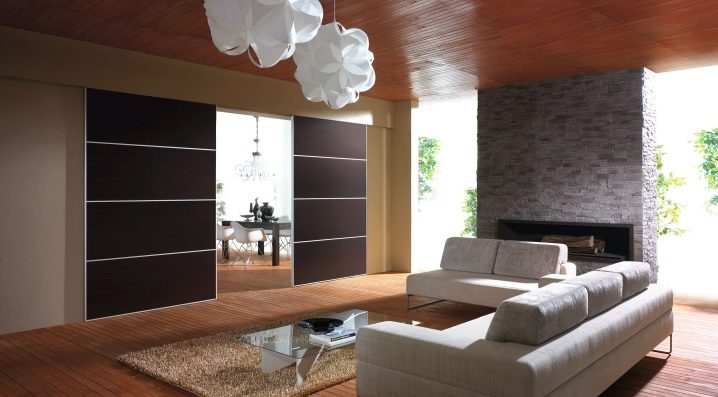
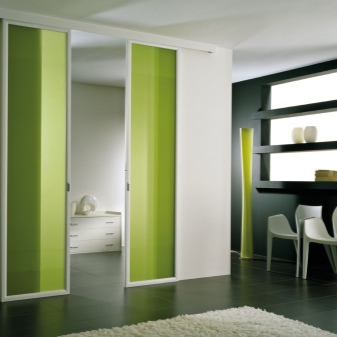
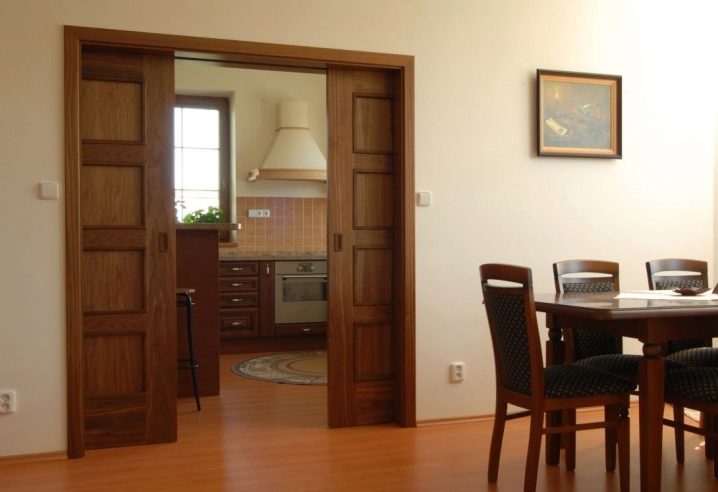
However, this does not mean that the use of the compartment is limited to the bathroom. Such doors can perfectly complement the style of the living room or create a comfortable space in the dressing room. A huge selection of amazing models makes it clear that such designs will delight even in the bedroom, kitchen or in any other room.
You should consider a couple of options for completing the interior with a compartment system.
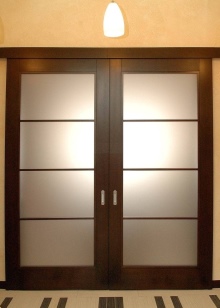
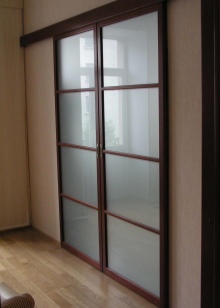
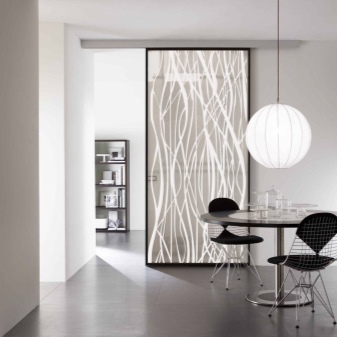
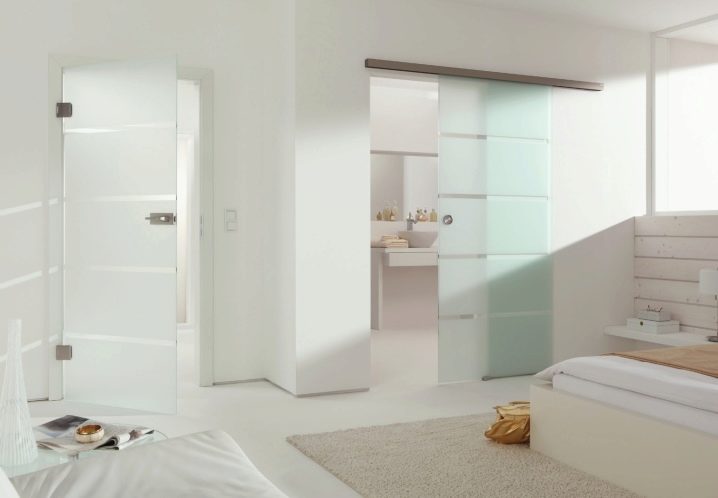
Sliding canvas in the bathroom. The filler is made of glass material, which favorably emphasizes the European style of the adjoining room. The clouded section gives the impression of a gray shade and perfectly complements the design of the bathroom itself. In this vein, the bathroom beckons with a relaxing atmosphere.
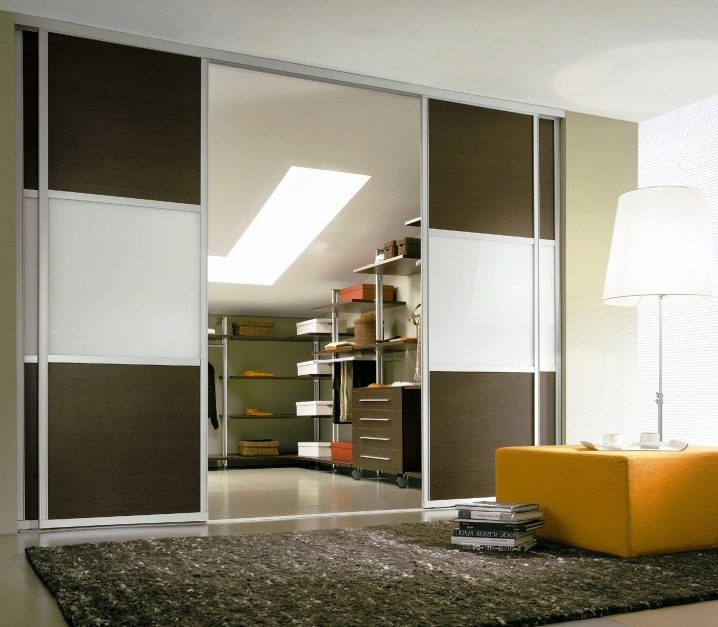
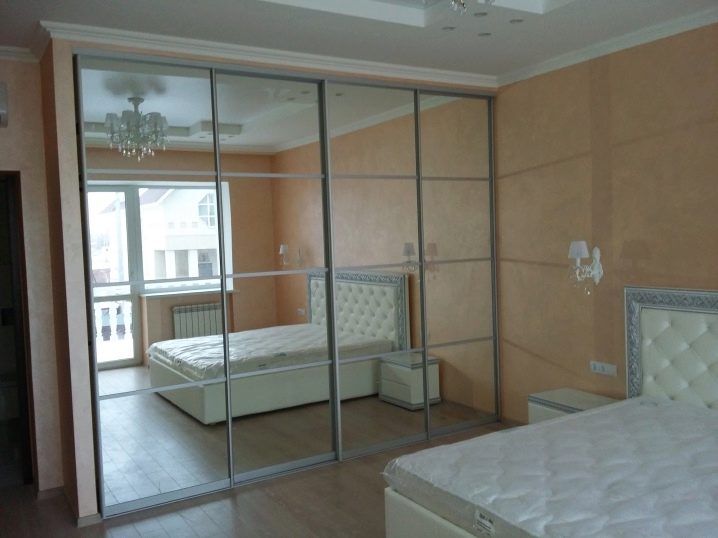
All-wall mirrored compartment. Creates a bedroom-enhancing effect. Thanks to the modest colors of the room itself, the mirrors do not press on the eyes. If you imagine an ordinary wardrobe in place of a mirror structure, then a design highlight will become noticeable against the background of comparison.
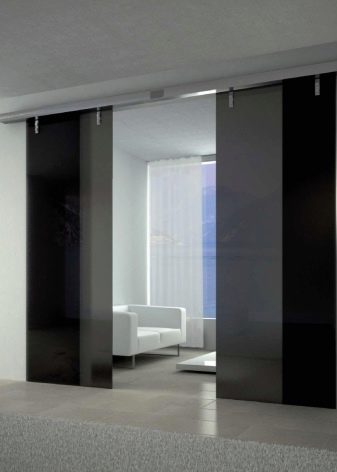
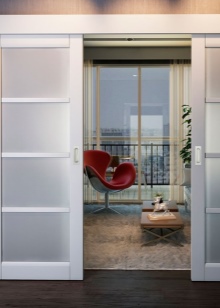
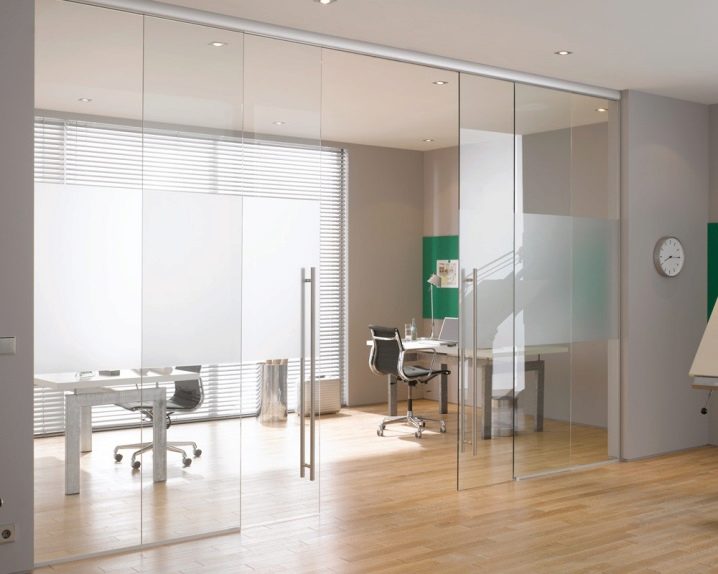
Installing a compartment system in an office space will be an excellent solution that you will not regret. Since the area of the offices is small, it is quite understandable to strive to save precious space. In the variant under consideration, sliding doors with a transparent base contribute to maintaining the strict style of the room. The gloomy color of the selected profiles will not distract from your work.
Summing up, it should be noted that the best solution is to always keep up with the times. There is no need to cling to familiar things that are only comfortable and durable. Classic doors are a thing of the past.Now it is more correct to say that the doors are sliding, not opening.
Step-by-step instructions for installing a compartment door are in the next video.


The comment was sent successfully.